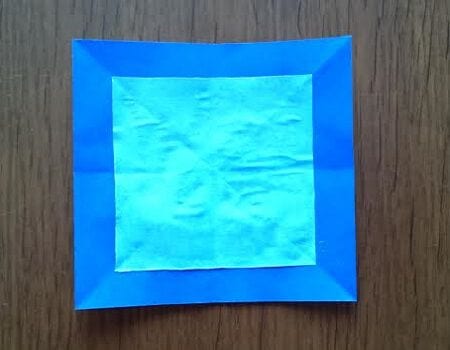
Origami Iris Flower
The iris is one of those flowers that looks fancy but folds up surprisingly well in paper — all sharp, elegant petals and a confident stance. This tutorial is pitched at the intermediate folder, but don't let that scare you off: the whole thing is built from one repeated move — open a little pocket, flatten the sides — done on each of the flaps. Once you've done it once, the rhythm carries you to the end. Make a few in different colors and you've got an instant paper bouquet that brightens any shelf or card. Grab a square you love and let's fold an iris.

This Iris is relatively simple make and looks so sweet when bunched together with other irises, or different types of flowers. Use lovely colorful paper for this one, it will surely brighten your day!
This is an intermediate level origami, but it makes for a beautiful flower, that can be hanged on the Christmas tree, or used in other kinds of decorations.
This origami Iris is easy to fold and very beautiful. It takes 7 minutes with this tutorial.

STEP 1.
Fold the paper along the dotted line in the direction of the arrow.

STEP 2.
Fold the paper along the dotted line in the direction of the arrow.

STEP 3.
Open the paper as shown to create a small pocket. Then flatten down the sides of the pocket.
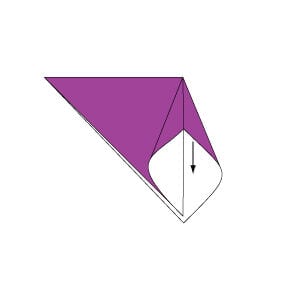
STEP 4.
Continue from Step 3.
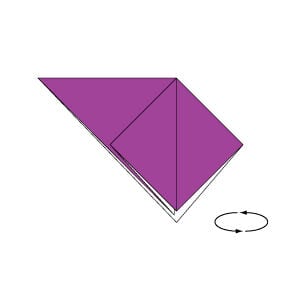
STEP 5.
Turn over the paper.
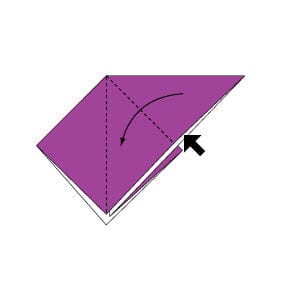
STEP 6.
Open the paper as shown to create a small pocket. Then flatten down the sides of the pocket.

STEP 7.
Open the paper as shown to create a small pocket. Then flatten down the sides of the pocket.

STEP 8.
Continue from Step 7.

STEP 9.
Fold the remaining three flaps in the same way.

STEP 10.
Fold the paper along the dotted line in the direction of the arrow. Fold the reverse side in the same manner.

STEP 11.
Rotate the paper 180 degrees.
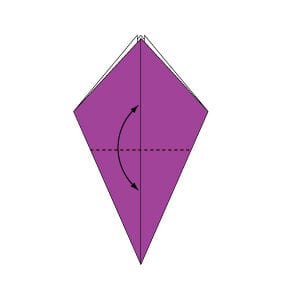
STEP 12.
Fold and crease in the direction of the arrow.
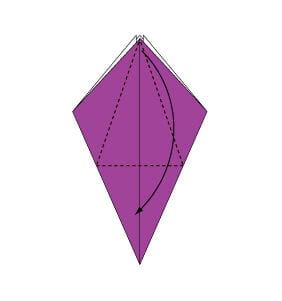
STEP 13.
Open the paper as shown to create a small pocket. Then flatten down the sides of the pocket.

STEP 14.
Continue from Step 13.

STEP 15.
Fold the remaining three flaps in the same way.

STEP 16.
Fold the paper along the dotted line in the direction of the arrow. Fold the reverse side in the same manner.

STEP 17.
Fold the paper along the dotted line in the direction of the arrow. Fold the reverse side in the same manner.
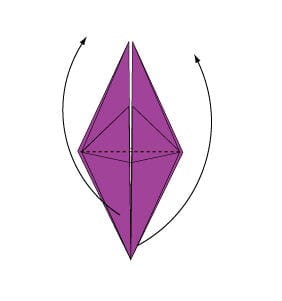
STEP 18.
Fold the paper along the dotted line in the direction of the arrow. Fold the reverse side in the same manner.

STEP 19.
Fold the paper along the dotted line in the direction of the arrow.

STEP 20.
Fold the remaining three flaps in the same way.
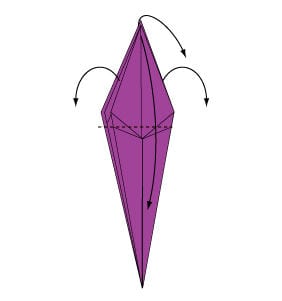
STEP 21.
Open the paper in the direction of the arrow.

STEP 22.
Complete.