New Origami Ball (balloon)
There is a special kind of delight in an origami model you can actually blow up — and this new origami ball delivers exactly that, with a clever twist that makes it easier than the traditional balloon base. The secret is a careful crease grid that sets you up for a clean collapse, so the hard part is mostly done before you start shaping. Follow the photos step by step and you will end with a round, squeezable ball and the fun of puffing it full of air. Let us fold one.
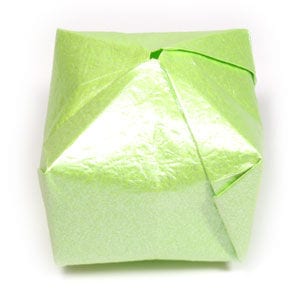
This page is for anyone who wants instructions for folding a new origami ball.
In my opinion, this origami ball is easier to make compared with the traditional origami ball, although it is based on the same balloon base.
If you are ready, then let's get started.
You may use any kind of paper to fold the origami ball. It is a little easier if the front and back of the paper are slightly different, whether in texture or color.
Make sure the paper you use is a square (all sides equal and all angles 90 degrees). The paper I am using here is 15 cm x 15 cm origami paper, a good size for those new to paper folding. Once you become familiar with this model, you can try smaller paper.
This is the front side of origami paper.

This is the back of the paper. Here I am using origami paper with two different colors.
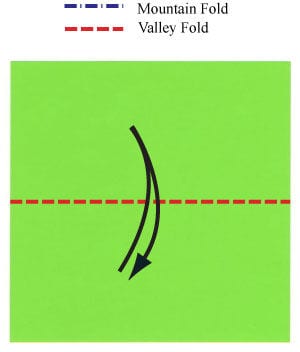
STEP 1.
Let's start with a paper's back side facing up. Prepare for a valley-fold and unfolding along the middle horizontal line.
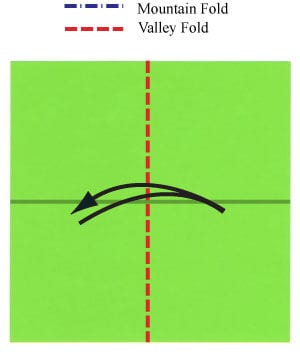
STEP 2.
Apply the valley-fold of the step #1 and then unfold. Prepare to apply a vertical valley-fold and unfolding along a vertical middle line.
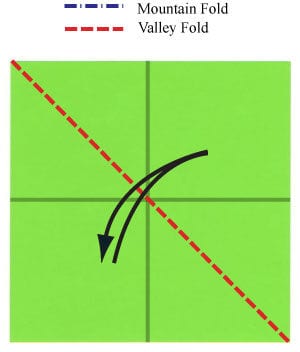
STEP 3.
Apply the valley-fold of the step #2 and then unfold. Prepare to apply a valley-fold diagonally and then unfold.
STEP 4.
Valley-fold diagonally and then unfold. Prepare to apply another diagonal valley-fold and then unfold.
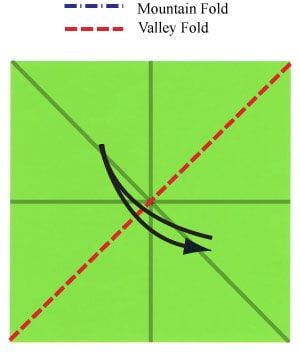
STEP 5.
Apply the diagonal valley-fold of the step #4 and then unfold. Prepare to apply a valley-fold along a slanted line which lies between both horizontal middle line and diagonal line.
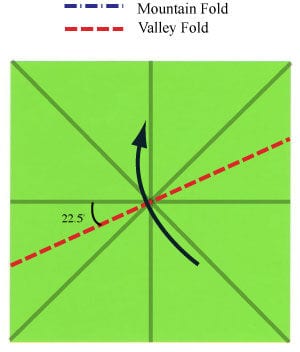
STEP 6.
Apply the slanted valley-fold of the step #5. This valley-fold can be easily accomplished by aligning existing crease lines. Prepare to unfold.
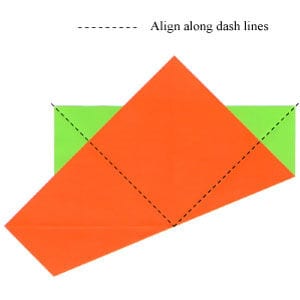
STEP 7.
Unfold the paper. Prepare to apply another slanted valley-fold. The folding line is perpendicular to the previous slanted valley-folded line.
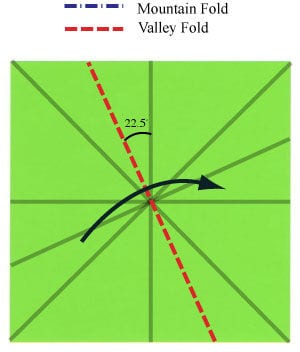
STEP 8.
Apply the slanted valley-fold of the step #7. This slanted valley-fold can be easily accomplished by aligning existing crease lines. Prepare to unfold.
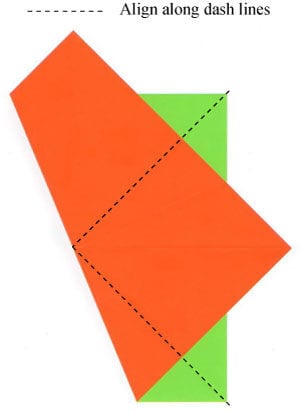
STEP 9.
Unfold the paper. There are six crease lines currently. Prepare to turn the paper over.
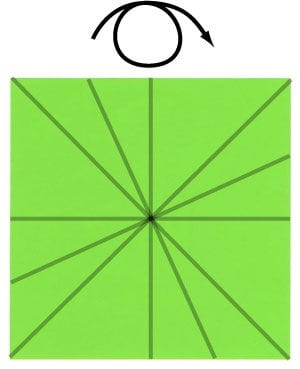
STEP 10.
Turn the paper over. Make sure that the existing crease lines are mirror images of those in step #10. Prepare to apply a slanted valley-fold again.
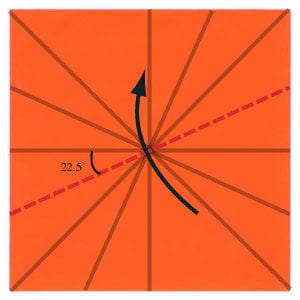
STEP 11.
Apply the slanted valley-fold of the step #10. Prepare to unfold.
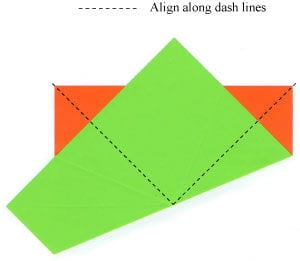
STEP 12.
Unfold the paper. The crease line made from the step #11 is shown as a dash line to differentiate it from mountain-folded crease lines.
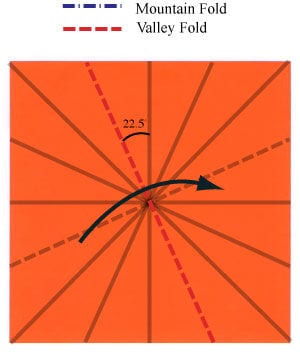
STEP 13.
Apply the final slanted valley-fold of the step #12. Prepare to unfold.
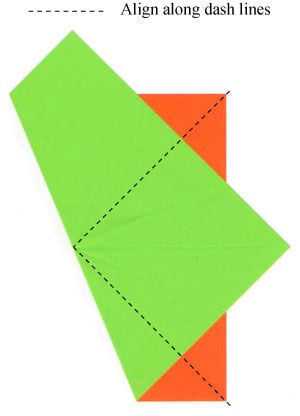
STEP 14.
Unfold the paper. There are six mountain-folded crease lines as well as two valley-folded crease lines.

STEP 15.
We will select three crease lines out of the eight. Prepare to apply two mountain-folds as well as one valley-fold.
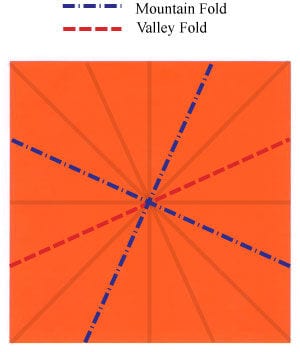
STEP 16.
Apply two mountain-folds and one valley-fold according to the step #15. You will have a shape like a upside-down heart. Prepare to apply a valley-fold.
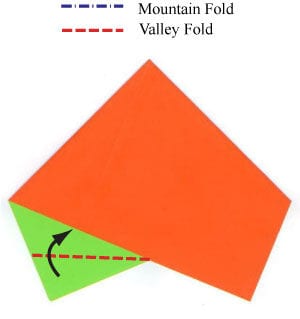
STEP 17.
Apply the valley-fold of the step #16. Prepare for another valley-fold.
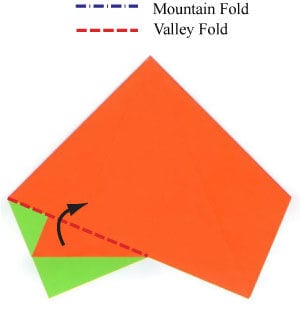
STEP 18.
Apply the valley-fold of the step #17. Now, prepare for another valley-fold. Be sure to make the valley-folding line perpendicular to the outer edge.
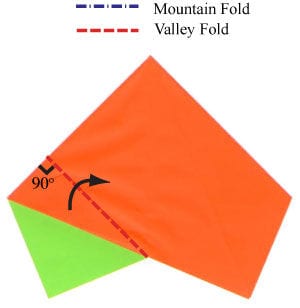
STEP 19.
Apply the valley-fold of the step #17. Prepare to apply a vertical valley-fold.
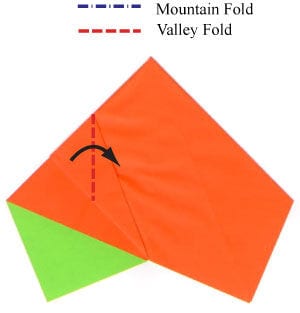
STEP 20.
Apply the vertical valley-fold of the step #19. Prepare to apply a mountain-fold.
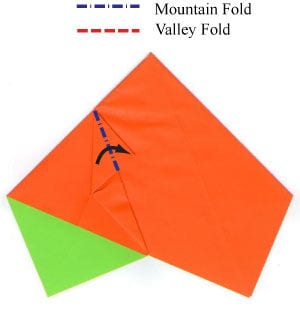
STEP 21.
Apply the mountain-fold of the step #20. Be sure to insert the folded flap into the pocket. Prepare to apply a vertical valley-fold.
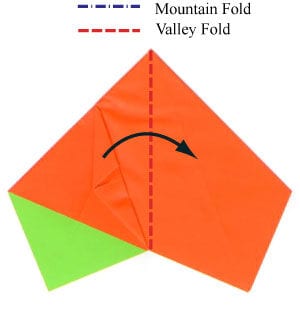
STEP 22.
Apply the vertical valley-fold. Prepare to repeat the steps #16-21.
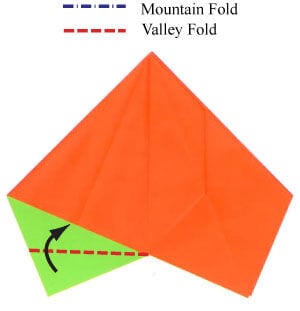
STEP 23.
Repeat the steps #16-21. Prepare to turn the model over.
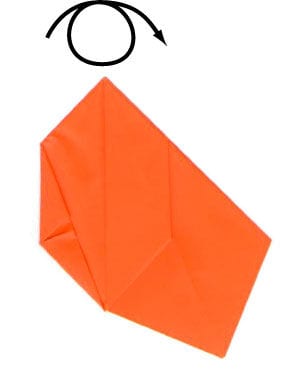
STEP 24.
Turn the model over. Prepare to repeat the steps #16-21.
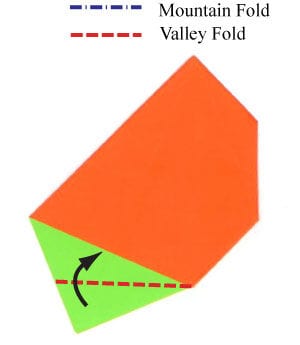
STEP 25.
Repeat the steps #16-21. Prepare to apply a vertical valley-fold.
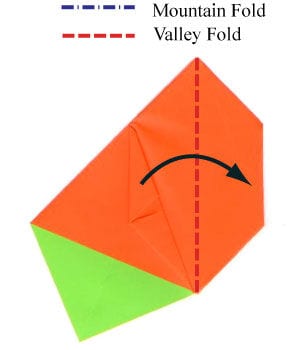
STEP 26.
Apply the vertical valley-fold. Prepare to repeat the steps #16-21.
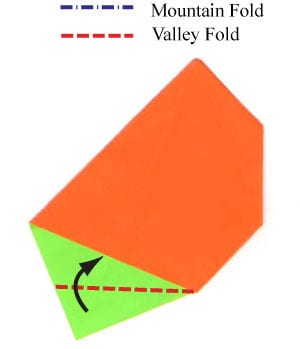
STEP 27.
Repeat the steps #16-21. Prepare to blow air into the hole indicated by the arrow.
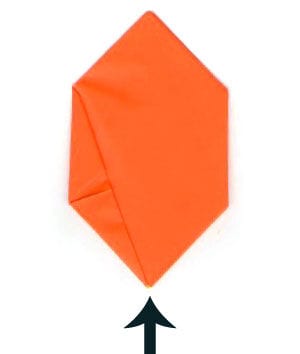
STEP 28.
Blow air into the hole. Congratulations! You have completed your new origami ball.
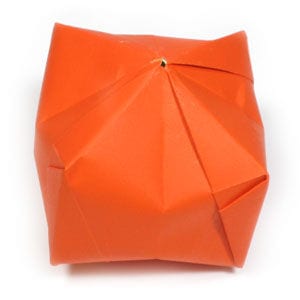
STEP 29.
I have made an origami ball with the same paper that I used for making a traditional origami ball (balloon).
STEP 30.
As you can see, it is a little larger than the traditional one.