Money 5 Pointed Star
There's a special kind of delight in turning spare cash into something you'd actually want to keep. This modular star takes five banknotes and locks them into a five-pointed showpiece—no glue, just clever folding.
Each unit folds in seconds, but the magic (and the mild frustration) is in the final assembly, where the last arm tucks in to lock everything tight. Start with the green side up for one look, or flip the orientation for another. It's the perfect origami tip, gift, or party trick.

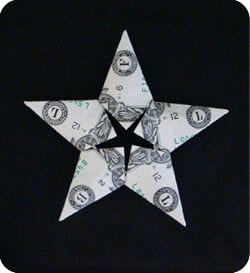

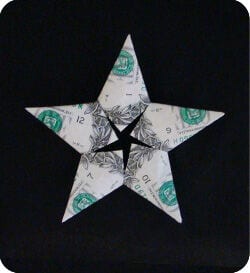
This is a fabulous money 5-pointed star made from 5 one-dollar bills. You can use five-dollar bills or even ten-dollar bills, but no matter which denomination you use, you will need 5 sheets. You can get at least 4 variations on the star depending on which side of the dollar bill is facing up when you start folding.
This money star is easy to make, but typical of modular origami, the last piece is challenging to assemble. This origami star is often credited to Trang Chung, who was the first to fold it from real money; the design itself, however, is a traditional one (published in Origami from Around the World) and includes a clever lock that keeps it from unraveling. Fold four more of these dollar-bill units.
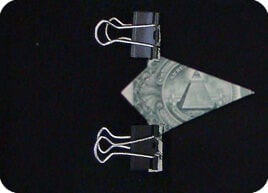
STEP 2. Assemble the Star
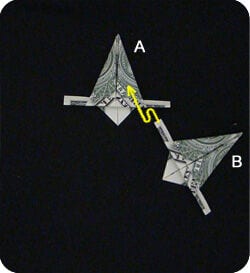
STEP 10a.
Take two units and turn them over so you can see the back. Insert the left arm of unit B between the paper layers of unit A.
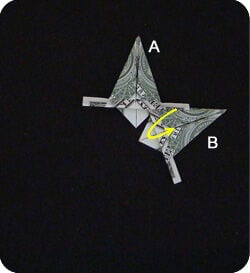
STEP 10b.
Once done, tuck the right arm of unit A under the paper layers of unit B. It’s a little tricky, but doable.
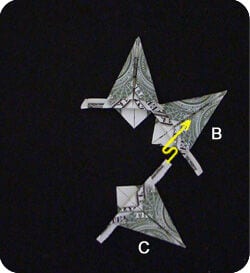
STEP 11a.
Add the third unit: slide the left arm of unit C under the paper layers of unit B. This part is easy.
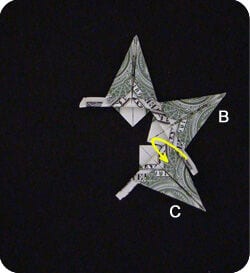
STEP 11b.
Slide the right arm of unit B under the paper layers of unit C. A bit harder, but it works.
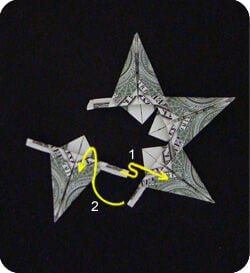
STEP 12.
Keep going with a fourth unit. Insert one arm (1), then the other (2). You may need to flex the unit’s arm a little to make it cooperate.
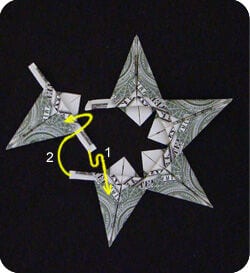
STEP 13.
Insert the final unit the same way. Sometimes you’ll need to loosen the previous step slightly to make room for the next move.
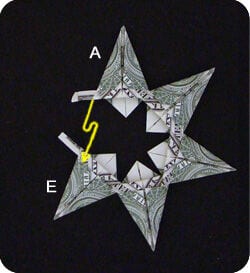
STEP 14a.
Close the loop by tucking the arm of one unit between the layers of the neighboring unit.
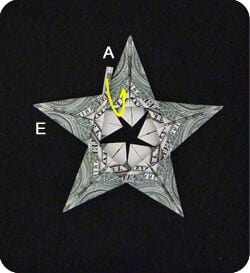
STEP 14b.
Finish the money star by tucking the remaining arm under the paper layers of the adjacent unit. This is the trickiest step, but once done it locks the units together securely.
Gently wiggle the units to settle into a nicely balanced money star, then turn it over to admire your work.

Start with the green side of the bill facing up and you’ll get a different pattern. You can also change the pattern by folding the left side of the bill rather than the right, as shown above. The images below show how to orient the money for each pattern.