Traditional Origami Swallow
There's a reason the traditional origami swallow has stayed popular for generations: it's elegant, it's recognizable, and it teaches one of the most useful moves in all of paper folding — the inside reverse fold. If you've been wanting to level up from flat models to something with a bit of dimension and life, this little bird is a perfect next step.
Don't worry if the bird base sounds intimidating; the tutorial walks you through it one valley-fold at a time, always telling you what to prep before the next step. By the end you'll have a swallow with a forked tail and swept wings that looks like it's mid-flight. Use a 20 cm square if you're new, and once you've got the rhythm, try smaller paper for tiny birds you can hang in a window.
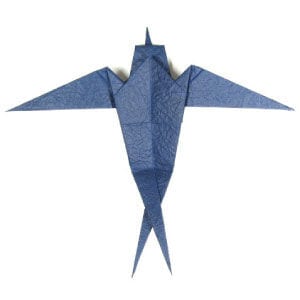
This page is for those who want the instruction to fold a traditional origami swallow.
This traditional origami swallow starts from bird base. One special folding technique you need to know for this model is inside reverse-fold.
Before working on this model, you need to know what valley-fold and mountain-fold are. If you know these two folding techniques, then you will have no problem in making origami swallow.
If you are ready, then let's get started.
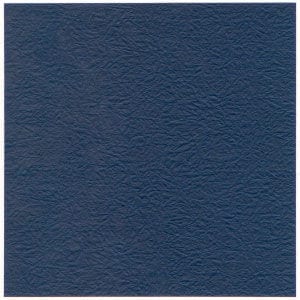
You may use any kind of paper to fold the origami swallow. It is a little easier if the front and the back side of the paper are slightly different whether it be in texture or color.
Make sure the paper that you use is a square (all sides are equal and all the angles equal 90 degrees). The paper I am using here is 20cm x 20cm square one. It is a good size for those who are not experienced in paper folding. If you become familiar with this model, then you can try a smaller size of paper.
This is the front side of paper.
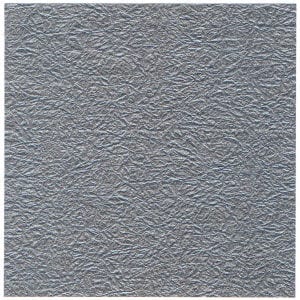
This is the back side of paper. Keep in your mind that the front side is the shinier one.
STEP 1.
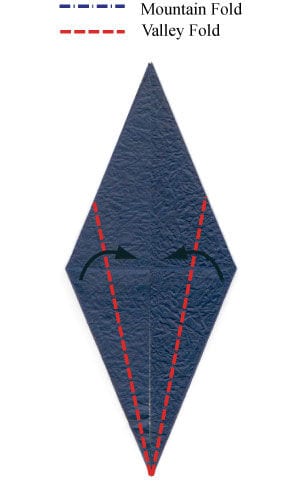
Let us start from the “bird base”. Here I am using the backside of the paper. This “bird base” has been used for many origami models, so you should get familiar with it. From the bird base, prepare to apply two valley-folds.
STEP 2.
Apply two valley-folds of the step #1. Prepare to turn the origami swallow model over.
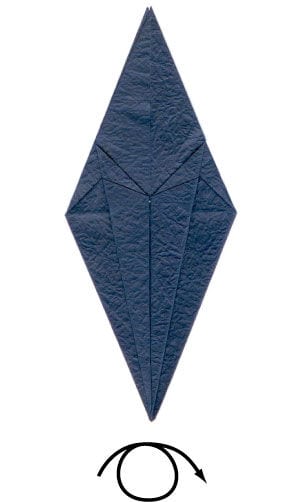
STEP 3.
Turn the origami swallow model over. Prepare to apply two valley-folds.
STEP 4.
Apply two valley-folds of the step #3. Prepare to apply a vertical valley-fold.
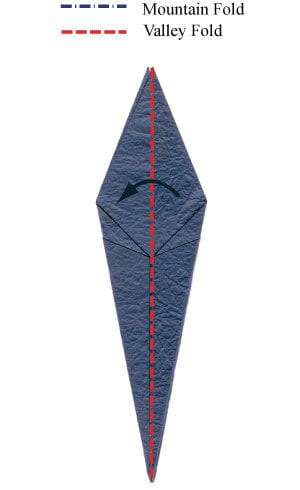
STEP 5.
Apply the vertical valley-fold of the step #4. Prepare to turn the origami swallow model over.
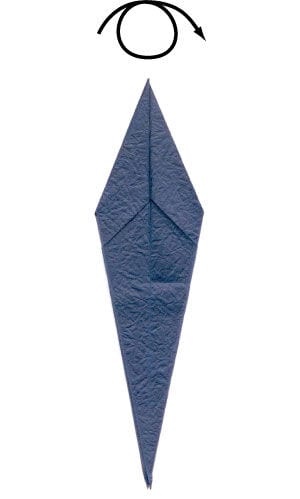
STEP 6.
Turn the origami swallow model over. Prepare to apply a vertical valley-fold.
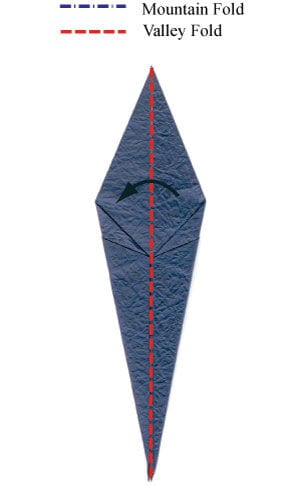
STEP 7.
Apply the valley-fold of the step #6. Prepare to apply an “inside reverse-fold”.
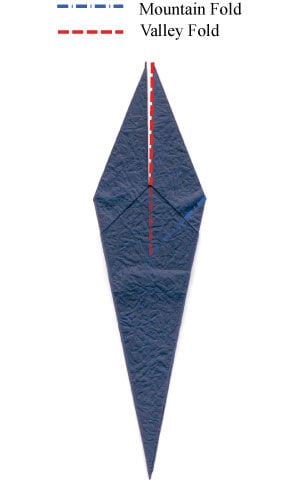
STEP 8.
Apply the “inside reverse-fold” of the step #7. Prepare to apply another “inside reverse-fold”.
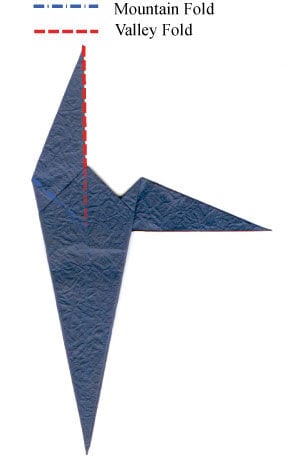
STEP 9.
Apply the “inside reverse-fold” of the step #8. Prepare to apply a horizontal valley-fold.
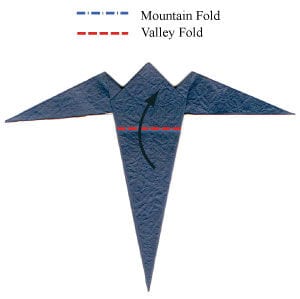
STEP 10.
Apply the horizontal valley-fold of the step #9. Prepare to apply a horizontal valley-fold.
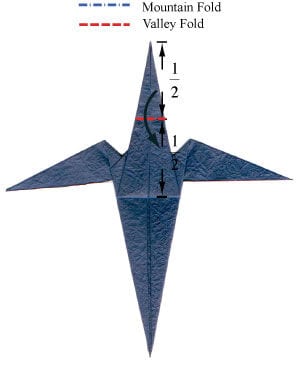
STEP 11.
Apply the horizontal valley-fold of the step #10. Prepare to apply a horizontal valley-fold.
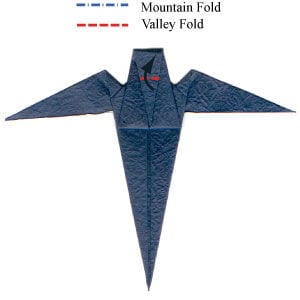
STEP 12.
Apply the horizontal valley-fold of the step #11. Prepare to turn the origami swallow model over.
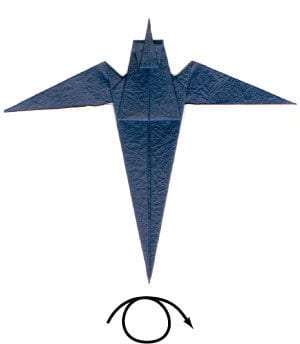
STEP 13.
Turn the origami swallow model over. Prepare to apply a horizontal valley-fold.
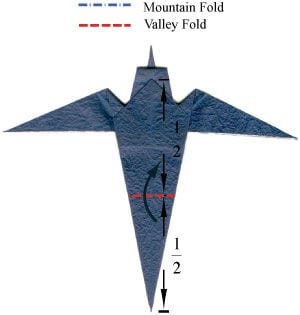
STEP 14.
Apply the horizontal valley-fold of the step #13. Prepare to unfold the valley-fold you have just applied.
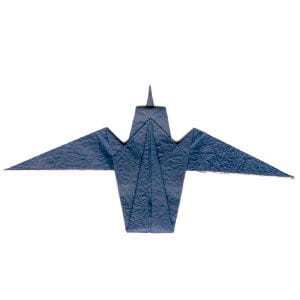
STEP 15.
Unfold the previous valley-fold of the step #14. Prepare to cut the tail in half along the dotted line.
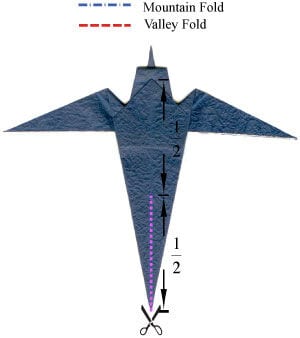
STEP 16.
Cut the tail in half along the dotted line of the step #15. Prepare to cross two tails
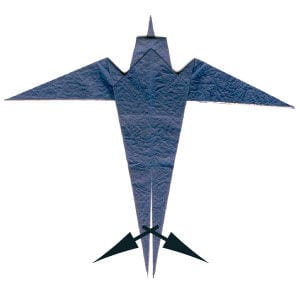
STEP 17.
Cross two tails. Congratulations! You have just completed making a traditional origami swallow.