Long helmet
Have you ever wanted to fold your very own Long helmet? There is something quietly satisfying about turning a flat square of paper into a little recognizable model using nothing but your hands and a few well-placed creases.
This Long helmet is one of those classic folds that looks impressive but comes together one step at a time, so don't worry if it feels fiddly at first — the photos will keep you on track. Whether you are new to origami or just after a quick, rewarding build, you will have a finished Long helmet before you know it. Let's get folding!
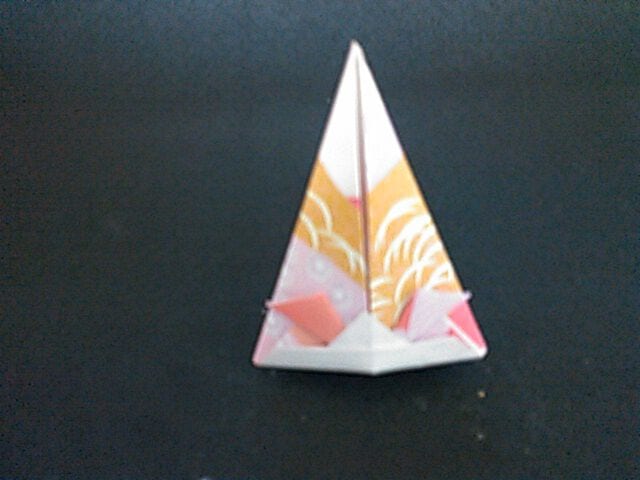
Way of folding
STEP 1. We are in a triangle
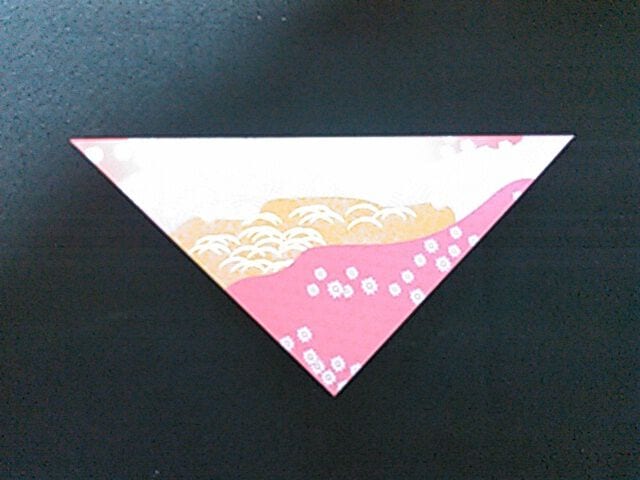
STEP 2. Fold it so that the corners match
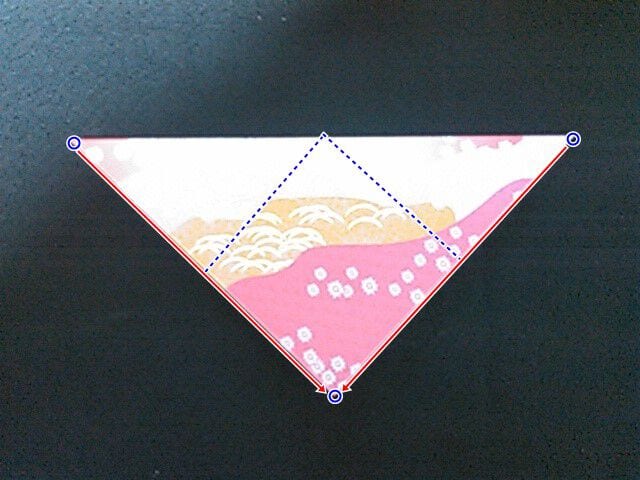
STEP 3. Fold it so that it is centered
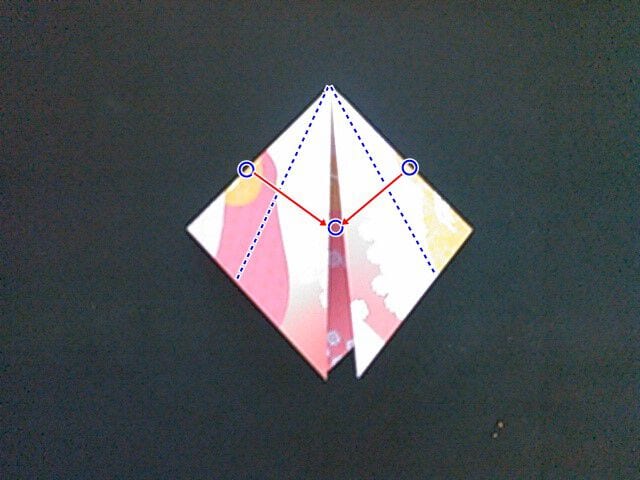
STEP 4. Fold the corner
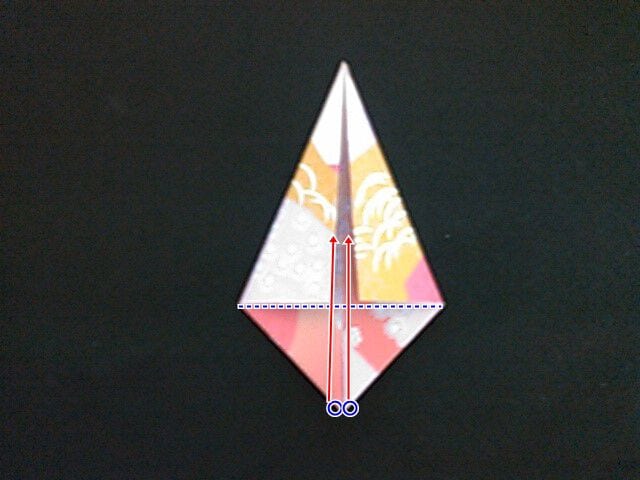
STEP 5. Spread the corner sideways
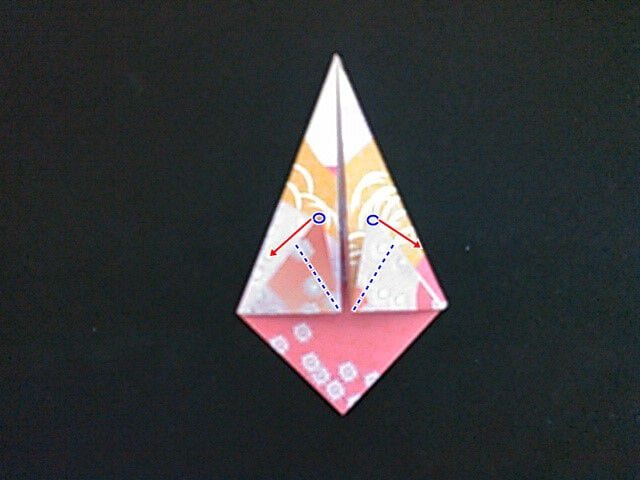
STEP 6. Fold the top piece up
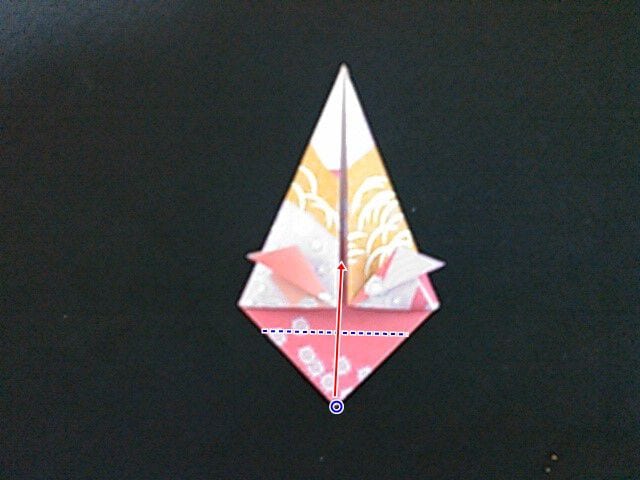
STEP 7. Fold it again
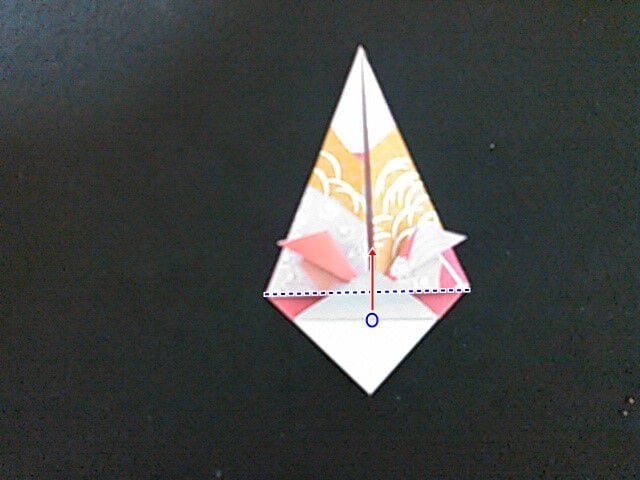
STEP 8. Fold the corner back
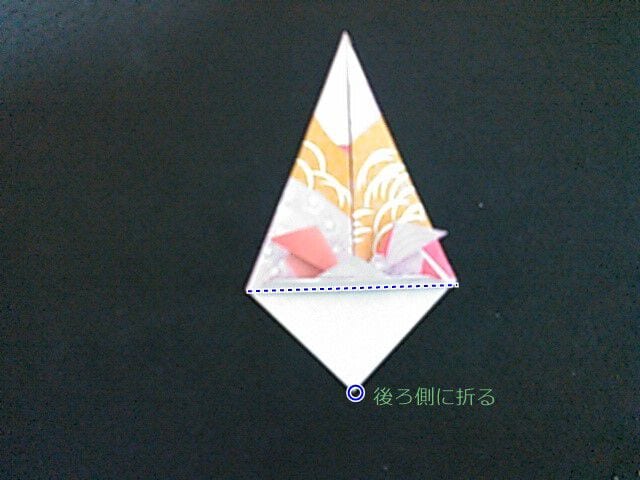
STEP 9. Finished
[Points when folding]
If you are wearing something, prepare a large piece of paper.
Since the head part is long, you can add various decorations. If you attach silver tape or gold tape, the children will be crazy.
It's a good idea to arrange 100 small items and decorate them as you like!
It's a little cool, and if you write your name in kanji on a golden tape, you'll be happy!