How to Fold an Origami Tropical Fish
There is something instantly cheerful about a paper fish with a wide fan tail — it is one of those shapes that reads as "underwater" even before you add eyes or scales. This version keeps things friendly: no tricky sinks, no colour-change folds, just a clean chain of valley creases that a beginner can follow confidently and a child can finish without help.
It is also a wonderfully reusable model. Fold one large and it becomes a card decoration; fold a dozen small ones in bright paper and string them up, and suddenly you have a shoal for a mobile or a classroom wall. Try adding a tiny eye with a pen, or use striped paper so the fins and tail look like they belong to a real reef fish. Give yourself a sheet around 15 cm and follow along — the first surprise arrives when the flat shape opens into a body with real depth.

Tropical fish are among the friendliest origami subjects: one square sheet, a short chain of simple creases, and you have a little creature ready to swim off the page. Follow the photo guide below — each of the steps shows exactly where to crease next.
How to Fold a Tropical Fish
STEP 1.
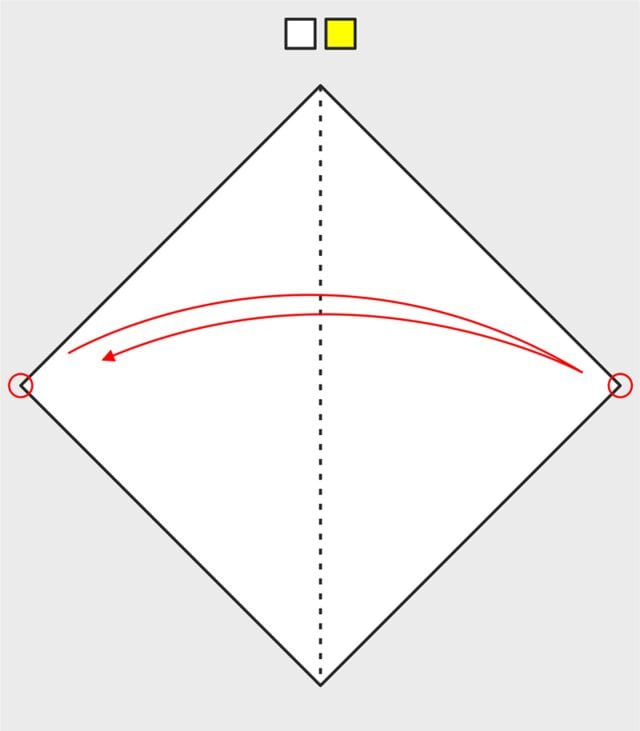
STEP 2.
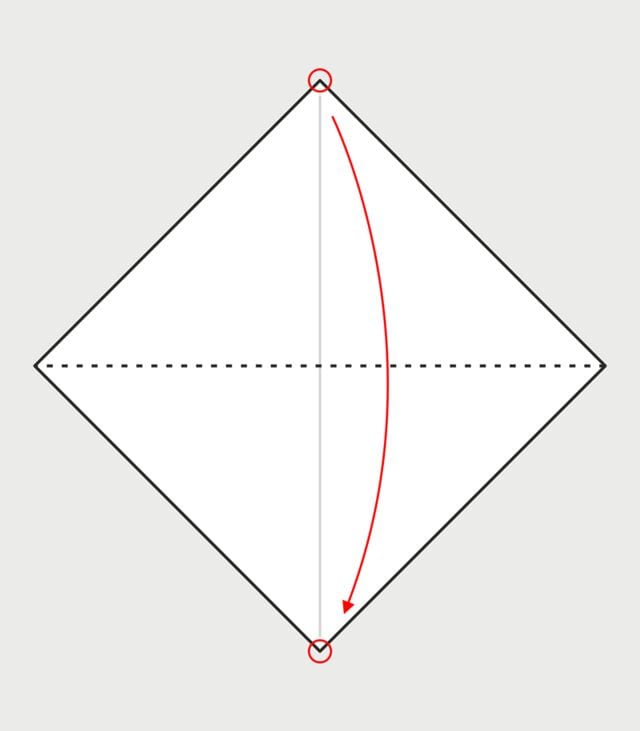
STEP 3.
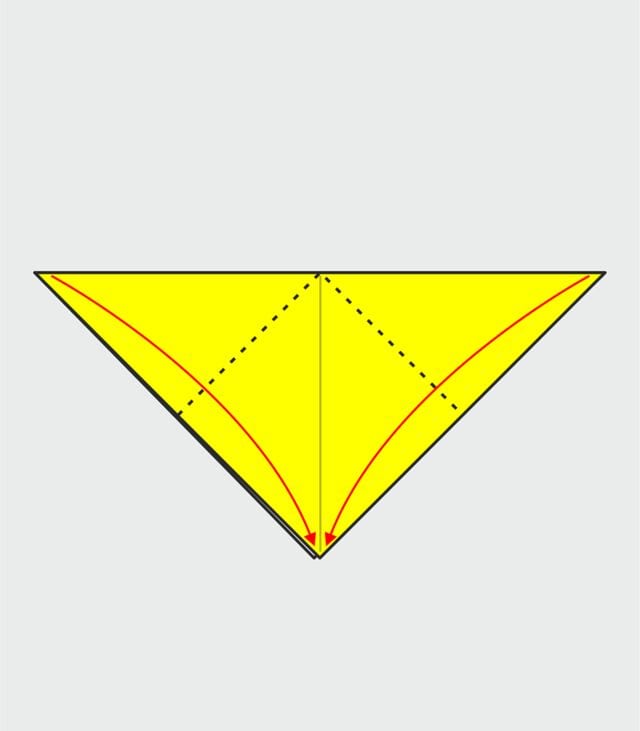
STEP 4.
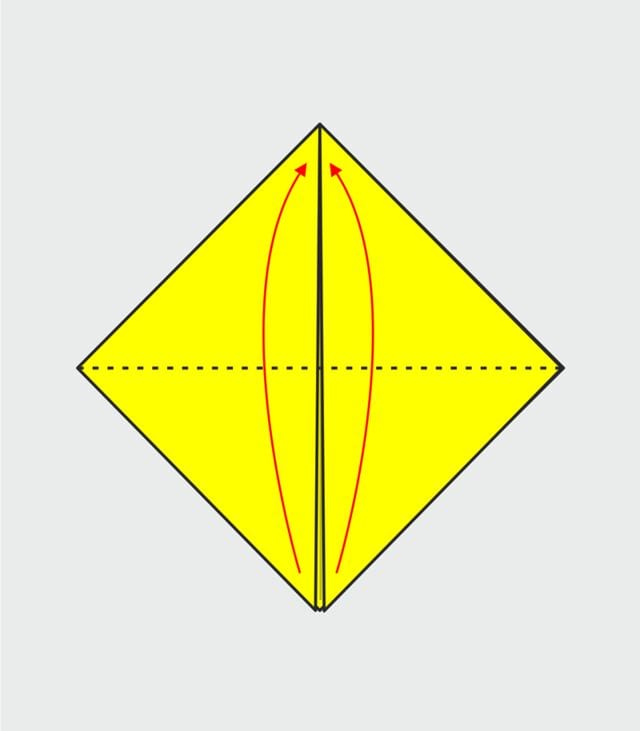
STEP 5.
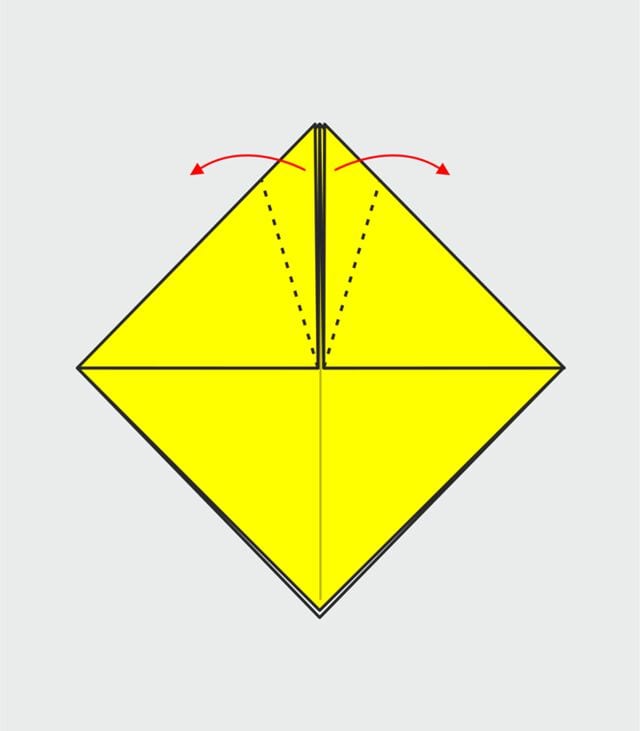
STEP 6.
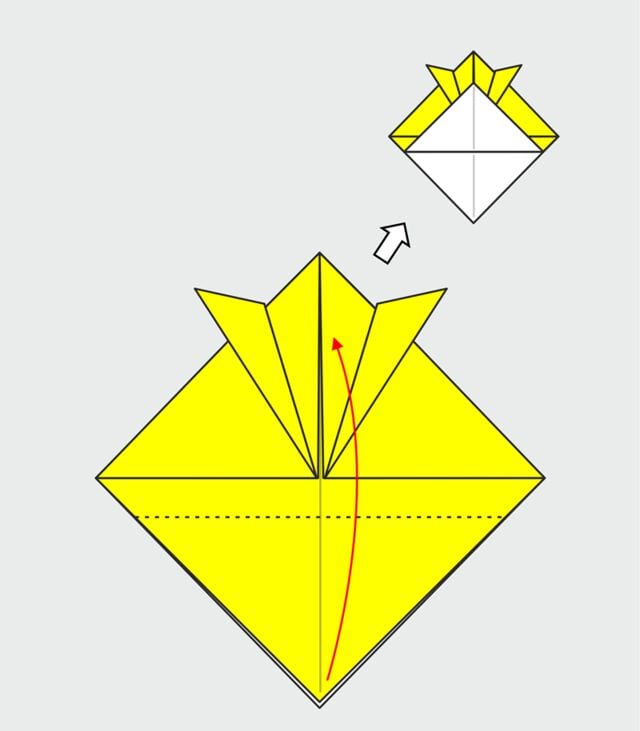
STEP 7.
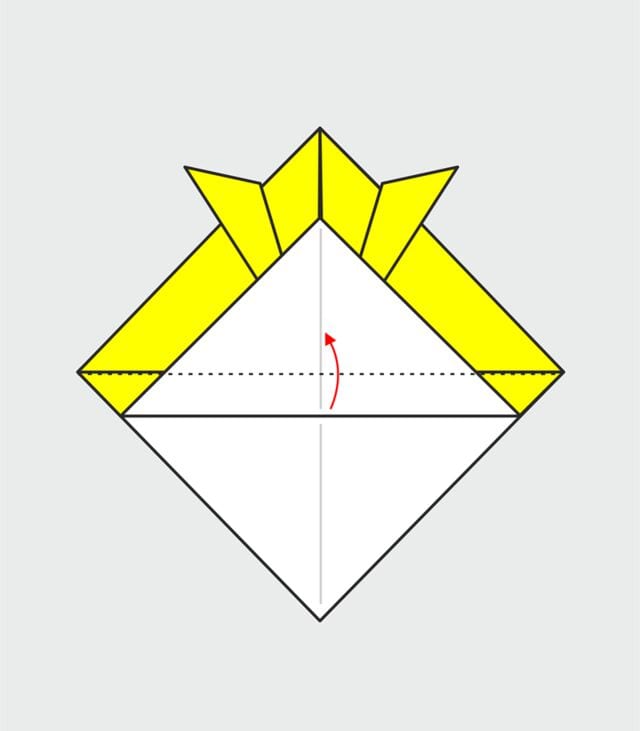
STEP 8.
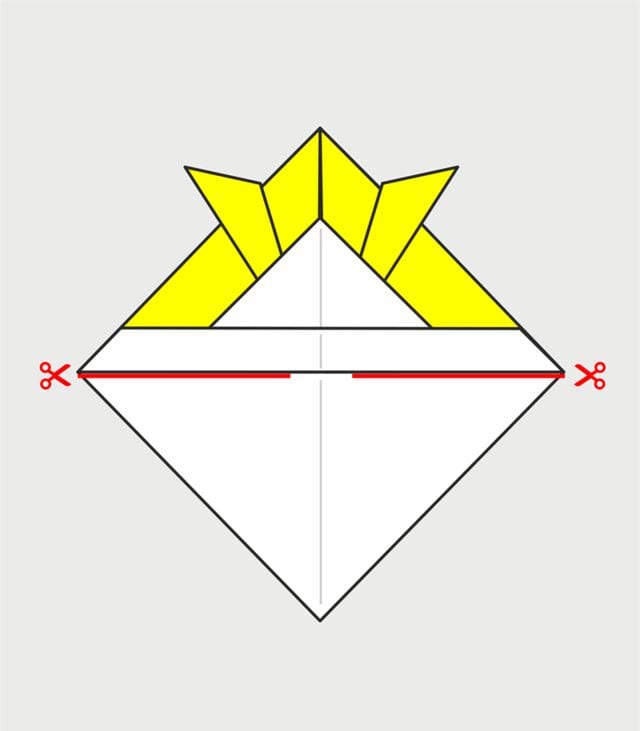
STEP 9.
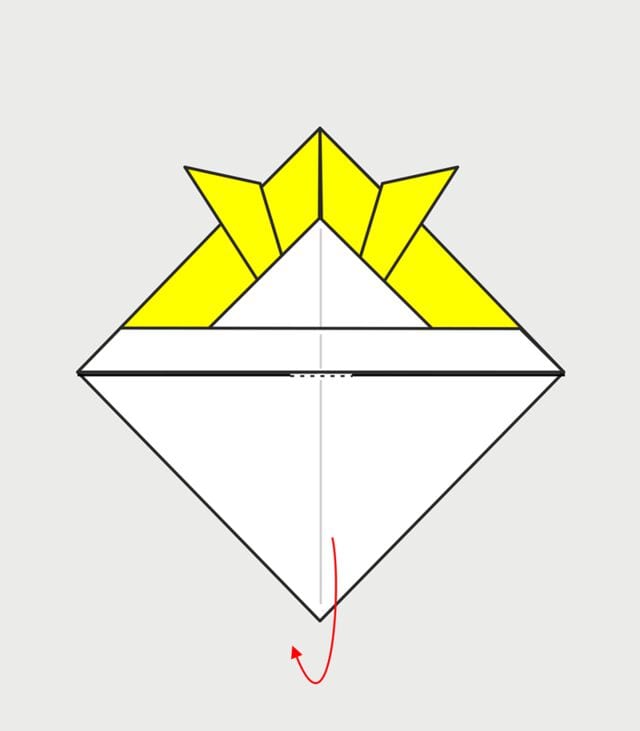
STEP 10.
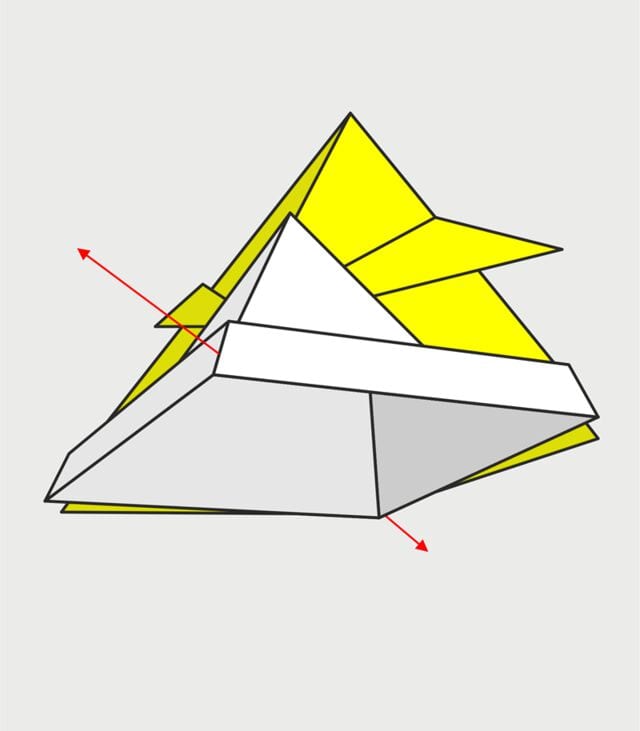
STEP 11.
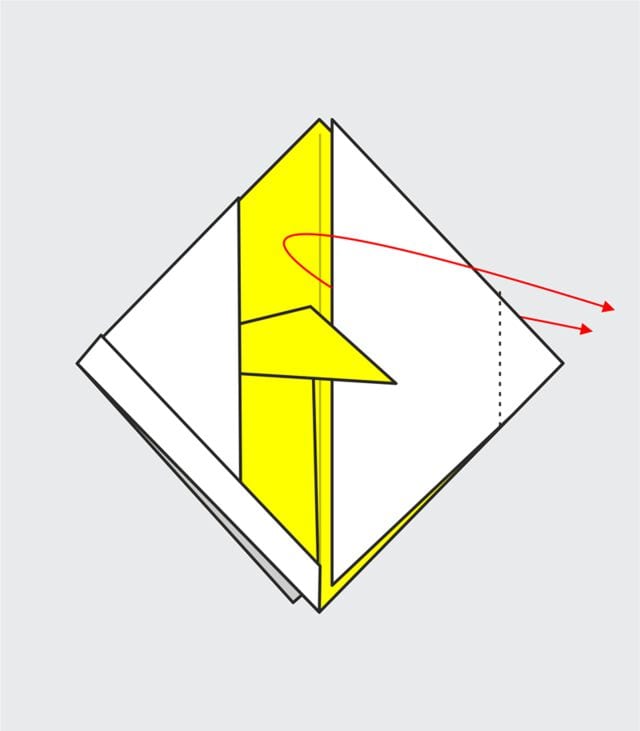
STEP 12.
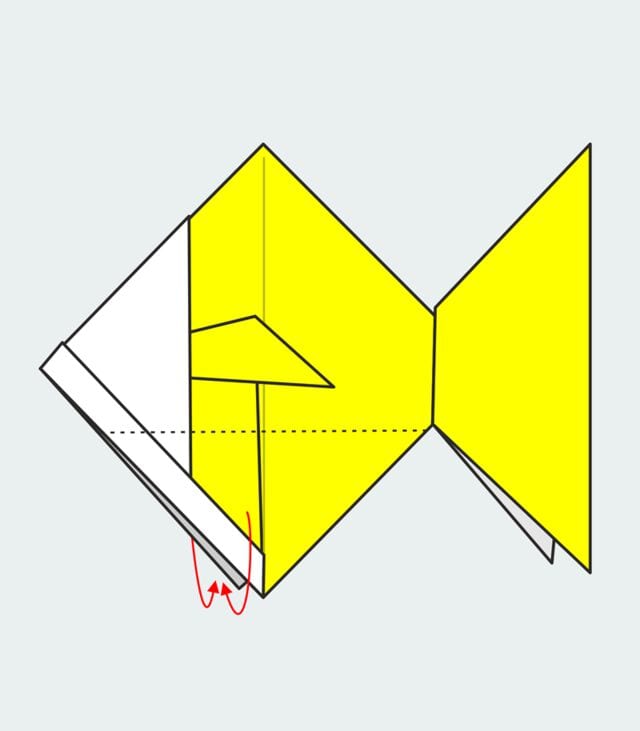
STEP 13.
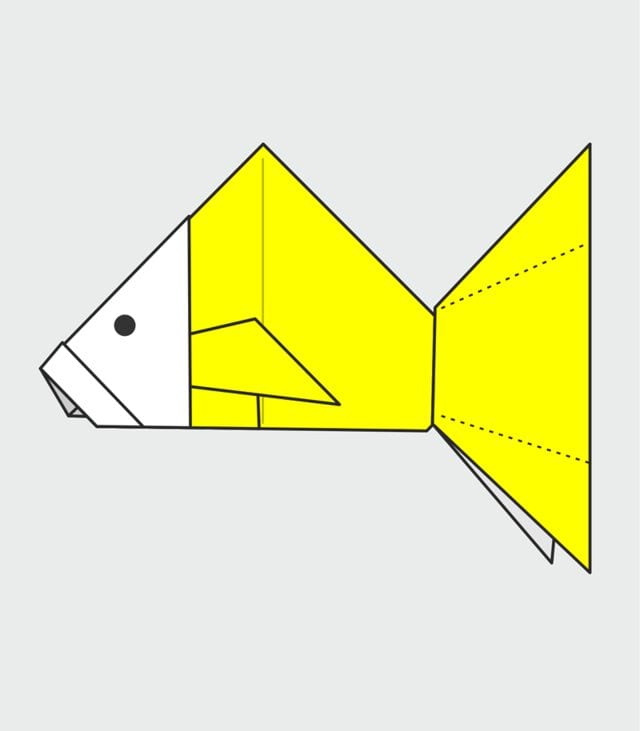
STEP 14. Adjust the body, tail and fins so the fish sits nicely. Your origami tropical fish is complete.