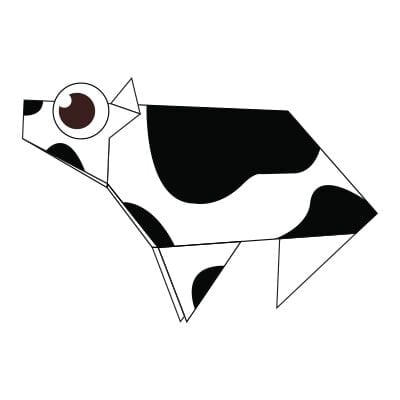
Cow
Few farm animals are as satisfying to fold as a cow — that chunky body, the humble face, and those little ears somehow read as "cow" from the very first creases. This easy version keeps things friendly for newer folders: thirteen photo steps take you from a plain square to a finished paper cow, with the trickier moves (swivel folds, a pleat for the head, an inside reverse fold for the snout) broken down one picture at a time. There is even a tiny cut near the end that lets you fold the ears up and give your cow some personality. Grab a sheet — a two-tone paper looks especially good here — and let's fold something that belongs in a paper barnyard.
These instructions will show you how to fold an easy origami cow. If you’re just starting out, we suggest you take a minute to review our Beginner’s Guide, which will teach you all the basic techniques.
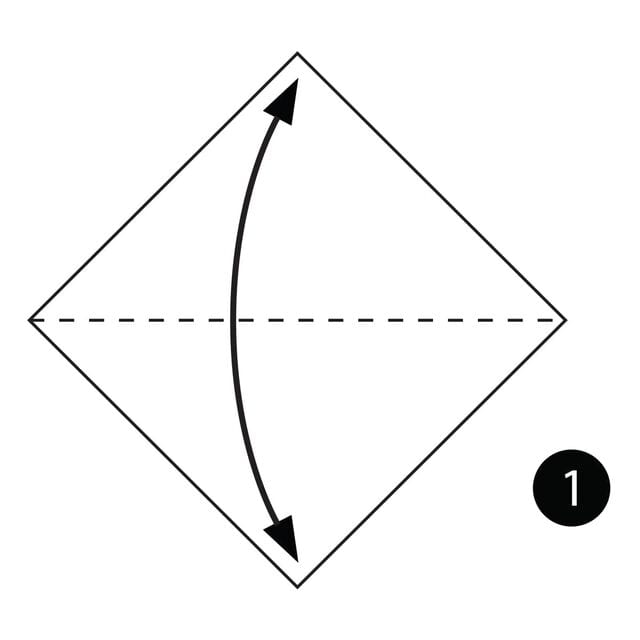
STEP 1. Fold the paper in half and then unfold it.
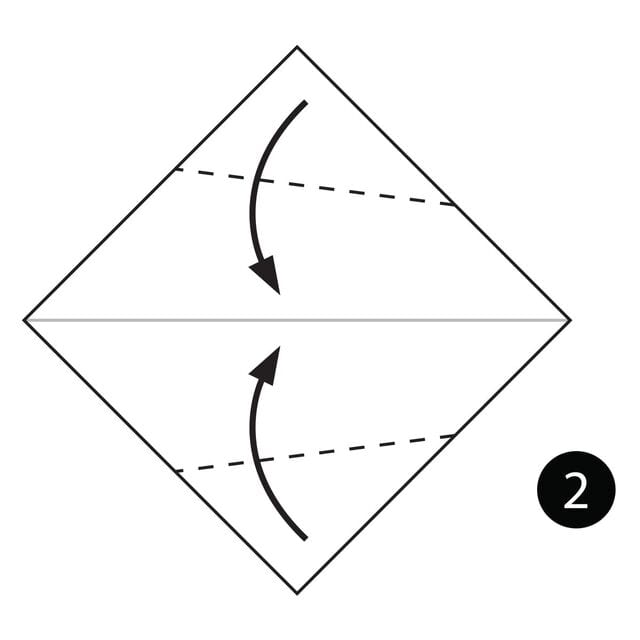
STEP 2. Fold the top and bottom of the paper toward the centre along the dotted lines.
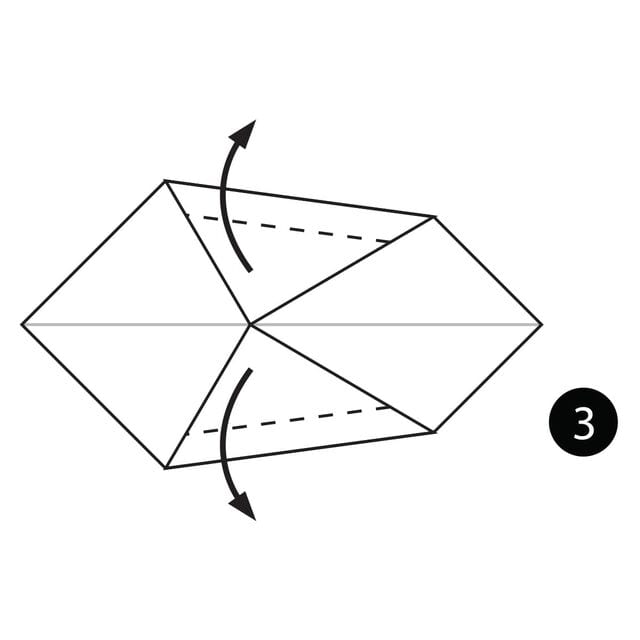
STEP 3. Fold the top layers of paper out along the dotted lines.
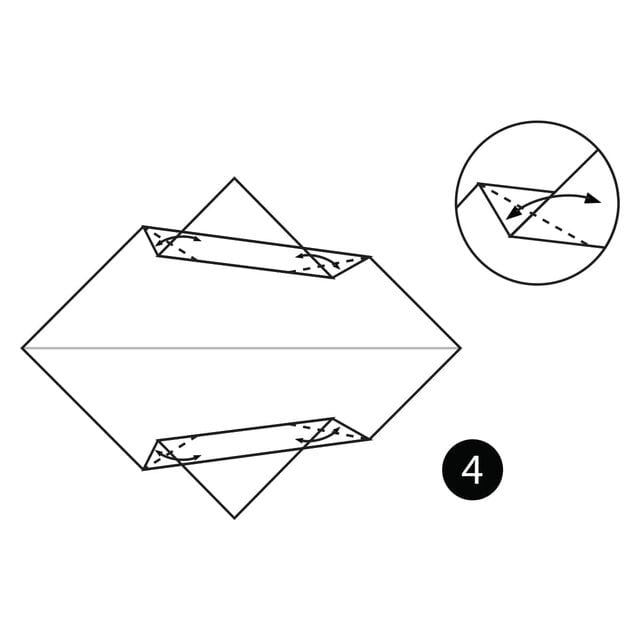
STEP 4. Fold and unfold all the corners along the dotted lines.
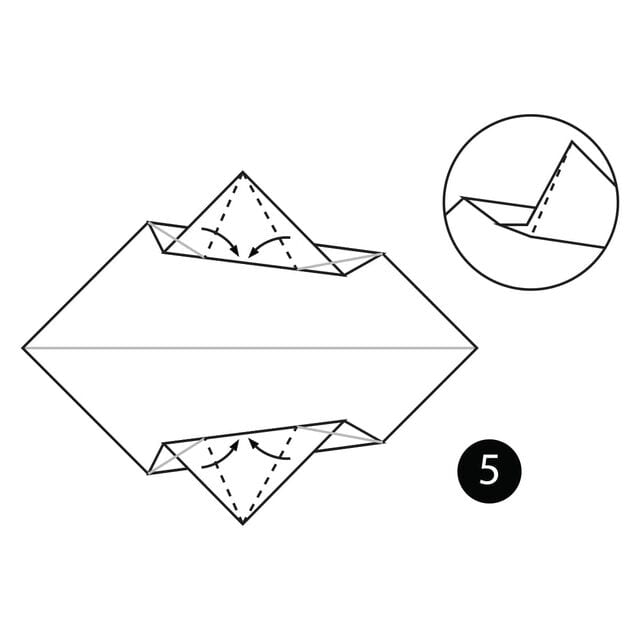
STEP 5. Fold the paper along the dotted lines and make swivel folds along the previous creases.
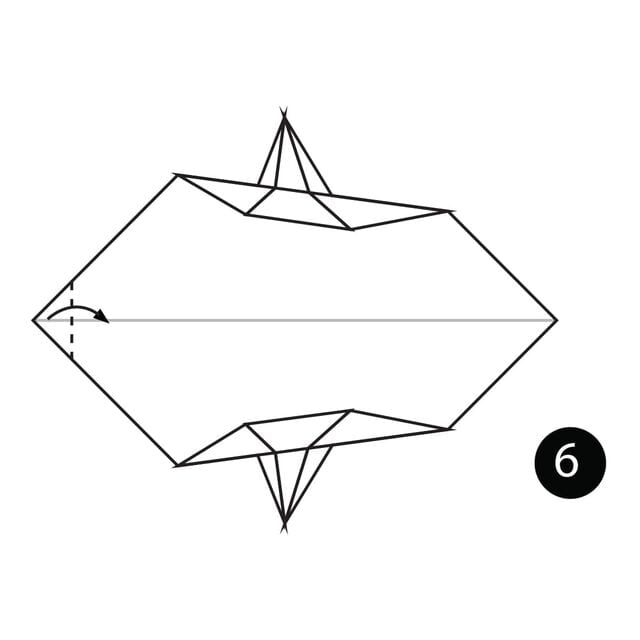
STEP 6. Fold the side of the paper in along the dotted line.
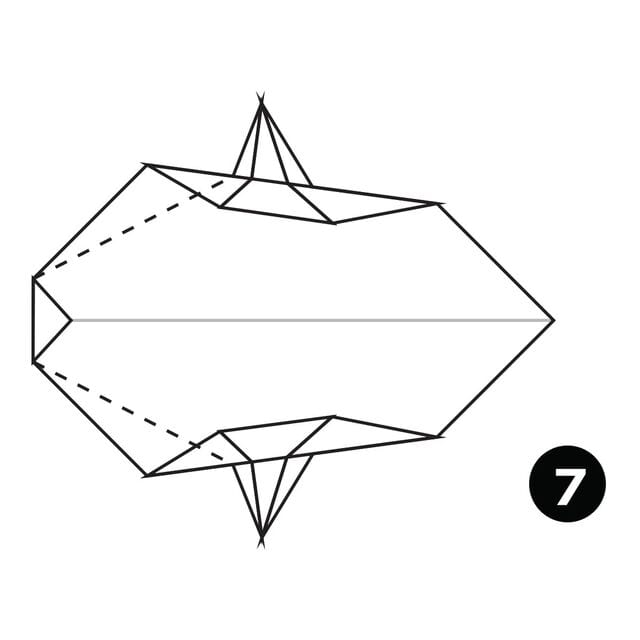
STEP 7. Fold the paper in along the dotted lines.
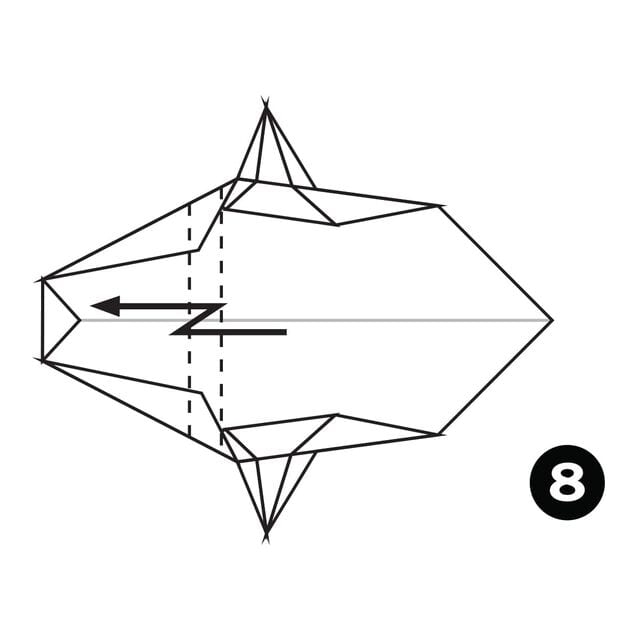
STEP 8. Make a pleat fold along the dotted lines.
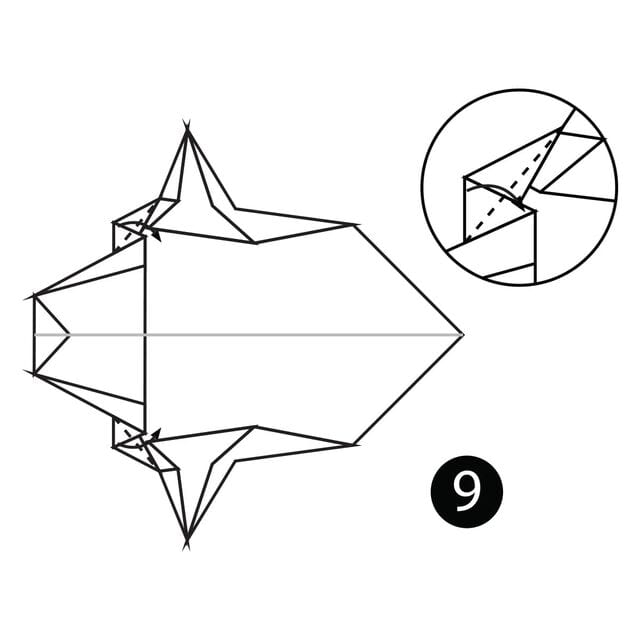
STEP 9. Fold the paper in along the dotted lines.
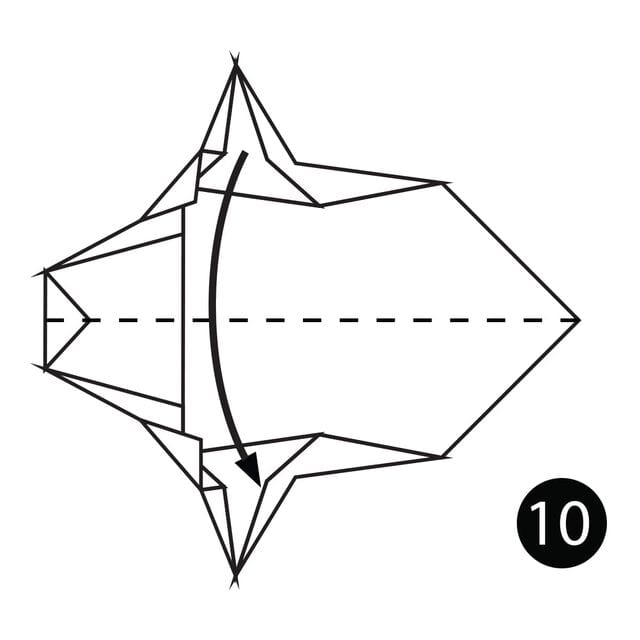
STEP 10. Fold the model in half.
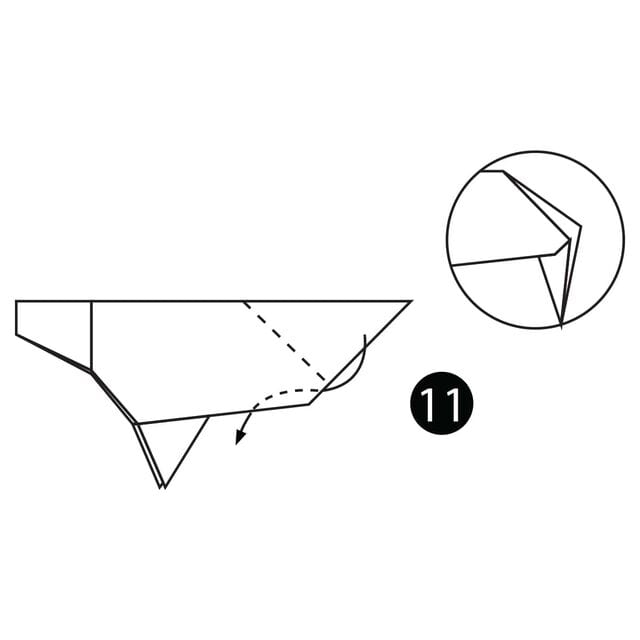
STEP 11. Make an inside reverse fold along the dotted line.
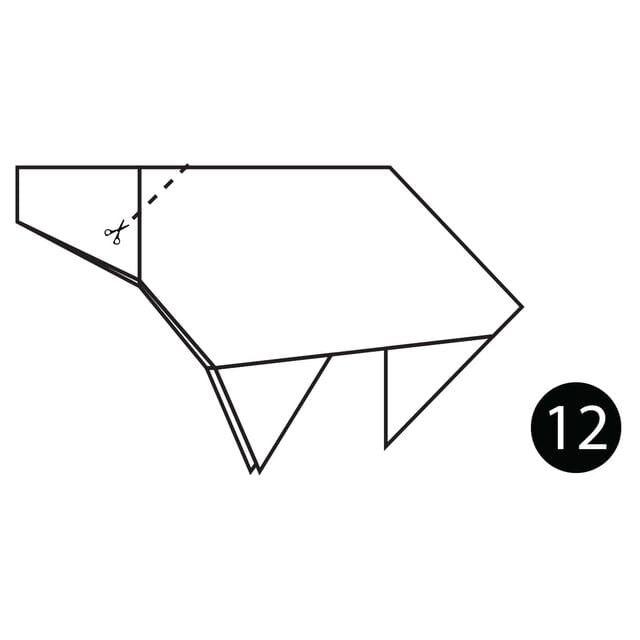
STEP 12. Make a small cut along the dotted line.
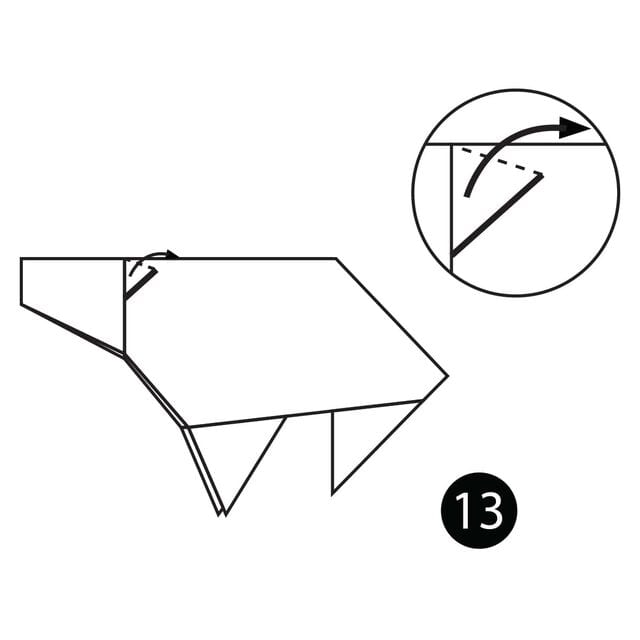
STEP 13. Fold up the cut paper to make ears.
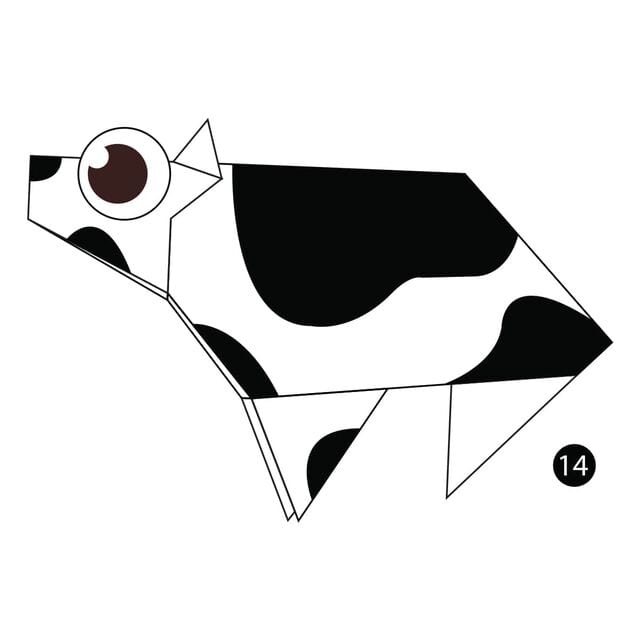
The completed cow.