Ladybug (Short Tutorial)
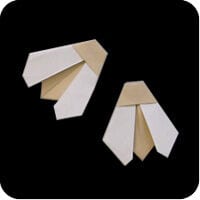
Few origami bugs are as instantly recognizable as the ladybug, and this tiny six-step version is about as quick a make as it gets. From a single square you will shape the rounded wing case and little head, then flip it over to reveal a neat little beetle that looks ready to crawl off your desk.
Because the sequence is so short, it is a brilliant first project for kids or a fast filler when you want a satisfying fold without a big time commitment. Dab on a few black spots with a marker and your ladybug becomes a cheerful card decoration, party favor, or gift topper. Grab a square of paper and let's fold one together.


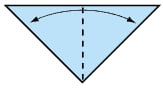
STEP 1. Start with a square piece of paper, white side up. Fold in half.
STEP 2. Fold this triangle in half, crease well, then open.


STEP 3. Fold the top 2 corners downward, but not right to the centre line: leave a little gap.
STEP 4. Turn the model over. Fold the top corner down to the centre point of the model.


STEP 5. Now fold this corner upward, and flatten.
STEP 6. Turn back over. Finished ladybug!