
Calyx Origami Base
A flower is often remembered by its petals, but the small cup that holds them together, the calyx, is what quietly anchors the whole bloom. In origami, that anchor deserves its own base: a simple sheet gathered into a neat cup shape, ready to be slipped under any paper blossom you fold. The Calyx Origami Base starts with a few familiar creases, a square folded in half both ways and along both diagonals, before the real work begins. You fold corner points to the vertical half-line, rotate the paper a quarter turn, and repeat the same gentle fold around all four sides. Then, with a handful of mountain-folds and valley-folds, the flat paper draws itself up into a perfect little cup. Grab a 10cm square, keep the shinier side in mind, and let us build the foundation every good flower deserves.
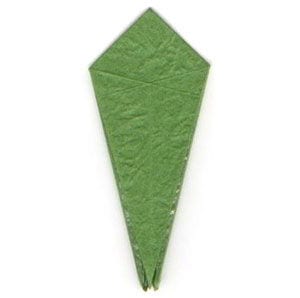
This page is for those who want the instruction to fold a Calyx Origami Base. As the name suggests, this base is needed when you fold a flower calyx, and various kinds of calyxes can be made from it.
If you are ready, then let’s get started.
You may use any kind of paper to fold this base. It is a little easier if the front and the back side of the paper are slightly different, whether in texture or color.
Make sure the paper you use is a square (all sides are equal and all angles equal 90 degrees). The paper I am using here is a 10cm x 10cm square.
This is the front side of the paper. It is somewhat shinier compared to the back side.
This is the back side of the paper. Keep in mind that the front side is the shinier one.
Step 1
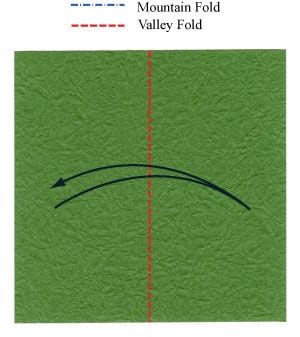
Prepare to valley-fold in half vertically and then unfold.
Step 2
Valley-fold in half vertically and then unfold. Prepare to valley-fold in half horizontally and then unfold.
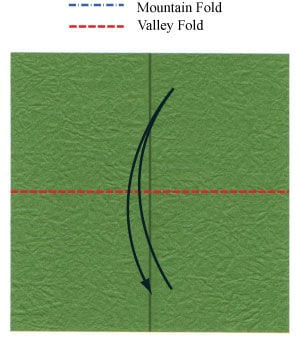
Step 3
Valley-fold in half horizontally and then unfold. Prepare to valley-fold diagonally and then unfold.
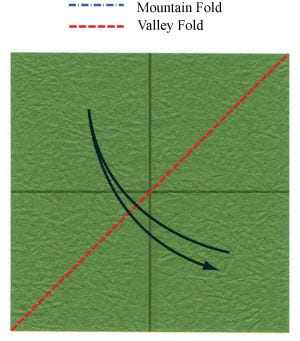
Step 4
Valley-fold diagonally and then unfold. Prepare to valley-fold along the other diagonal and then unfold.
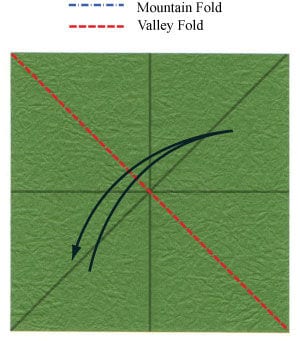
Step 5
Valley-fold diagonally and then unfold according to step 4. Prepare to turn the paper over.
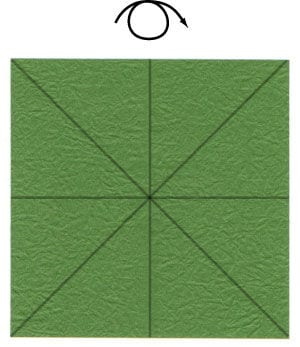
Step 6
Turn the paper over. Prepare to apply a valley-fold so that the point at the bottom-right corner meets the vertical line.
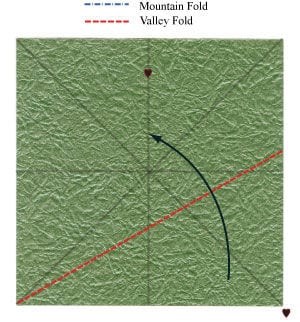
Step 7
Valley-fold according to step 6 so that the bottom-right corner meets the vertical half-line. Prepare to unfold.
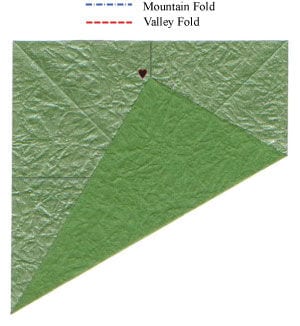
Step 8
Unfold according to step 7. Prepare to rotate the paper 90 degrees clockwise.
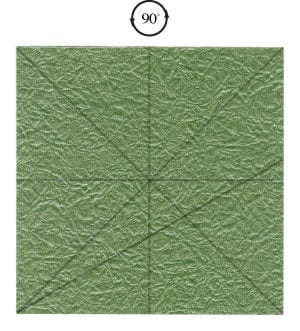
Step 9
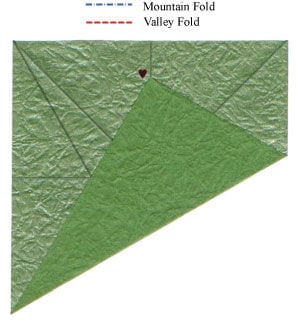
Rotate the paper 90 degrees clockwise. Prepare to apply a valley-fold so that the point at the bottom-right corner meets the vertical half-line. This is the same as step 6.
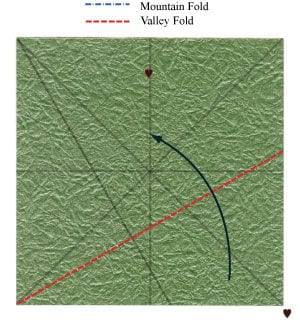
Step 10
Valley-fold according to step 9 so that the bottom-right corner meets the vertical half-line. This is the same as step 7. Prepare to unfold.
Step 11
Unfold according to step 10.
Step 12
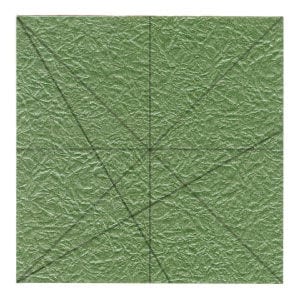
Repeat steps 8-11 twice more.
Step 13
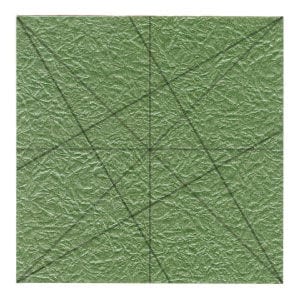
Prepare to apply a valley-fold so that the point at the bottom-left corner meets the vertical half-line.
Step 14
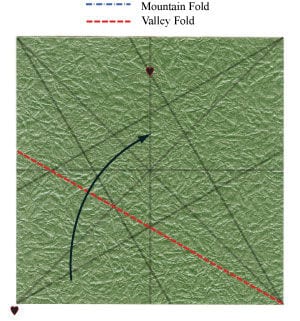
Apply a valley-fold so that the point at the bottom-left corner meets the vertical half-line. Prepare to unfold.
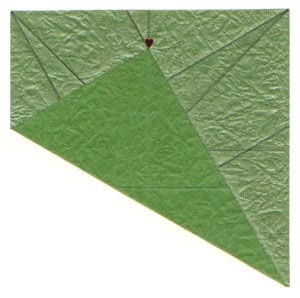
Step 15
Unfold the paper. Prepare to rotate the paper 90 degrees clockwise.
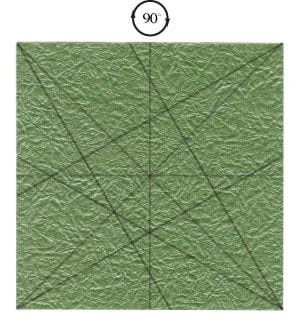
Step 16
Rotate the paper 90 degrees clockwise. Prepare to apply a valley-fold so that the point at the bottom-left corner meets the vertical half-line.
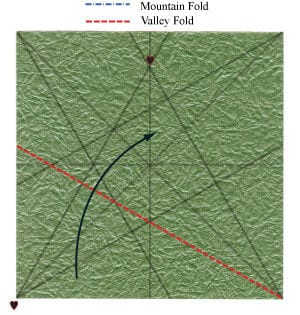
Step 17
Apply a valley-fold so that the point at the bottom-left corner meets the vertical half-line. Prepare to unfold.
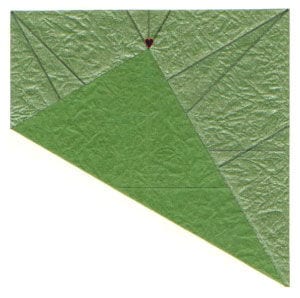
Step 18
Unfold the paper.
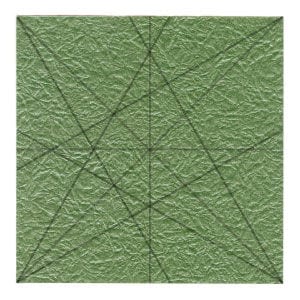
Step 19
Repeat steps 15-17 twice more. Prepare to turn the paper over.
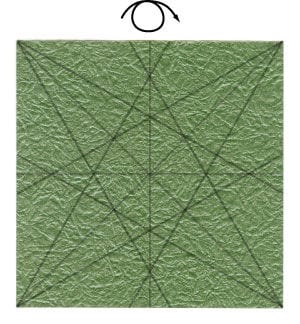
Step 20
Turn the paper over. Prepare to apply the crease pattern (CP) shown on the left. That is, (1) prepare to apply three mountain-folds along the existing crease lines, then (2) apply a new valley-fold.
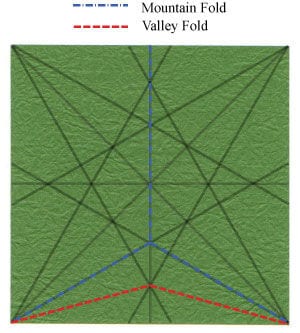
Step 21
Apply the three mountain-folds of step 20 using the existing crease lines. Prepare to apply a valley-fold.
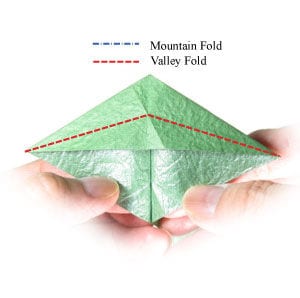
Step 22
Apply the valley-fold of step 21.
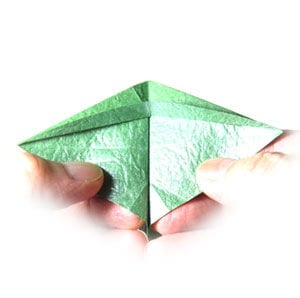
Step 23
Prepare to repeat steps 20-22 on all four sides by applying the CP shown on the left.
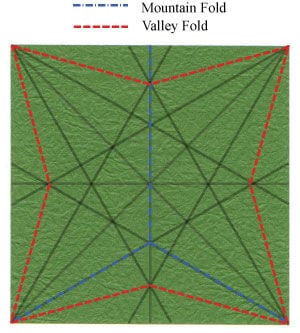
Step 24
Apply the CP of step 23. Prepare to apply two valley-folds while mountain-folding at the center.
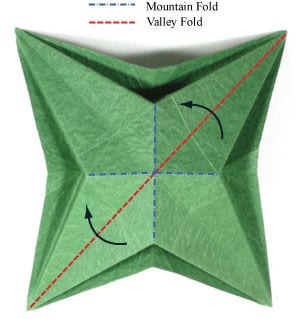
Step 25
Apply the CP of step 24. You have just completed making a Calyx Origami Base.




