How to Fold a Regular Origami Chair
Most origami models are meant to be looked at. A chair is meant to be used, and this one really does stand up and hold its shape — small enough to line up along a dollhouse wall, sturdy enough to seat a paper figure or two.
It also teaches one genuinely transferable skill: the 90-degree fold. Instead of folding a crease flat through the usual 180 degrees, you stop at a right angle. That single idea is what gives the chair its thickness and its back, and it is the same technique behind a great deal of origami furniture. Read step 16 carefully before you attempt it; folding that step flat instead of square is the most common mistake.
Use a generous 20 cm square to begin with, ideally coloured differently on the two sides so you can always tell which face you are working on. Twenty-six steps sounds like a lot, but most are small, and there is a pleasant moment near the end when a flat sheet of creases suddenly becomes something with legs and a back.
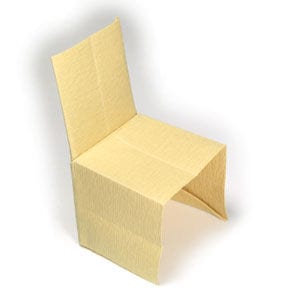
This page is for those who want the instruction to fold a regular origami chair.
This origami chair asks you to use 90-degree valley folds and mountain folds. The technique is the same as usual, only the angle differs: you fold through a quarter turn instead of flattening the paper completely.
So long as you are comfortable telling a valley fold from a mountain fold, nothing here will cause trouble.
If you are ready, let us begin.
The sheet I am using here is a 20 cm square, a comfortable size if you are not yet used to folding. Once the model feels familiar, try working with something smaller.
This is the front side of the sheet. Any paper will do for this chair. I have chosen paper that is the same colour and texture on both sides, but using two different colours makes the chair easier to read as you fold.
This is the back side of the sheet.
STEP 1. Start with the backside of the paper facing up. Prepare to apply a vertical “gate-fold”.
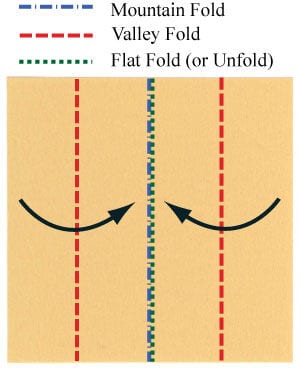
STEP 2. Apply a vertical “gate-fold” of the step #1. Prepare to unfold.
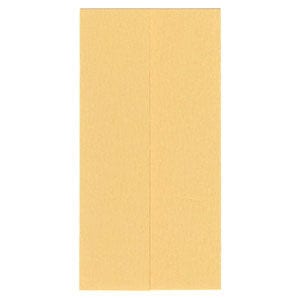
STEP 3. Unfold the paper. Prepare to apply a horizontal “gate-fold”.
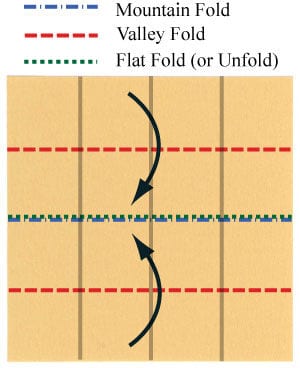
STEP 4. Apply the horizontal “gate-fold” of the step #3. Prepare to apply two valley-folds.
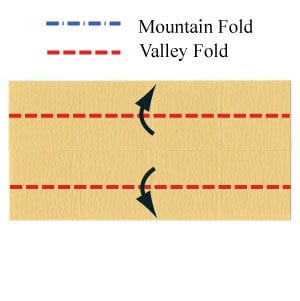
STEP 5. Apply two valley-folds of the step #4. Prepare to turn the model over.
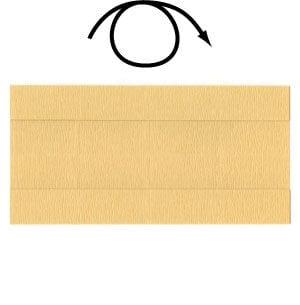
STEP 6. Turn the model over. Prepare to apply two valley-folds.
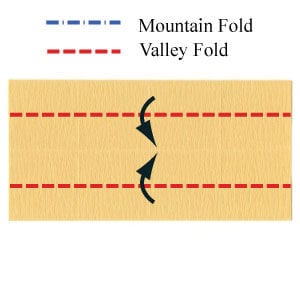
STEP 7. Apply two valley-folds of the step #6. Prepare to rotate the model by 90 degrees in the clockwise-direction,
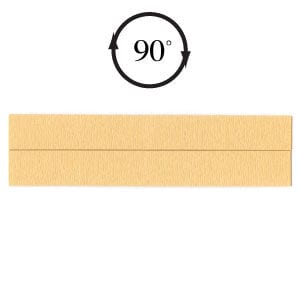
STEP 8. Rotate the model by 90 degrees in the clockwise-direction, Prepare to unfold the paper.
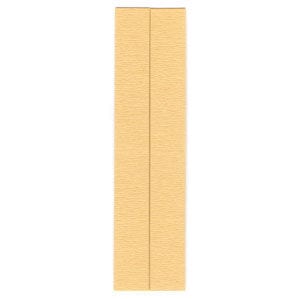
STEP 9. Unfold the paper. There are now ten crease lines. Keep the back side facing up if your paper differs in colour front to back.
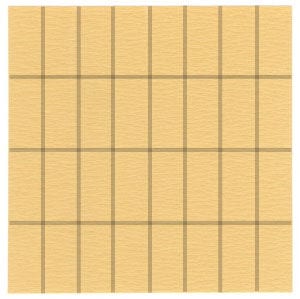
STEP 10. Prepare to apply two valley-folds.
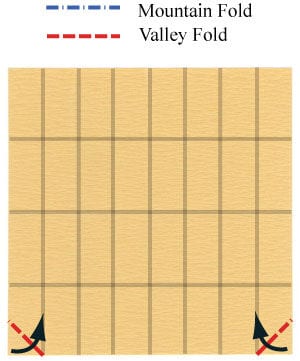
STEP 11. Apply two valley-folds. Prepare to apply another two-valley-folds.
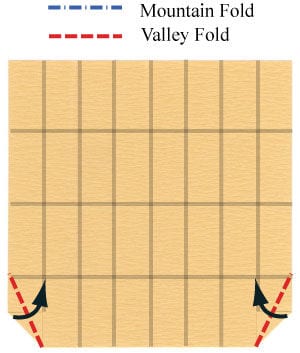
STEP 12. Apply two valley-folds of the step #11. Prepare to apply two valley-folds.
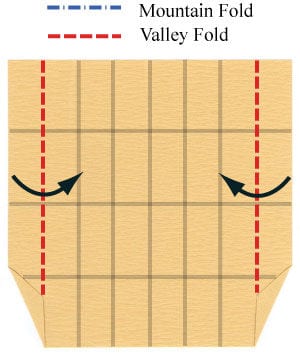
STEP 13. Apply two valley-folds of the step #12. Prepare to apply two valley-folds.
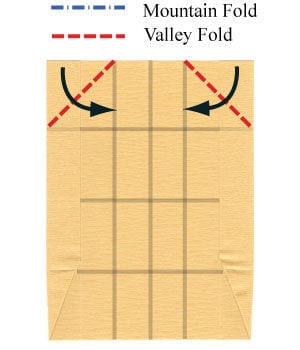
STEP 14. Apply two valley-folds of the step #13. Prepare to turn the paper over.
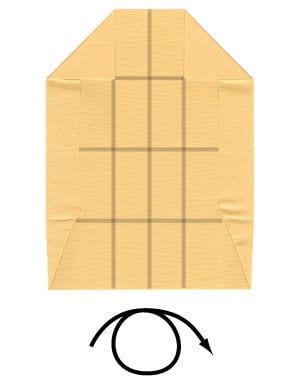
STEP 15. Turn the paper over. Prepare to apply a valley-fold.
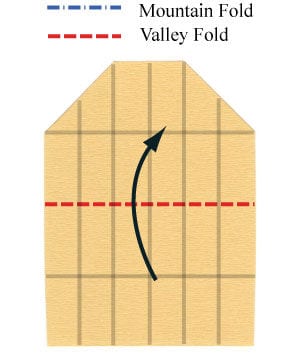
STEP 16. Apply the valley-fold of the step #15. Prepare to apply the crease pattern shown on the left. A 90-degree valley or mountain fold means folding only a quarter turn rather than the usual 180 degrees.
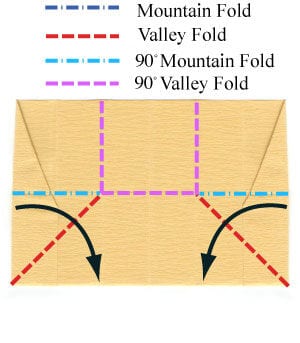
STEP 17. Apply the CP of the step #16. Prepare to apply a mountain-fold.
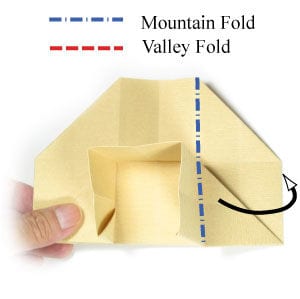
STEP 18. Apply the mountain-fold of the step #17. Prepare to turn the model over.
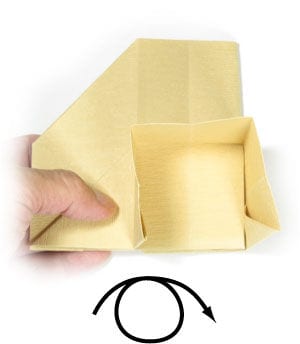
STEP 19. Turn the model over. Prepare to rotate the model by 90 degrees in the clockwise direction.
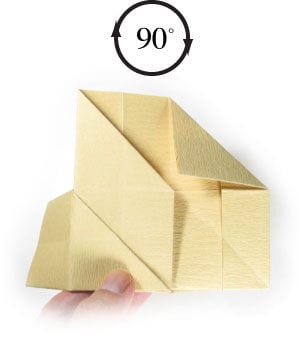
STEP 20. Rotate the model by 90 degrees. Prepare to grab the edge encircled by a dotted circle.
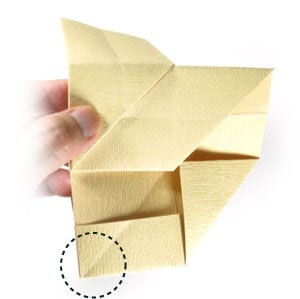
STEP 21. Grab the edge marked in step 20, ready to insert it into the pocket marked with a dotted ellipse.
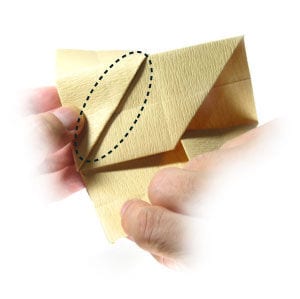
STEP 22. Begin inserting the flap into the pocket.
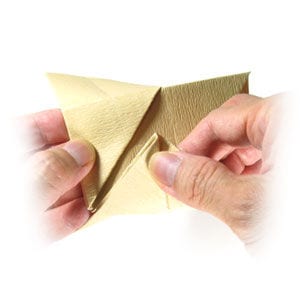
STEP 23. Keep easing the flap into the pocket.

STEP 24. Finish inserting the flap so it locks inside the pocket.
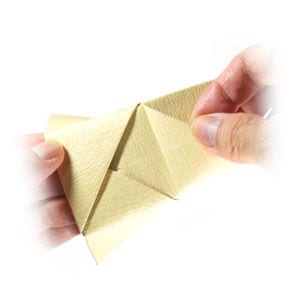
STEP 25. Lay the model down. The back of the origami chair is shown here.
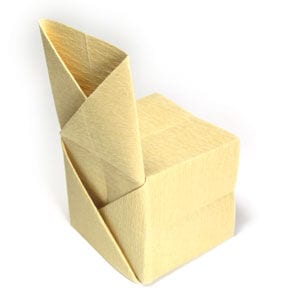
STEP 26. Congratulations — you have just finished folding a regular origami chair. Stand it up and give the seat a gentle press so it holds its shape.