
3D Christmas Tree with Star
There is something extra satisfying about a Christmas tree you can make without a single drop of glue or a trip to the store — just one square of paper and a pair of scissors. This little 3D tree even grows its own star on top, and you get to decorate that star before the folding even begins.
It looks impressively three-dimensional when it stands up, but every step is a friendly, repeatable move. Pour a cup of cocoa, pick a festive paper, and let's fold a tiny forest.
How to Fold a 3D Christmas Tree with a Star

You will need: 1 sheet of 15 × 15 cm origami paper and a pair of scissors.

STEP 1. Fold it in half through the middle.

STEP 2. Fold it in half through the middle again and make a crease.

When the tree is finished, this section becomes the front face of the star.
If you fold it as it is, you will get a blank white star. So first, decorate it:

Super easy method — draw your favorite color with a pen.

That's it!
I painted mine as a square, but a circle works just as well.
Make the decoration generously sized, just to be safe. The sample is painted about 4 cm square.
If you paint after the tree is finished, the star will lose its shape, so it is best to paint first and fold only after the ink has dried.

Super easy method — stick on your favorite paper.

That's it!
With this method you can freely use golden stars, polka-dot stars, and more.
Make it generously sized, just to be safe. The sample uses a quarter of a 7.5 cm square sheet, so about 3.75 cm square.
This method makes the paper thicker, which can make it a little harder to fold.
Now, back to the folding steps.

STEP 3. Fold along the dotted line so it meets the center.
* At this point the bottom is the center of the origami and the top is the edge.

STEP 4. Turn it over.

STEP 5. Fold along the dotted line so it meets the center.

STEP 6. Open the inside and fold it into a square base.

It looks like this.

STEP 7. Make a valley fold along the dotted center line and crease it.


STEP 8. Open the pocket on the left and fold it along the dotted line.

It looks like this. Fold the back side the same way.

STEP 9. Tilt the left side to the right and fold it.

It looks like this. Fold the back side the same way.

Fold the same way as in steps 7, 8, and 9. Fold the back side the same way.

STEP 10. Once it opens up like this, cut along the red line.
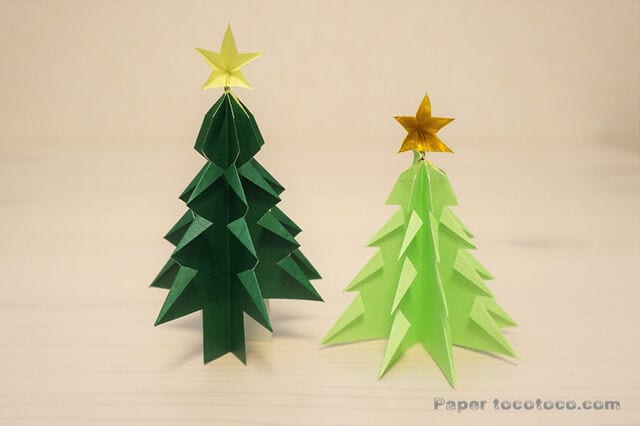
You can cut the leaves at an angle, and feel free to customize the number and depth of the cuts. The green version has a trunk, and the yellow-green version has no trunk.

STEP 11. After making the notches, fold the dotted lines on every layer.
You can also choose which way to fold the dotted lines — for example, fold them all to the right.

STEP 12. Tilt the left side to the right and fold it.

This divides the pages into 3 and 5 layers.

STEP 13. Make a cut along the red line on the 5 layers.
Be careful not to cut them all the way off.
Especially, if you add paper on the back it becomes very stiff, so take care.
The shape and size of the star change with the angle and position of the cut: a tight angle gives a sharp star, a loose angle gives a thick star, a cut near the top gives a small star, and a cut far from the top gives a large star.

Like this.

STEP 14. Open the star and lift it up.

Shape the stars,

Once the branches are spread out evenly,
your Christmas tree is complete!
The star on the left is colored with a pen,
and the one on the right has gold paper applied.




