
Origami Loveseat
There's a special kind of joy in building tiny furniture out of a single square of paper, and this little loveseat might be the cutest seat on the origami block. With its two cushions, rolled arms, and a back you can see from behind, it reads instantly as "couch"—no explainer required. The path there is a satisfying puzzle of gate-folds and a chair-fold that collapses the sheet into a neat 16-cell grid before standing itself up. Once you've made one, it'll be begging for a matching chair and coffee table. Grab a 20 cm square and let's furnish your paper living room.
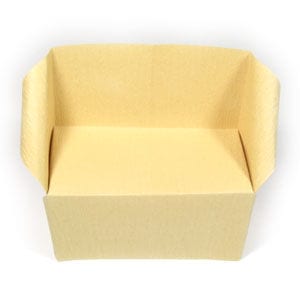
This page is for anyone who wants to fold an origami loveseat.
You will apply both horizontal and vertical gate-folds at the start, then a chair-fold. The model comes together in under twenty steps.
Before working on this model, you need to know what the valley-fold and mountain-fold are. If you know these two folding techniques, then you will have no problem making the origami loveseat.
If you are ready, then let’s get started.
The paper I am using here is a 20cm x 20cm square, a good size for those who are not experienced in paper folding. Once you are familiar with this model, you can try smaller paper.
This is the front side of the paper.
This is the back side of the paper.
STEP 1.
We can start to apply a “gate-fold”. Prepare to apply a horizontal “mountain-fold” and then unfold.
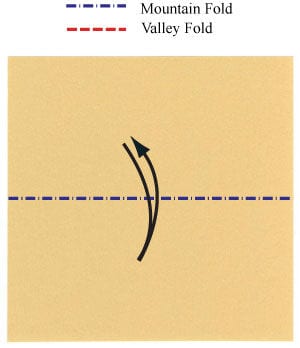
STEP 2.
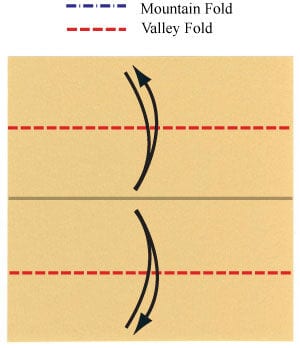
Apply the horizontal mountain-fold from step #1 and then unfold. Prepare to apply two valley-folds and then unfold.
STEP 3.
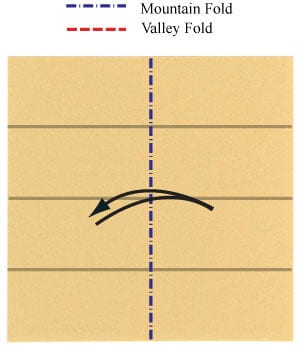
Apply the two valley-folds from step #2 and then unfold. Prepare to apply a vertical mountain-fold and then unfold.
STEP 4.
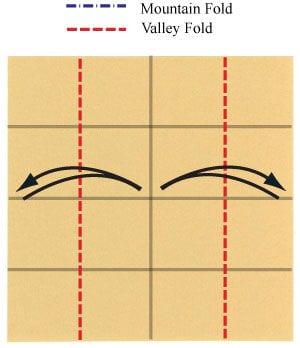
Apply the vertical mountain-fold from step #3 and then unfold. Prepare to apply two vertical valley-folds and then unfold. Here we are applying a vertical “gate-fold”.
STEP 5.
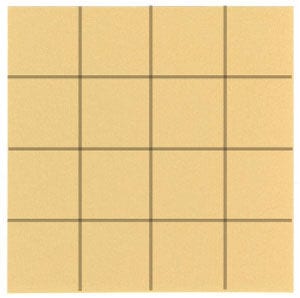
Apply the two vertical valley-folds from step #4 and then unfold. Now we have a grid of creases forming 16 square cells.
STEP 6.
Prepare to apply a “chair-fold” (if you’re new to it, the chair-fold is a simple fold that forms the seat shape).
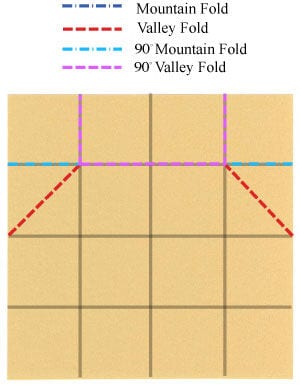
STEP 7.
Apply the “chair-fold” from step #6. Prepare to apply the crease pattern (CP) on the left.
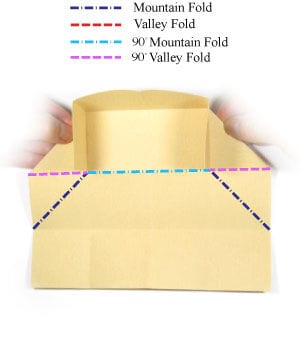
STEP 8.
Apply the CP from step #7. Prepare to turn the paper over.
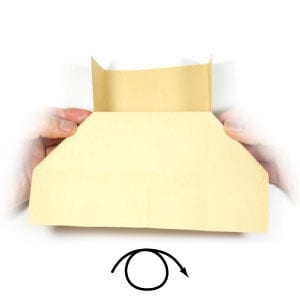
STEP 9.
Turn the paper over. Prepare to apply two valley-folds.
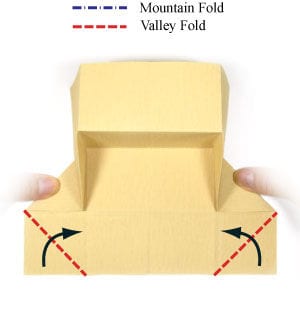
STEP 10.
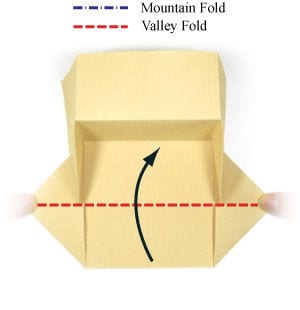
Apply the two valley-folds from step #9. Prepare to apply a valley-fold.
STEP 11.
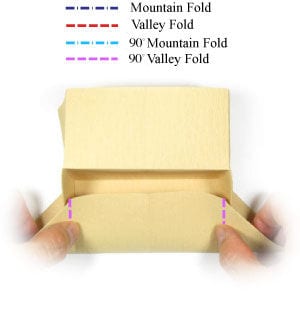
Start to apply the valley-fold from step #10. Prepare to apply two 90-degree valley-folds.
STEP 12.
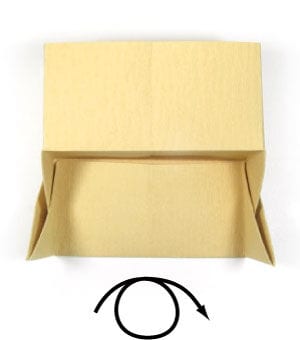
Apply the two 90-degree valley-folds from step #11. Prepare to turn the model over.
STEP 13.
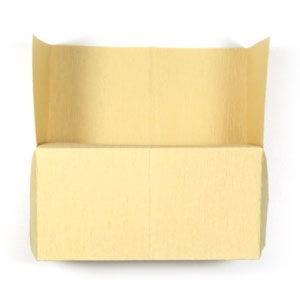
Turn the model over. Prepare to tilt the model a little.
STEP 14.
Tilt the model. Prepare to curl the right edge.

STEP 15.
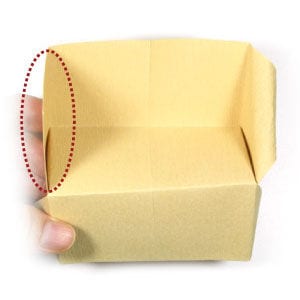
Curl the right edge. Prepare to curl the left edge.
STEP 16.
Curl the left edge. Prepare to see the back of the origami loveseat.
STEP 17.
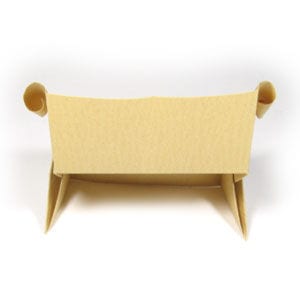
This is the back view of the origami loveseat.
STEP 18.
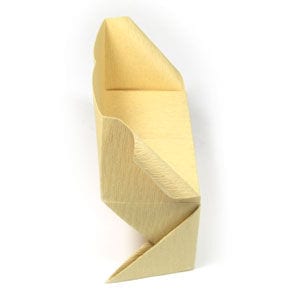
This is the side view of the origami loveseat.
STEP 19.
This is the perspective view of the origami loveseat. Congratulations! You have completed making an easy origami loveseat.





