How to Fold a Simple Origami Flower
Some origami flowers ask for an afternoon and a great deal of patience. This one asks for a square of paper and about ten steps, and it still produces something you would happily put in a small vase. It is built on the Preliminary Base, which means learning it is quietly useful: once that base is under your fingers, a long list of traditional models opens up.
The step that decides how good your flower looks is the last one. Pull the tip down further than feels natural, then ease the blossom open rather than forcing it, working round the shape so the petals stay even. Press the edges flat once it is open and the creases will hold. Paper matters more than usual too — thin sheets bloom easily, thick ones resist, so keep the heavy card for something else.
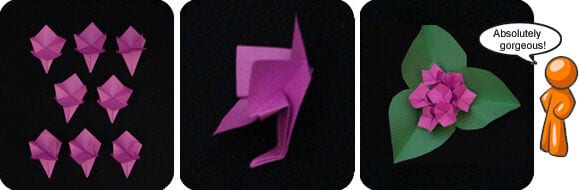
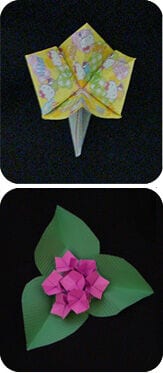
Once you have one you like, the variations practically fold themselves: pinking shears along the petal edges make a carnation, a marker dot in the middle suggests a pansy, and five or ten blooms taped to a paper leaf become a hydrangea cluster.

Instructions for Simple Origami Flower
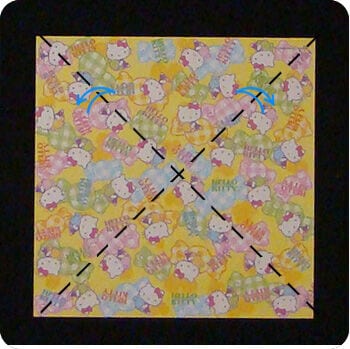
STEP 1. Start with a square sheet of paper with the color-side up. Fold the paper along the diagonals (in both directions). Unfold to give you an “X” shaped crease.

STEP 2. Turn the paper over. Fold it in half from left to right, then unfold.
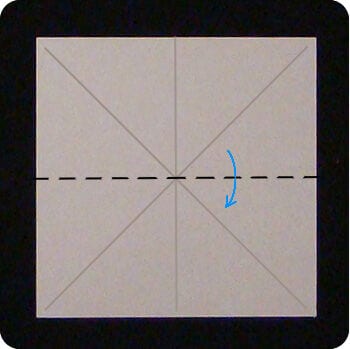
STEP 3. Fold the paper in half, top to bottom.
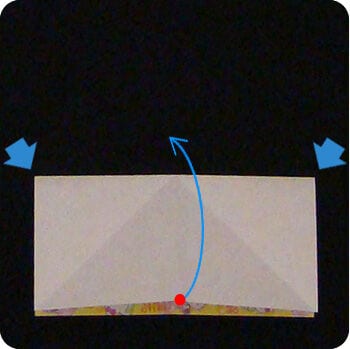
STEP 4. Gently push together the top-left and top-right corners of the paper.
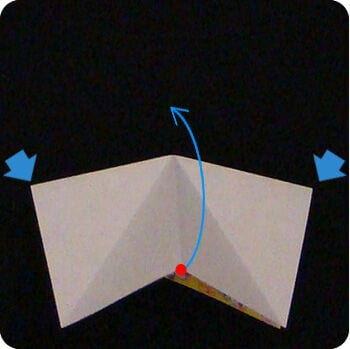
The top layer of paper will lift up as you push together the corners.

A little more…
STEP 5. Swivel the front-flap of paper towards the right. Behind the model is another flap which points back. Swivel this back-flap towards the left.
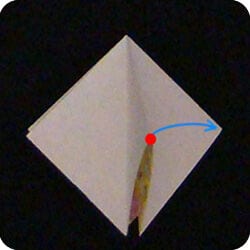
STEP 6. What you have now is a “Preliminary Base”. Rotate the model 180 degrees so the open-end of the paper points up.

STEP 7. Fold the bottom-left and bottom-right edges of the paper towards the vertical midline.
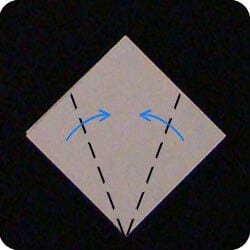
STEP 8. Turn the model over.

STEP 9. Repeat on this side: fold the bottom-left and bottom-right edges of the paper to the vertical midline.
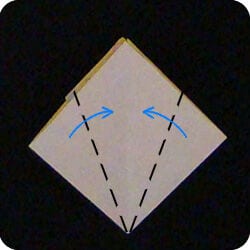
STEP 10. Grasp the tip of the paper at the top of the model and pull down as far as is comfortable.
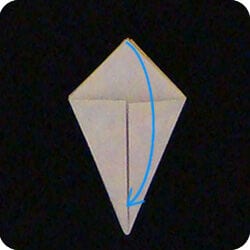
Peel open the flower so the inside is visible.
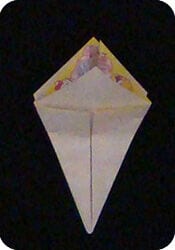
Be firm.
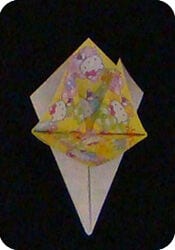
When the flower is fully open, press evenly along the edges of the paper so the creases set properly.
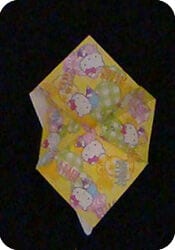
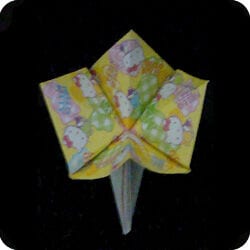
To make a carnation from this flower, trim the edges of the petals with pinking shears to get a colour change in the blossom. Or colour the centre with a marker for the distinctive dark heart of a pansy.

You can also use the simple origami flowers in a hydrangea cluster. To do this, fold five to ten flowers, bend each stem, and tape the bends onto green paper shaped like leaves.