
Origami Swan Cleaning Itself
There is a reason the paper swan is such a beloved fold—and this little variation gives it a personality. The swan cleaning itself is the same elegant bird you know, caught mid-groom, neck curving down as if tidying a feather. What makes the pose work is one special move you will learn along the way: the outside reverse fold, the technique that turns a flat sheet into a smooth, lifelike neck and head. It is a great project once you are comfortable with the basic swan, because it builds on familiar bases—kite base, valley folds, a half mountain fold—and then rewards you with something that feels alive. Grab a square of paper (black makes a striking black swan against a light background), and let's shape this graceful, self-preening little bird.
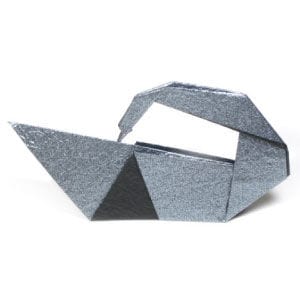
This page is for anyone who wants instructions to fold an origami swan cleaning itself.
This is a modified version of the traditional origami swan. One special folding technique you will learn from this model is the outside reverse fold.
If you are ready, then let's get started.
You may use any kind of paper to fold the origami swan. It is a little easier if the front and back of the paper are slightly different, whether in texture or color.
Make sure the paper that you use is a square (all sides are equal and all the angles equal 90 degrees). The paper I am using here is a 20 cm × 20 cm square. It is actually a quite large paper. You can use a smaller sheet once you become familiar with this model.
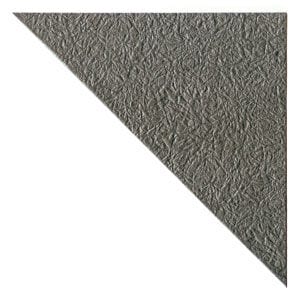
This is the front side of the paper. It would be nice to use a white sheet, but it is extremely difficult to see the paper against a white background. So I use black paper instead to make a black swan.
This is the back side of paper. Keep in mind that the front side is the shinier one.
STEP 1.
Let us start with a paper's back side facing up. Prepare to apply a diagonal valley-fold.
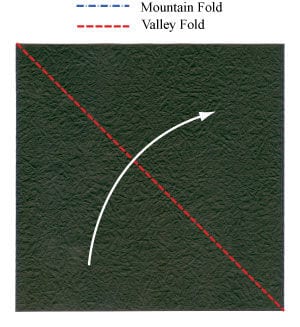
STEP 2.
Apply the diagonal valley fold from STEP 1. Prepare to unfold.
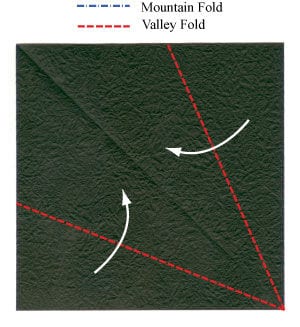
STEP 3.
Unfold the previous diagonal valley fold. Prepare to apply two valley-folds.
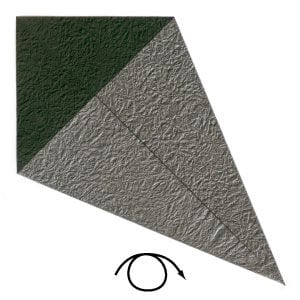
STEP 4.
Apply the two valley folds from STEP 3. This is called “kite base” since the shape resembles a kite. Prepare to turn the model over.
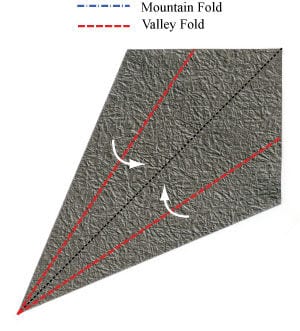
STEP 5.
Turn the model over. Prepare for two valley-folds. The black dotted line indicates the center diagonal, which serves as a reference for the two valley folds.
STEP 6.
Apply the two valley folds from STEP 5. Prepare for another valley-fold.
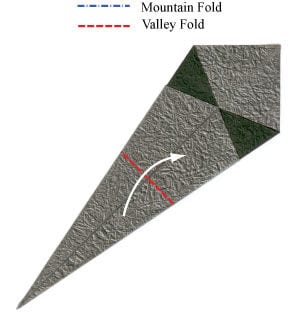
STEP 7.
Apply the valley fold from STEP 6. Prepare to rotate the origami swan model by 45 degrees in the clockwise direction.
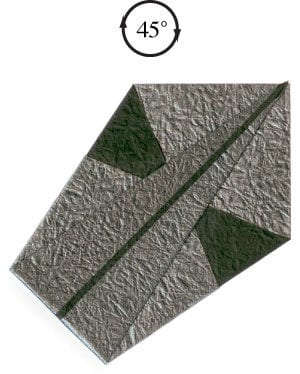
STEP 8.
Rotate the origami swan model by 45 degrees in the clockwise direction. Prepare to mountain-fold in half horizontally.
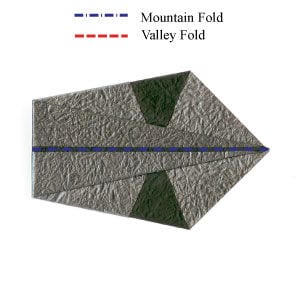
STEP 9.
Mountain-fold in half horizontally. Prepare to rotate the flap following the arrow direction.
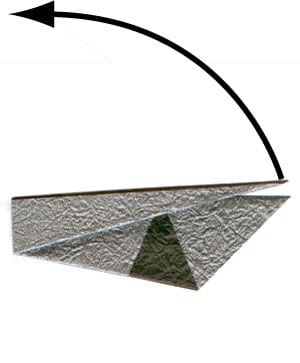
STEP 10.
Rotate the flap following the arrow direction from STEP 9. Prepare to apply a mountain-fold.
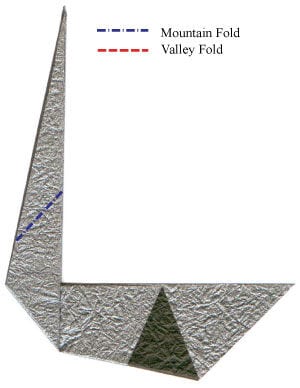
STEP 11.
Apply the mountain fold from STEP 10. Prepare to apply an “outside reverse fold”.
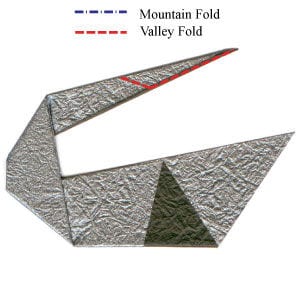
STEP 12.
Apply the “outside reverse fold” from STEP 11. Prepare to apply one valley-fold and one mountain-fold. The same valley and mountain folds need to be applied on the other side.
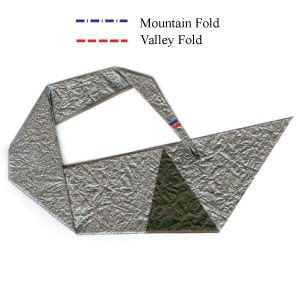
STEP 13.
Apply the valley and mountain folds from STEP 12. Prepare to turn the origami swan model over.
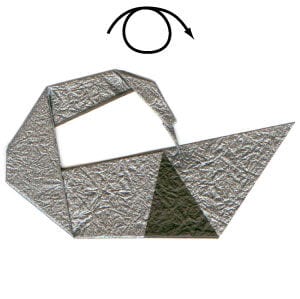
STEP 14.
Turn the origami swan over. Let it stand on the ground by itself. Congratulations! You have completed a traditional origami swan cleaning itself.




