
Origami Christmas Wreath
There’s something wonderfully satisfying about a handmade ornament at Christmas, and this little origami wreath delivers exactly that — a tidy ring of folded paper with a gold center that catches the light.
You don’t need any special supplies: just a square of paper (red and green feel most festive) and a dab of glue for the finishing touch. The fold takes a bit of patience because you’ll repeat a sequence of moves, but each step is a basic fold you’ve likely done before. Pour a cup of cocoa, clear a flat surface, and let’s fold a wreath to brighten the season.
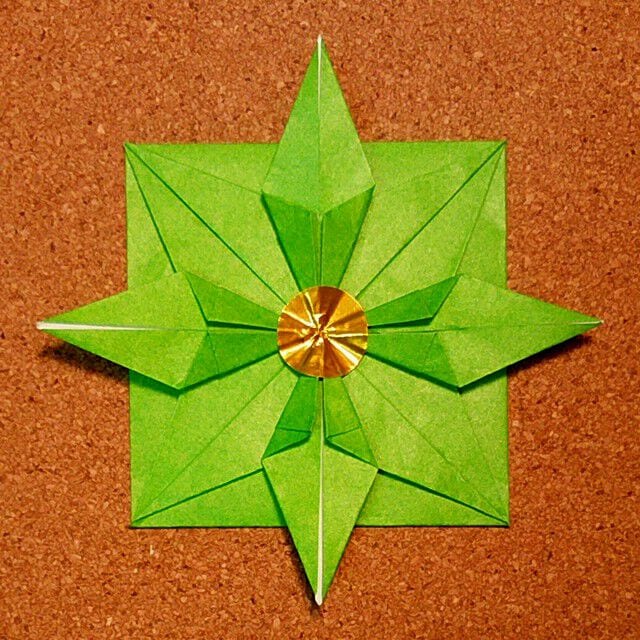 This time I’ll show you how to fold an origami Christmas wreath.
I once made wreaths from the morning glory vines my son grew over the summer — lovely, but you obviously can’t make those without the actual vines (laughs). So this time the material is origami instead.
Even if there’s no specialty paper shop nearby, do give it a try: you can pick up origami paper immediately at any 100-yen store.
The wreath itself is easy to fold, though it takes a little patience because you’ll be making several identical pieces. Let’s do our best (laughs)!
I’ll walk you through the folds step by step — I also referred to a video while working it out.
How to Fold a Christmas Wreath
Prepare origami in whatever color you like. Red and green, of course, feel most Christmassy.
STEP 1.
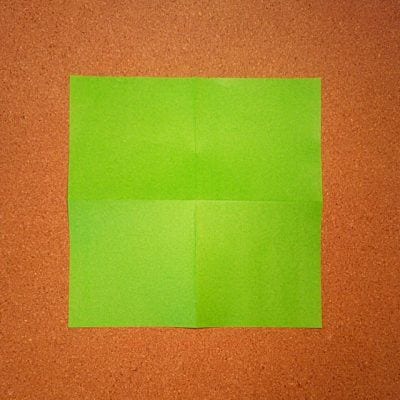
Turn the paper over, make vertical and horizontal creases, and open it face up.
 STEP 2.
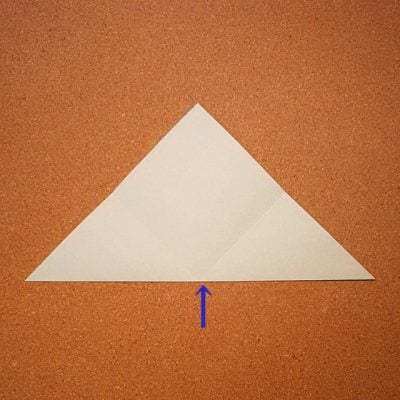
Fold a crease from bottom to top so it forms a triangle.
 STEP 3.
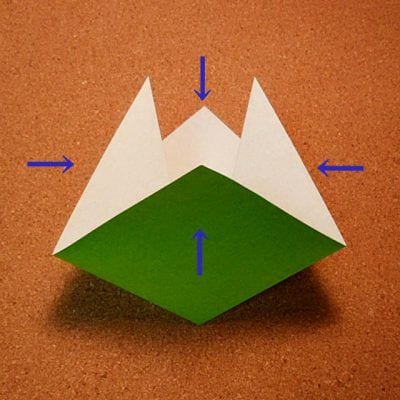
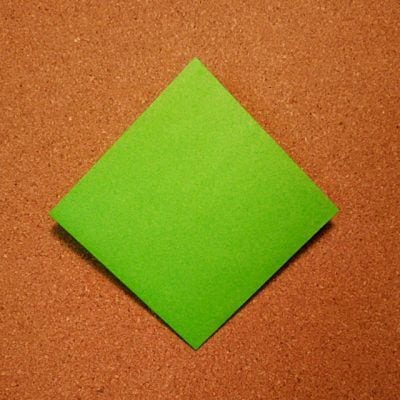
Open it and fold the left/right and top/bottom corners to meet at the center.
 STEP 4.
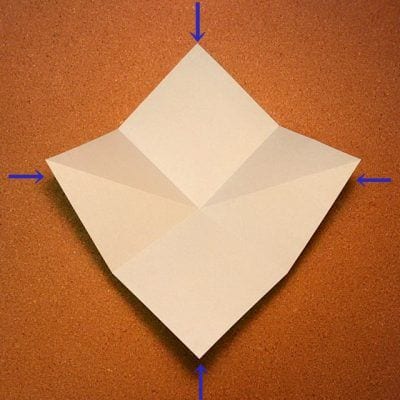
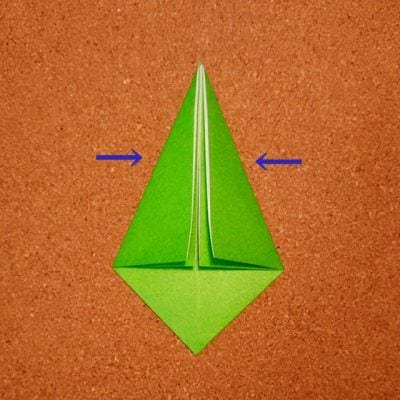
Bring the left and right corners to the center and fold. (Fold the top and bottom at the same time.)
 STEP 5.
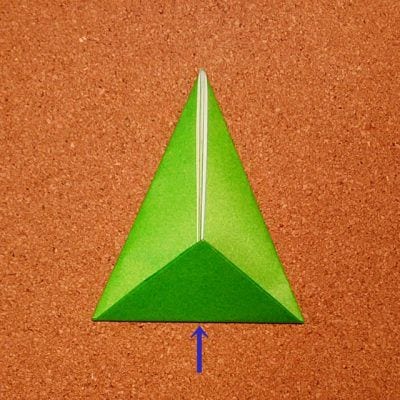
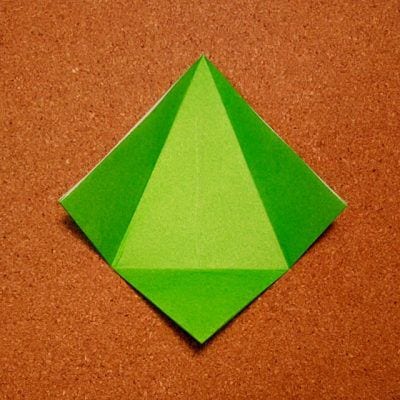
Fold the bottom corner upward.
 STEP 6.
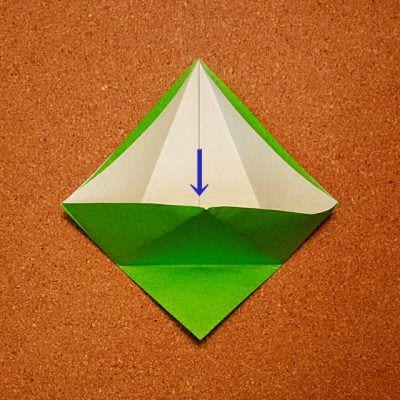
Open the folded piece and open it from top to bottom, starting from the crease at the lower corner.
 STEP 7.
Once opened to the bottom, bring the left and right sides together.
 STEP 8.
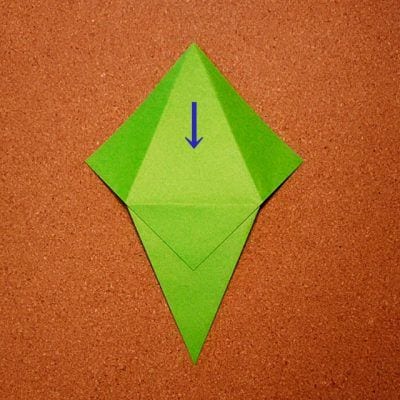
Turn it over from right to left and open it from top to bottom the same way.
 STEP 9.
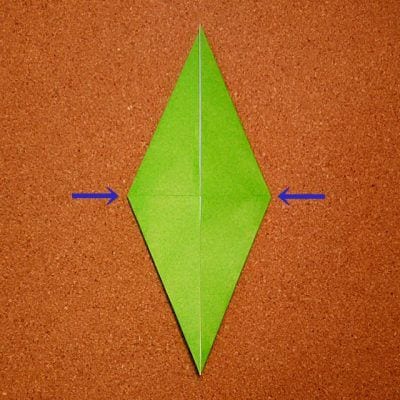
Fold it so the left and right sides align.
 STEP 10.
Open the lower section into two forks and shape it as shown in the figure.
 STEP 11.
Continue pulling left and right until the center opens further.
 STEP 12.
As shown, mountain-fold the crease along the line, tilt the upper corner downward, and fold the left and right sides to meet at the center.
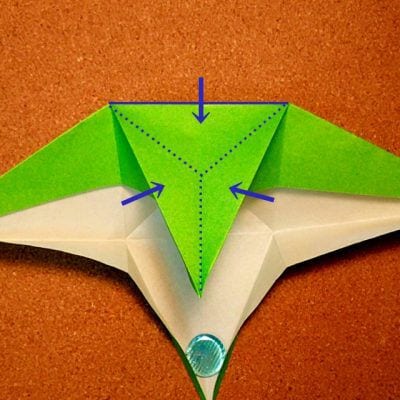 STEP 13.
As you align the left and right, fold so the line section in the figure stays straight.
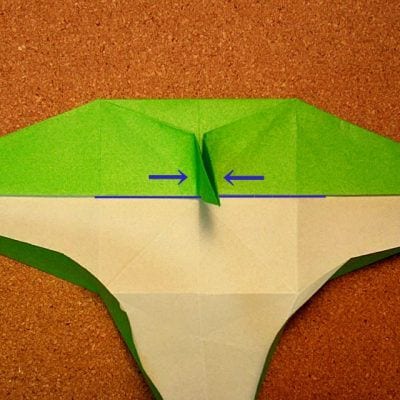 STEP 14.
Likewise, bring the left and right sides of the bottom corner to the center and fold along the horizontal center line.
 STEP 15.
Open the lower center section like a sack and tilt it downward so it stands perpendicular to the horizontal center line.

 STEP 16.
Fold the left and right corners of that folded section along the center line.
 STEP 17.
In the same way, open the upper center section like a sack, fold it upward, and fold its left and right corners along the center line.
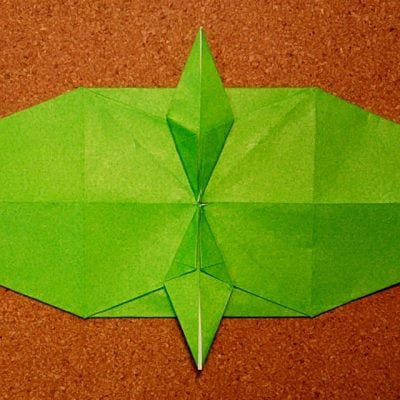 STEP 18.
Rotate the model 90 degrees to the right.
 STEP 19.
Tilt the upper corner downward at the line and fold the left and right sides to the center as before.
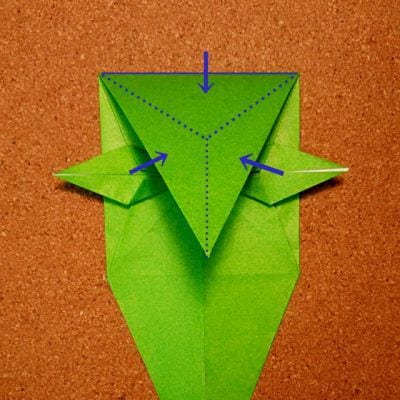 STEP 20.
As you align the left and right, fold so the line section in the figure meets the center point.
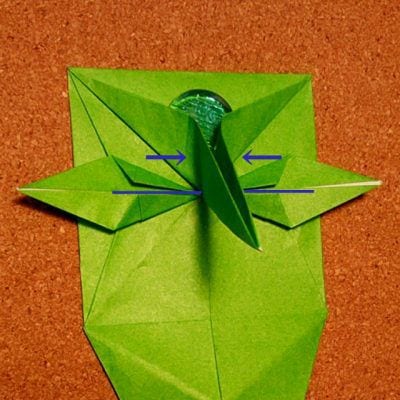 STEP 21.
Likewise, bring the left and right sides of the bottom corner to the center and fold along the horizontal center line.
 STEP 22.
Open the upper and lower center sections into sack shapes as before, and fold them up and down.
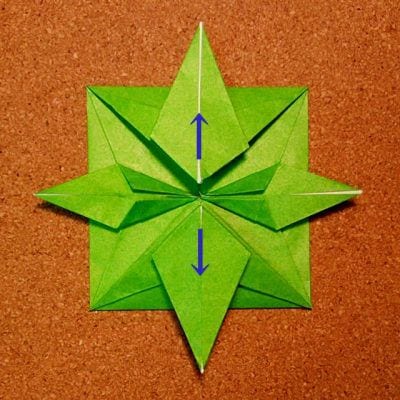 STEP 23.
Align the left and right corners of the vertically tilted section along the center line.
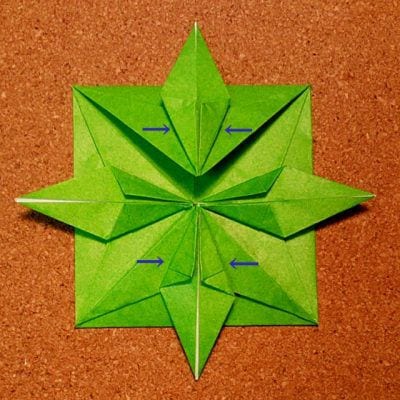 STEP 24.
Glue the upper and lower open sections to hold them shut so they don’t spring open.
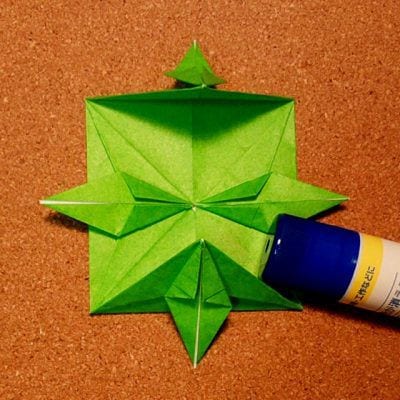
 STEP 25.
Prepare a piece of gold origami paper cut into a round shape, as shown in the figure.
 STEP 26.
Glue the gold round paper in the center, and your Christmas wreath is complete!
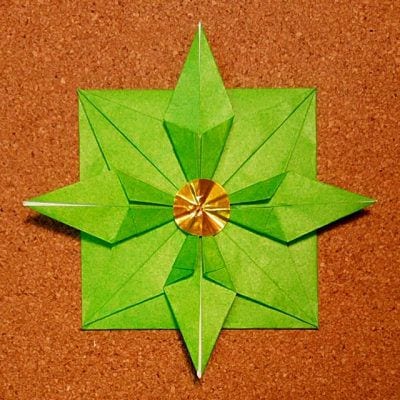 Well done! How did it turn out?
It’s not as hard to fold as it looks. You can cut the center round from origami paper, or just buy a sticker at the 100-yen shop.
Swap in different materials and try out your own ideas.




