
Simple Origami Santa Claus
A Santa that starts as a flat grid of creases and ends as a standing figure is a lovely thing to watch happen. This simple version grows out of a 4x4 matrix base, so the first few steps are pure prep - mountain and valley folds that mark the paper into sixteen little squares - and then the real work begins.
From there it is inside reverse fold after inside reverse fold: tucking, flipping, and coaxing the same fold through both layers until a hat, a face, a beard, and a body quietly appear. A 15 cm square is plenty. Fold one in December and you will probably fold five more for the people around you.

This page walks you through folding a simple origami Santa Claus.
This simple Santa starts from a 4x4 matrix base and is a great workout for the inside reverse fold, a move you will apply again and again.
Before you begin, you should know what valley folds and mountain folds are. If you’re comfortable with those two basics, you will have no trouble making this Santa.
If you’re ready, let’s get started.
The paper I’m using is a standard origami sheet, 15 cm x 15 cm.
This is the front side of the paper.

This is the back side of the paper.

Step 1.
Let’s start with the front side of the paper facing up. Prepare to fold the paper in half with a horizontal mountain fold, then unfold.
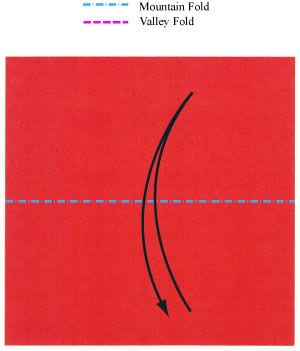
Step 2.
Apply the horizontal mountain fold from Step 1, folding the paper in half, then unfold. Prepare to fold the paper in half with a vertical mountain fold, then unfold.
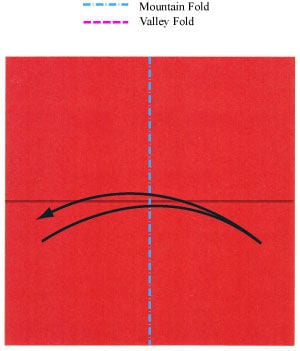
Step 3.
Apply the vertical mountain fold from Step 2, folding the paper in half, then unfold. Prepare to apply a horizontal gate fold and then unfold.
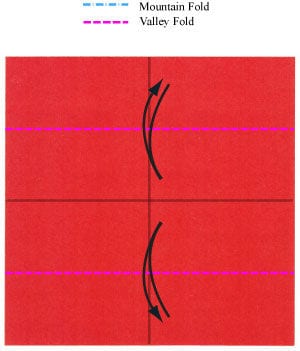
Step 4.
Apply the horizontal gate fold from Step 3 and then unfold. Prepare to apply a vertical gate fold and then unfold.
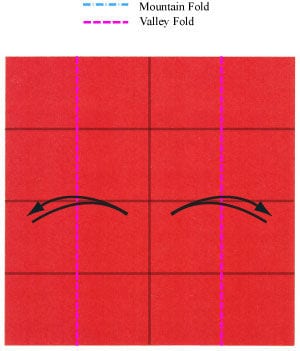
Step 5.
Apply the vertical gate fold from Step 4 and then unfold. You have now completed the 4x4 matrix base. Prepare to apply two horizontal mountain folds and then unfold.
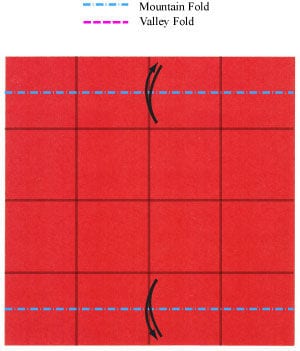
Step 6.
Apply two horizontal mountain folds from Step 5 and then unfold. Prepare to apply two horizontal mountain folds and then unfold.
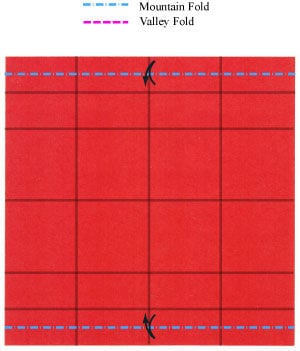
Step 7.
Apply two horizontal mountain folds from Step 6 and then unfold. Prepare to apply two horizontal valley folds.
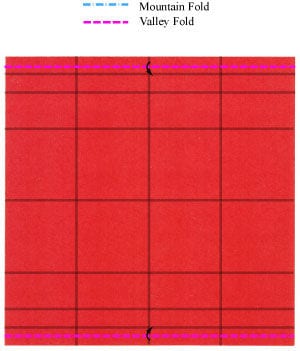
Step 8.
Apply two horizontal valley folds from Step 7. Prepare to turn the paper over.

Step 9.
Turn the paper over. Prepare to apply two horizontal valley folds.
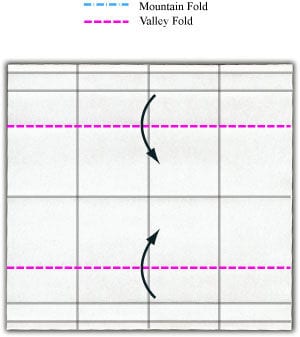
Step 10.
Apply two horizontal valley fold from Step 9. Prepare to apply two valley folds and then unfold.
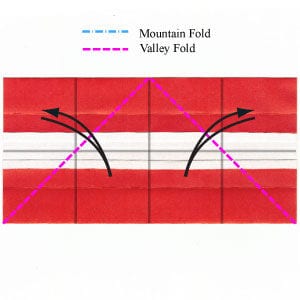
Step 11.
Apply two valley folds from Step 10 and then unfold. Prepare to apply two inside reverse folds.
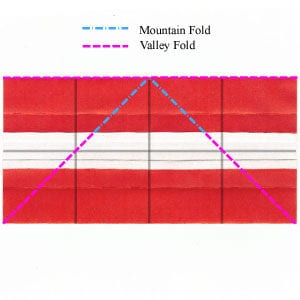
Step 12.
Apply two inside reverse folds from Step 11. Prepare to apply two valley folds and then unfold.
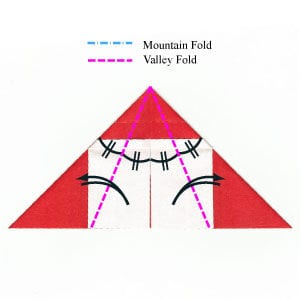
Step 13.
Apply two valley folds from Step 12 and then unfold. Prepare to apply two inside reverse folds.
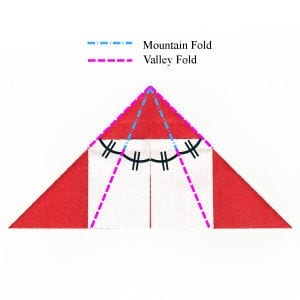
Step 14.
Apply two inside reverse folds from Step 13. Prepare to turn the Santa model over.

Step 15.
Turn the Santa model over. Prepare to apply two valley folds.
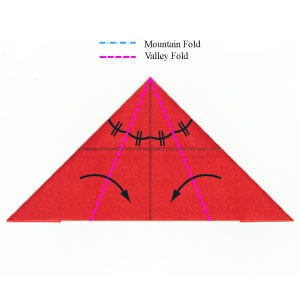
Step 16.
Apply two valley folds from Step 15. Prepare to turn the Santa model over.

Step 17.
Turn the Santa model over. Prepare to apply two valley folds and then unfold.
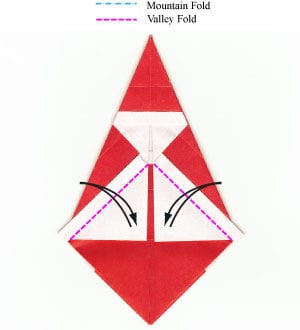
Step 18.
Apply two valley folds from Step 17 and then unfold. Prepare to apply two inside reverse folds.
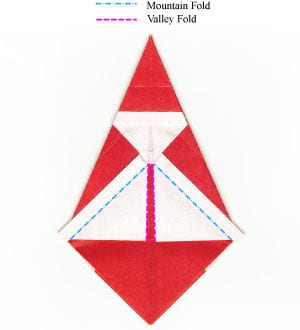
Step 19.
Apply two inside reverse folds. Prepare to apply two horizontal valley folds.

Step 20.
Apply two horizontal valley folds from Step 19. Prepare to apply two inside reverse folds.
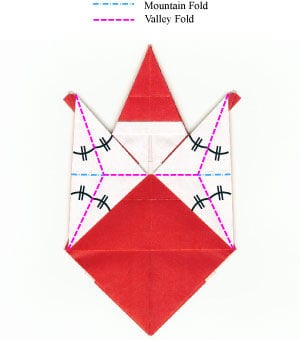
Step 21.
Start applying two inside reverse folds from Step 20.

Step 22.
Continue applying two inside reverse folds from Step 20.

Step 23.
Complete applying two inside reverse folds from Step 20. Prepare to apply two valley folds and then unfold.

Step 24.
Apply two valley folds from Step 23 and then unfold. Prepare to apply two inside reverse folds.

Step 25.
Apply two inside reverse folds from Step 24. Prepare to stand the Santa up on the ground.

Step 26.
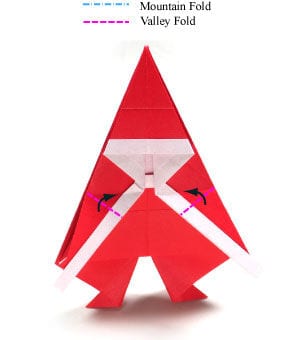
Stand the Santa up on the ground. Prepare to apply two valley folds.
Step 27.
Apply the two valley folds from Step 26. Congratulations - you have just folded a simple origami Santa Claus.





