
Tree
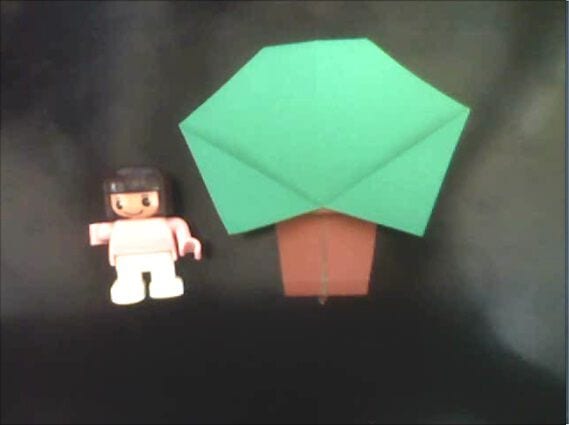
There's something quietly lovely about a paper tree that actually stands up on its own. No pot required, no glue — just a square of paper and a handful of creases that somehow coax a flat sheet into a little leafy shape with real depth.
This one's a joy to multiply. Make five and you've got a forest; dot the canopy with red and it's suddenly an apple tree; scatter a few different sizes across a shelf and you've built a whole tiny landscape. Grab a sheet that's green on one side and brown on the other, and let's grow one.
How to Fold
STEP 1. Make a crease.

STEP 2. Fold it so the yellow line lines up with the crease (red line) you just made.
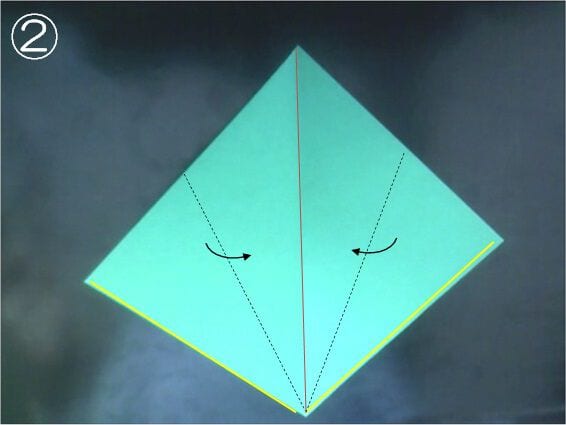
STEP 3. Fold it so the yellow line lines up with the red line.
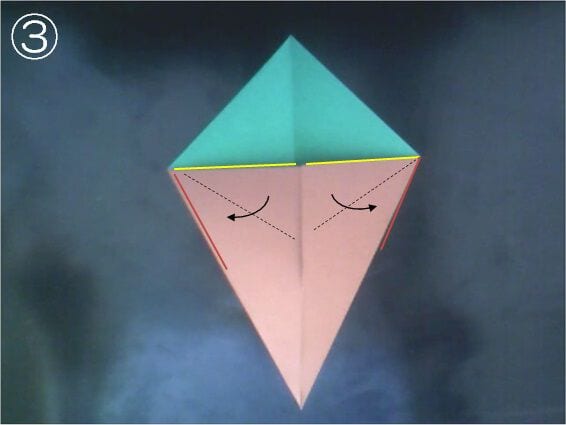
STEP 4. Turn it over.
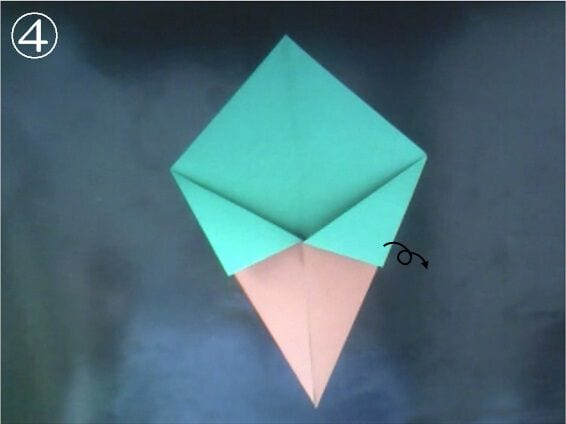
STEP 5. Valley-fold along the yellow line and mountain-fold along the red line.

STEP 6. Crease along the dotted line.

STEP 7. Fold it so it opens out along the crease you just made. Do the same on the other side.
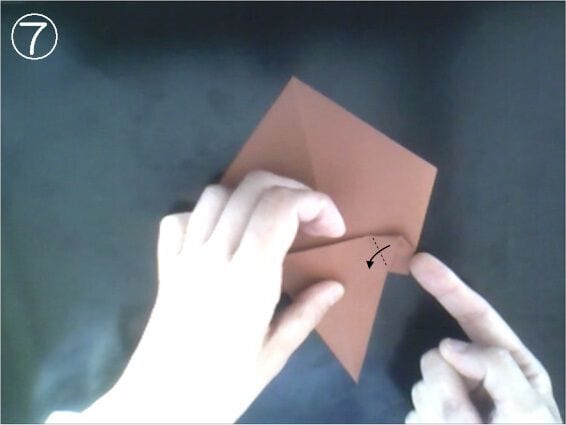
STEP 8. Fold the upper and lower parts.
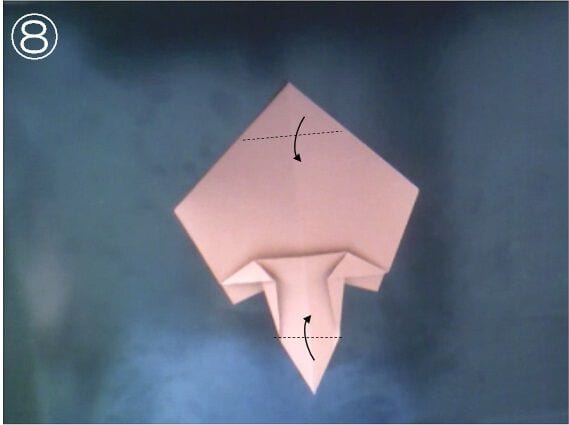
STEP 9. Turn it over.
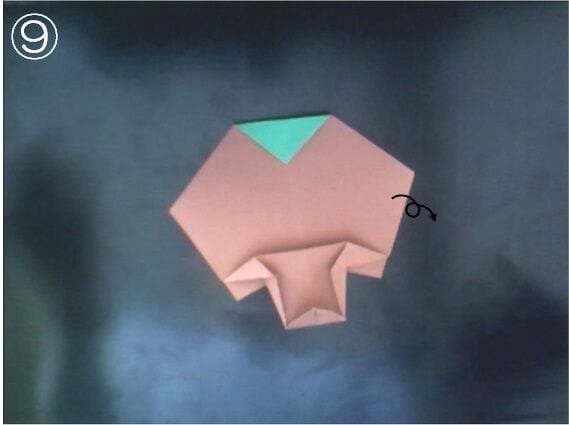
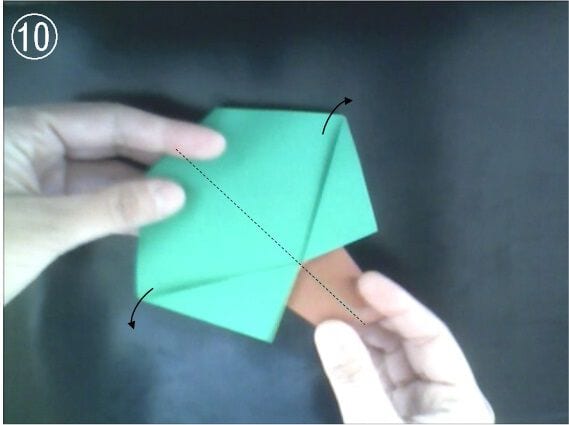
STEP 10. Fold it at the center to give it a three-dimensional shape.
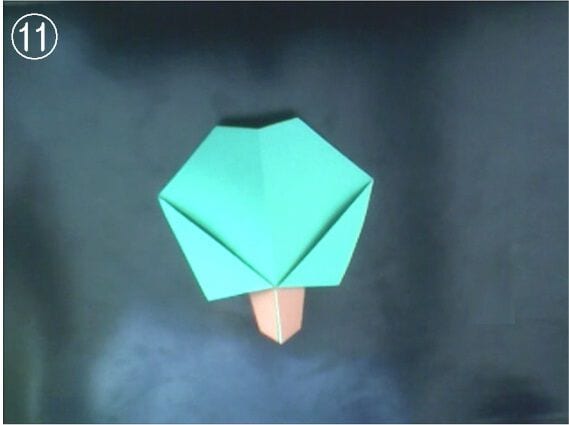
STEP 11. Your tree is complete!
Tips for Folding
If you don’t have green-and-brown double-sided origami, just glue two single-color sheets back to back.
I even lined mine up next to a little figure skater!
Make a bunch to build a forest, or add red fruits to turn yours into an apple tree. Origami is a great way to grow your own imaginary world.




