
Lily Origami Base With Six Petals
Real lilies have six petals, so if you want your paper lily to look just like the real thing, you need a base with six points instead of the usual four. That is exactly what the Lily Origami Base with Six Petals is for. The whole model starts with a regular hexagon, which you can fold from an ordinary square using the site's hexagon guide, and the base itself is built almost entirely from creases. You lay down a careful sequence of valley-folds and mountain-folds, rotate the paper, repeat the sequence, and let the crease pattern grow. Then comes the best part: the paper is turned over, the central creases are emphasized, and the six corner points are pushed together in your hand until the whole sheet gathers into a flower-like shape. Seventeen steps, a little patience, and you will have a six-pointed foundation ready for a lily that finally has the right number of petals.
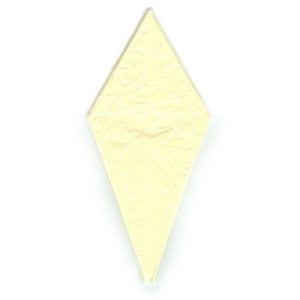
This page is for those who want the instruction to fold a Lily Origami Base with Six Petals. As the name says, this base is needed when you fold an origami lily with six petals. A real lily has six petals, so if you want to have a six-petalled lily, you need to start with a regular hexagon paper.
If you are ready, then let’s get started.
You may use any kind of paper to fold this base. It is a little easier if the front and the back side of the paper are slightly different, whether in texture or in color.
Make sure the paper that you use is a square (all sides are equal and all the angles equal 90 degrees). The paper I am using here is a 20cm x 20cm square. But the size doesn’t matter here.
This is the front side of the paper. It is somewhat shinier compared to the back side.
This is the back side of the paper. Keep in mind that the front side is the shinier one.

There is an instruction to teach how to make a regular hexagon out of a square paper. You can easily get a regular hexagon from the instruction. This is the front side of the regular hexagon.
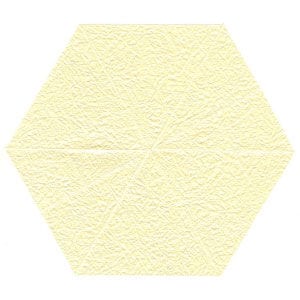
This is the back side of the regular hexagon.
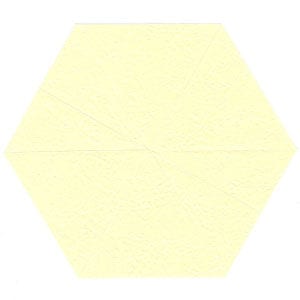
Step 1
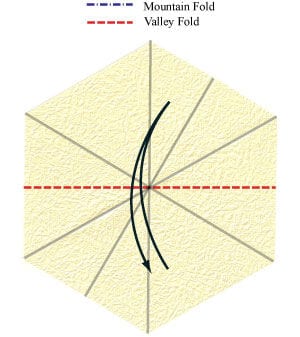
Start with the front side of the hexagon facing up. There are already four crease lines on the paper. Prepare to apply a horizontal valley-fold and then unfold.
Step 2
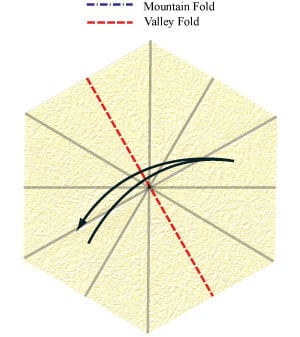
Apply the horizontal valley-fold of step 1 and then unfold. Prepare to apply another valley-fold and then unfold.
Step 3
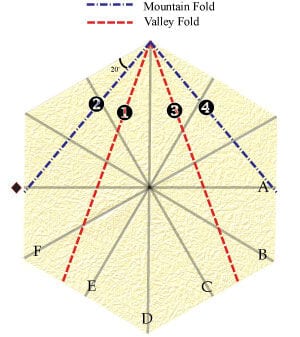
Apply the valley-fold of step 2 and then unfold. There are six crease lines on the paper. Prepare to apply a (1) valley-fold, (2) mountain-fold, (3) valley-fold, (4) mountain-fold in order. When you are applying the first valley-fold, make sure that the diamond point (located at the end of line A) merges on any point on line D.
Step 4
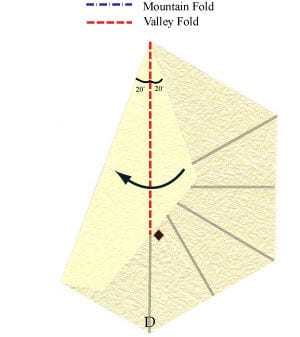
Apply the first valley-fold. Don’t forget to make the diamond point merge on the line D. Prepare to apply a valley-fold.
Step 5
Apply the valley-fold of step 4. Prepare to apply a valley-fold. Make sure that the diamond point merges on the line D after applying this valley-fold.
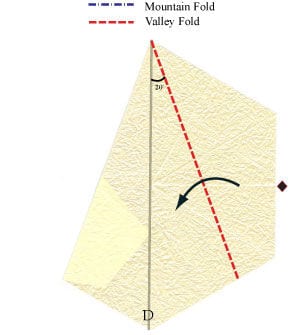
Step 6
Apply the valley-fold of step 5. Examine if the diamond point merges on the line D. Prepare to apply a valley-fold.
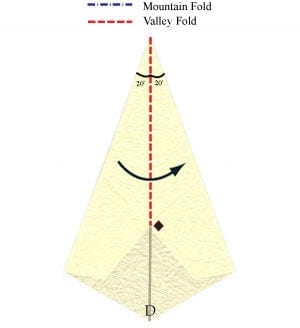
Step 7
Apply the valley-fold of step 6. Prepare to open the paper.
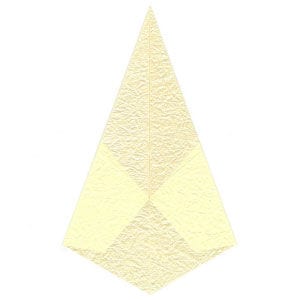
Step 8
Open the paper. There are ten crease lines now. Prepare to rotate the paper by 60 degrees.
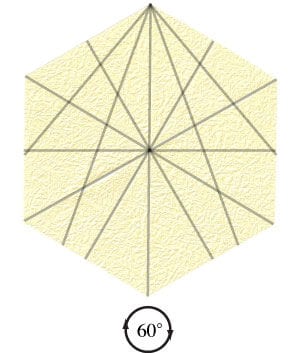
Step 9
Rotate the paper by 60 degrees. Prepare to repeat steps 3-8.
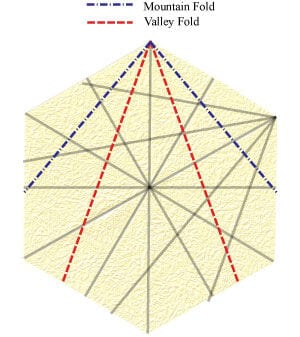
Step 10
Repeat steps 3-8. Prepare to rotate the paper by 60 degrees.
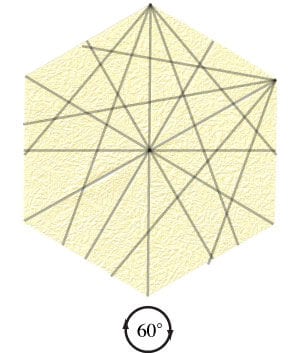
Step 11
Repeat steps 3-8. Prepare to repeat steps 9-11 four more times.
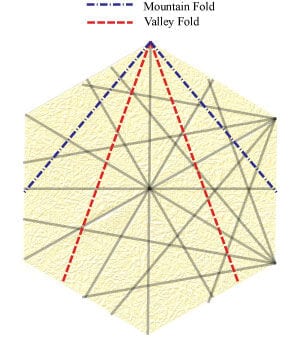
Step 12
Repeat steps 9-11 four more times. Prepare to turn the paper over.
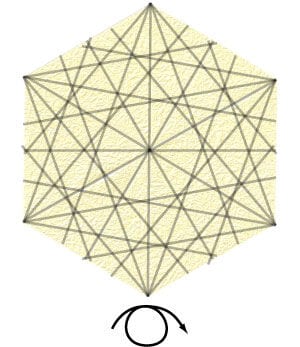
Step 13
Turn the paper over. Prepare to apply the crease pattern (CP) on the existing crease lines.
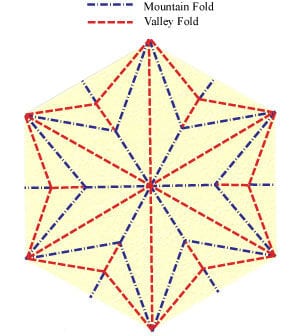
Step 14
Apply the CP of step 13. Prepare to emphasize the central part of the CP.
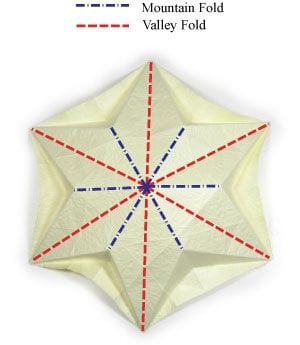
Step 15
Emphasize the central part of the CP. Prepare to merge the six corner points to the center by pushing them in the arrow directions.
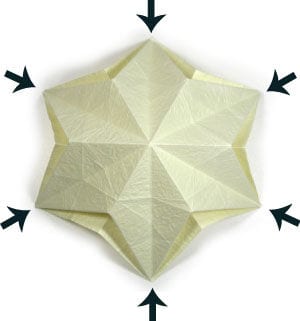
Step 16
Merge the six corner points to the center and hold them with your fingers. Prepare to rotate it by 90 degrees.
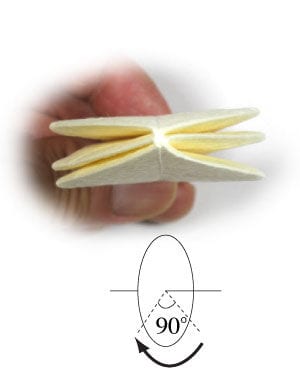
Step 17
Rotate it by 90 degrees. You have completed making a Lily Origami Base with Six Petals.




