
Ice Cream Cone
There's something irresistibly cheerful about a tiny ice cream cone you can make with your own two hands — no freezer required. This little origami version is the kind of model that makes people smile the moment they see it, and the best part is how achievable it is.
Whether you're decorating a handmade card, dressing up a gift, or just killing a few quiet minutes with a spare square of paper, this cone is a perfect pick. Grab a sheet of two-colour paper and let's fold something sweet.

These instructions will show you how to fold a simple origami ice cream cone. For this model it’s best to use two-colour paper. If you’re new to origami, we recommend getting comfortable with the basic folds and techniques first.

STEP 1. Fold the paper in half and then unfold it.
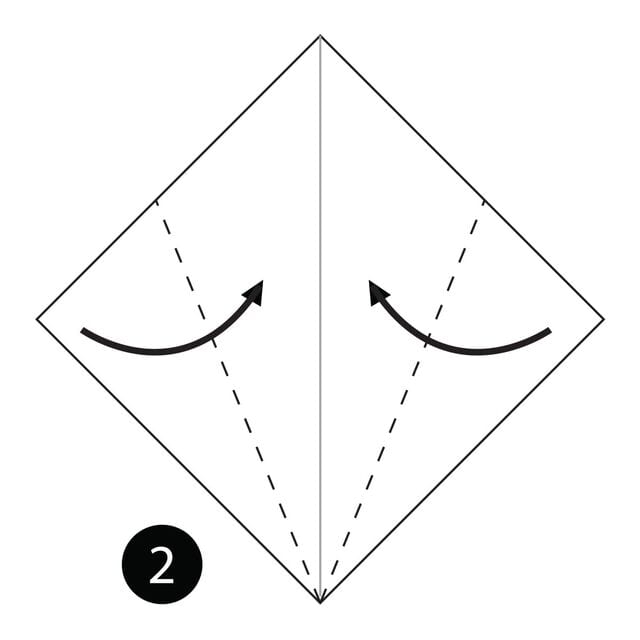
STEP 2. Fold both sides to the centre along the dotted lines.
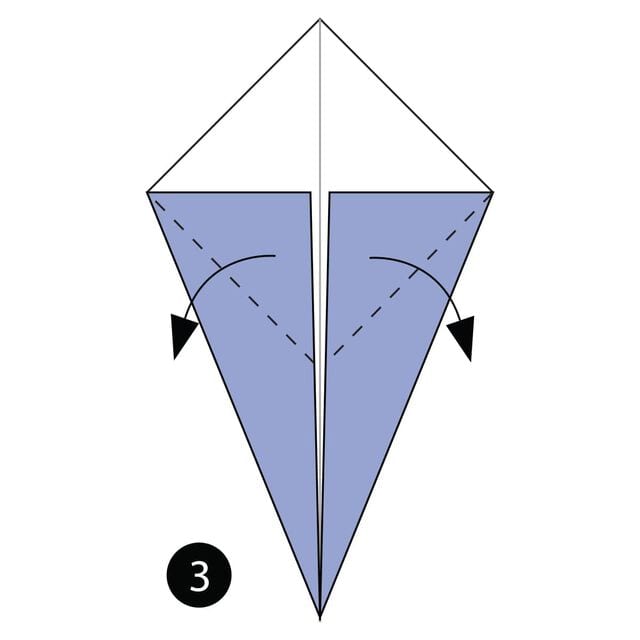
STEP 3. Fold the top layers of paper out along the dotted lines.
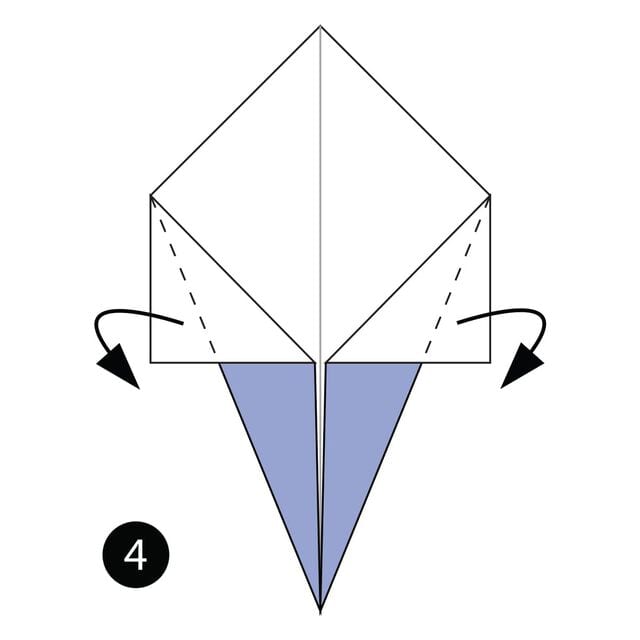
STEP 4. Fold the top layers of paper behind the model along the dotted lines.
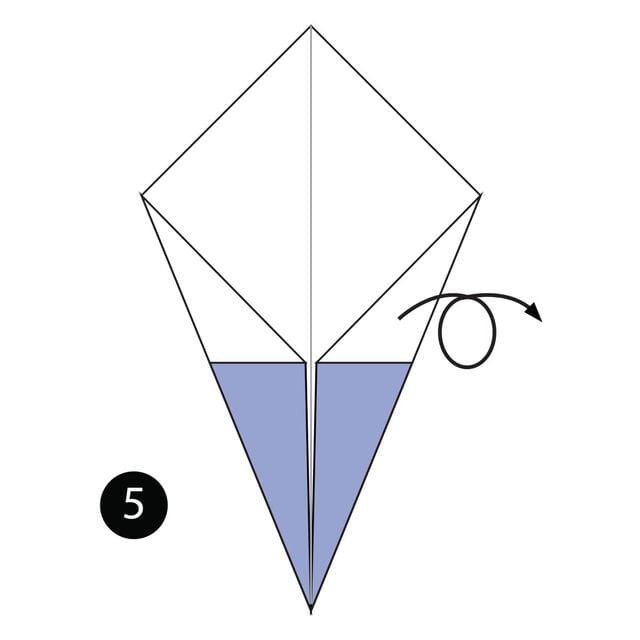
STEP 5. Turn the paper over.

STEP 6. Fold the paper in along the dotted lines.
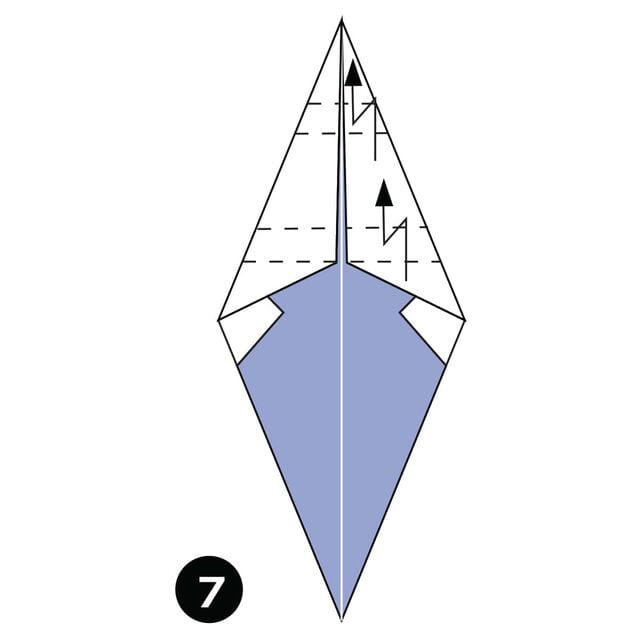
STEP 7. Make two pleat folds along the dotted lines.
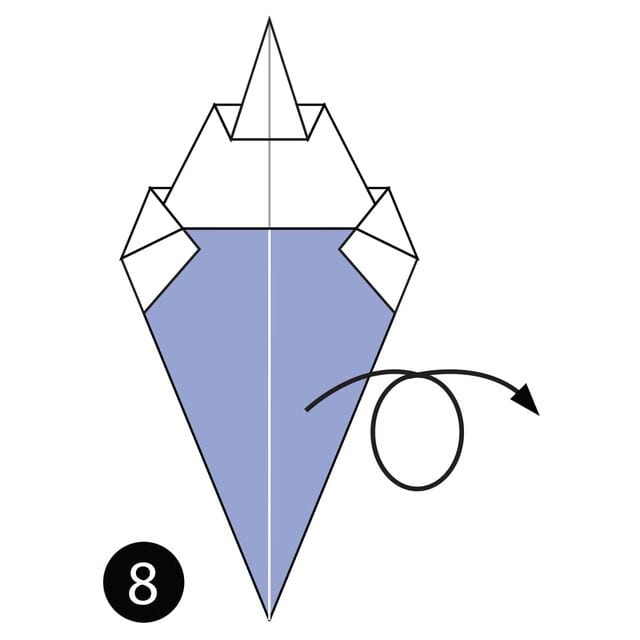
STEP 8. Turn the paper over.
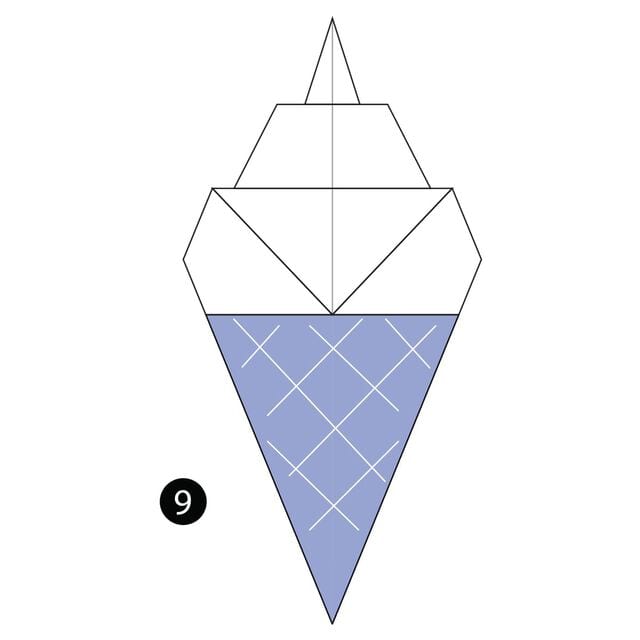
The complete ice cream cone.




