
Origami Box: How to Fold a Simple Paper Box in 9 Steps
There is a particular kind of satisfaction in a box that appeared out of a flat sheet and nothing else. No glue, no tape, no cutting, just creases holding the corners together. This is the classic version, and it is the one worth learning first, because once you understand how the sides pull themselves up, most other origami boxes stop looking mysterious.
It is also the model that buys you the most peace for the least effort. Hand a child a few sheets of paper and they will fold boxes for a surprisingly long time, then use them for pencils, erasers, shells, spare buttons and anything else small enough to disappear. Keep a stack of finished ones on a desk: they are perfect for tidying the little things that otherwise roll around in a drawer.
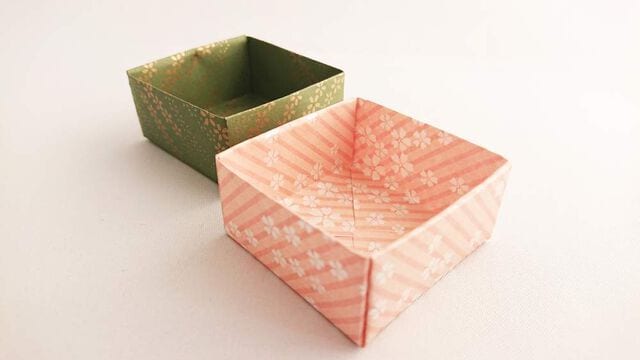
A simple sheet of paper can be turned into a handy origami box.
Origami boxes are loved by everyone, from children to adults. They are a favorite project in nurseries and kindergartens, and a great activity that keeps kids happily busy for hours. Once they remember how the folds go, they can make one whenever and wherever they like.

STEP 1. Fold and crease in the direction of the arrow.

STEP 2. Fold the paper along the dotted line, following the arrow.

STEP 3. Fold and crease in the direction of the arrow.

STEP 4. Open the paper out in the direction of the arrow.
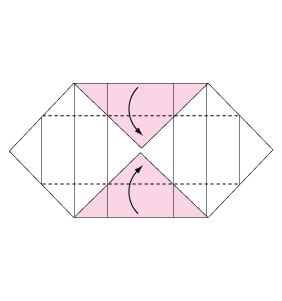
STEP 5. Fold the paper along the dotted line, following the arrow.
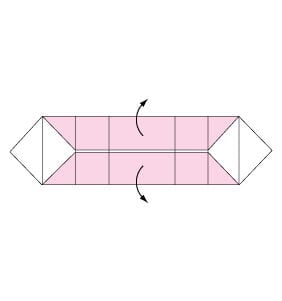
STEP 6. Open the paper out as shown to form a box.
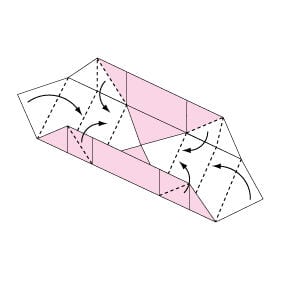
STEP 7. Assemble along the dotted line.
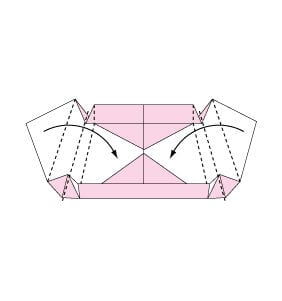
STEP 8. Assemble along the dotted line.
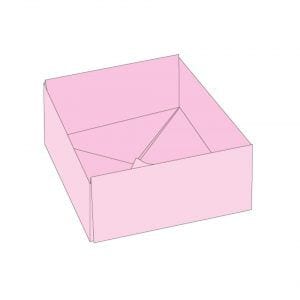
STEP 9. The box is complete.




