
Penguins (Complete Tutorial)
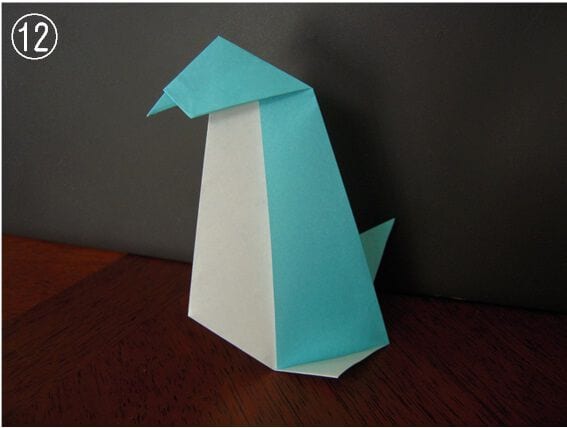
Penguins are endlessly fun to fold—round, roly-poly, and impossible not to smile at. This complete tutorial walks you through all twelve steps to build one from a single square, shaping the tail, head, and little beak that make it instantly recognizable.
Once your first penguin is done, you won't want to stop at one. The guide even shares ideas for staging a parent-and-chick pair on a bed of tissue-paper ice. Let's fold a whole waddle of them.
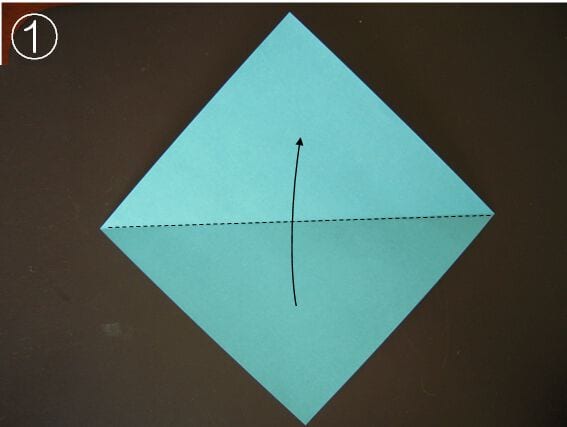
Way of folding
STEP 1. Fold the paper in half.
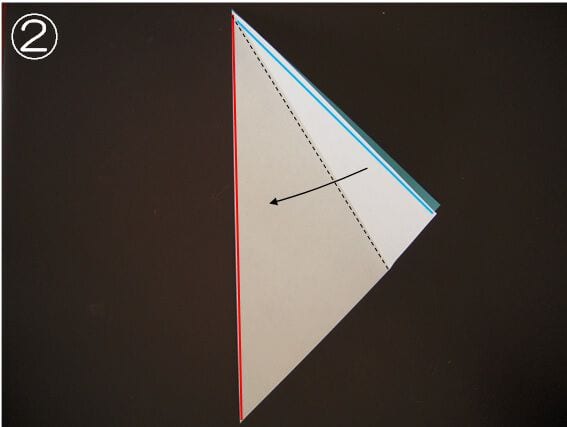
STEP 2. Fold it so the blue line matches the red line.
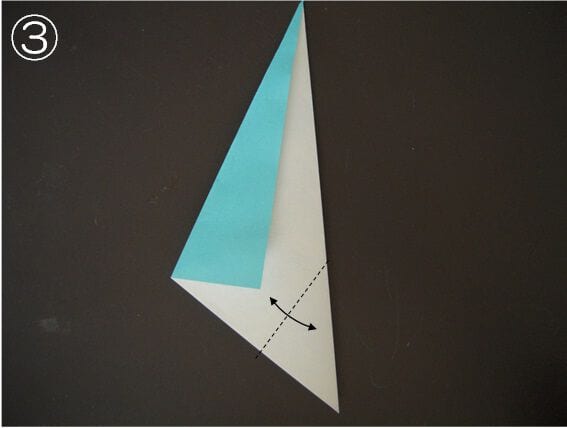
STEP 3. Make a crease along the dotted line.
STEP 4. Fold the paper inward from the crease you just made.
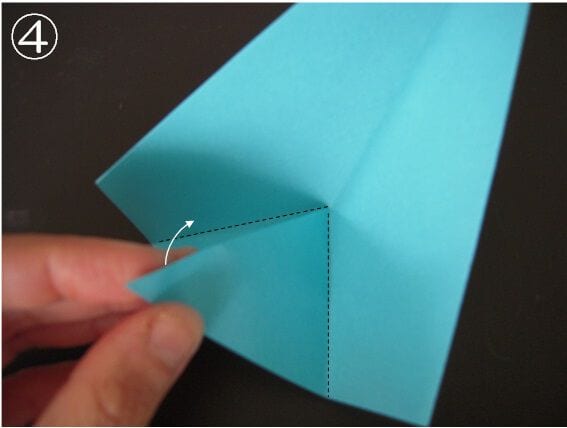
STEP 5. It should look like this. Shape the head and the tail, then make a crease along the dotted line.
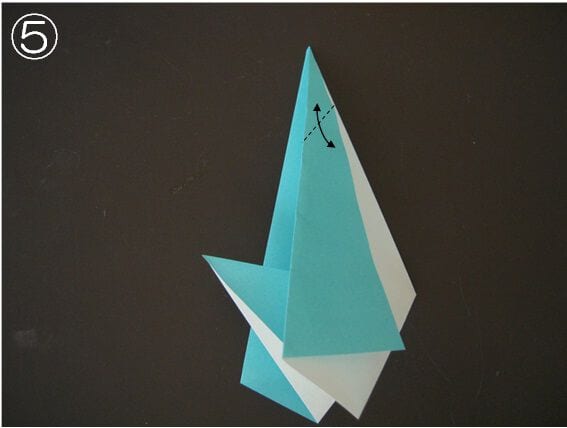
STEP 6. Fold down from the crease.
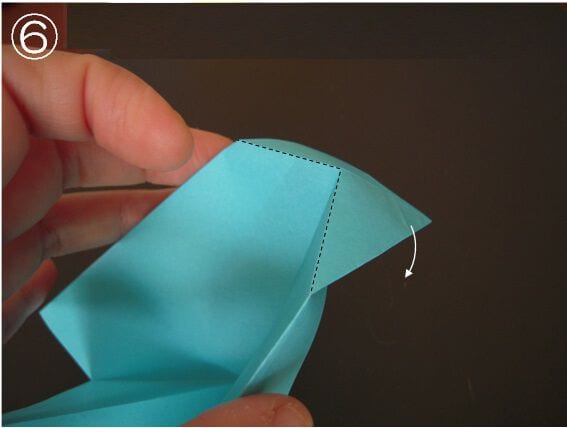
STEP 7. Now you have the head. Fold it inward from the dotted line.
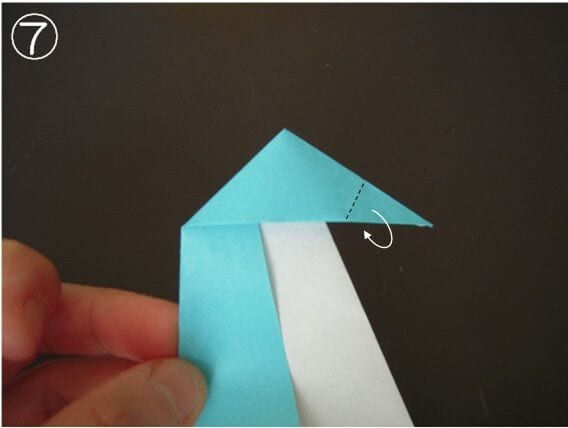
STEP 8. Open the head outward along the dotted line to the angle shown.
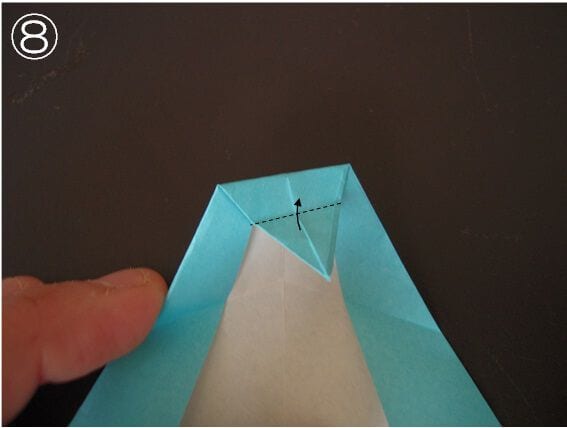
STEP 9. When it opens like this, fold it back into place.
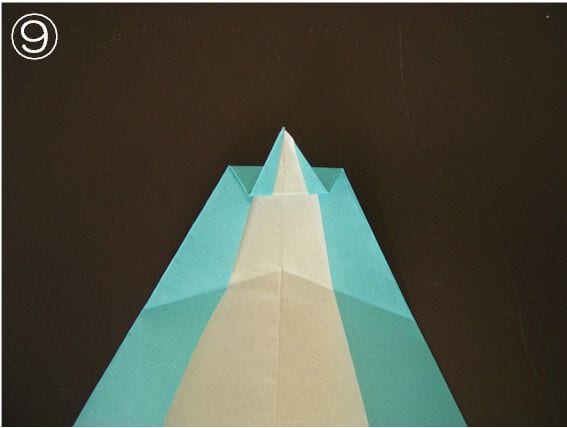
STEP 10. Now you have the beak.
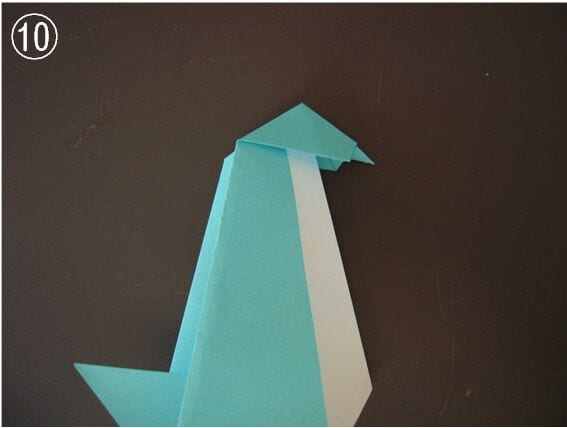
STEP 11. Fold it along the dotted line.
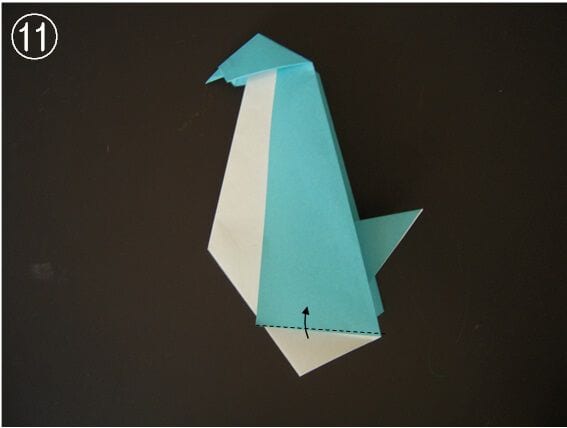
STEP 12. Your penguin is complete!
Try to decorate
Make a few small penguins so you have parent and child penguins together. You can roll up tissue paper to stand in for ice, or stack small boxes to build an iceberg.
Try making your own little penguin world.
Points when folding
A few steps may be a little tricky for young children—such as the tail (folded in the middle) and the head (folded into the cover). You’ll get clean results by first making a crease and then folding along it.




