
Flower
Ask anyone to picture an origami flower and they'll almost certainly imagine a rose — and for good reason. This classic design builds a surprisingly lifelike bloom from a single square of paper: no scissors, just folds, a dab of glue, and a little patience for the twist at the end.
It looks impressive, but don't let the twenty steps intimidate you. The magic happens around Step 12, where the flat paper suddenly becomes a pinwheel-like shape you twist into petals. Once you've made one, you'll want a whole bouquet — and with stems and leaves added, they make a gift that genuinely wows.

Folding Method
STEP 1. Place the paper colored-side down, then crease it both vertically and horizontally.

STEP 2. Crease it both vertically and horizontally so the paper collapses into a triangle when flipped.
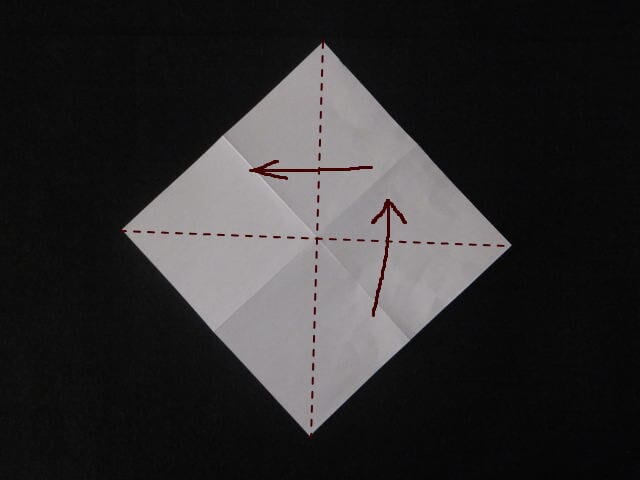
STEP 3. Bring the side creases inward toward the center to collapse the paper into a triangle.

STEP 4. Fold the bottom edge up about one-third of the way.

STEP 5. Open up the top layer.

STEP 6. As you open it, hold near the dotted lines and squash the center flat into a triangle.

STEP 7. Repeat the same fold on the other side.
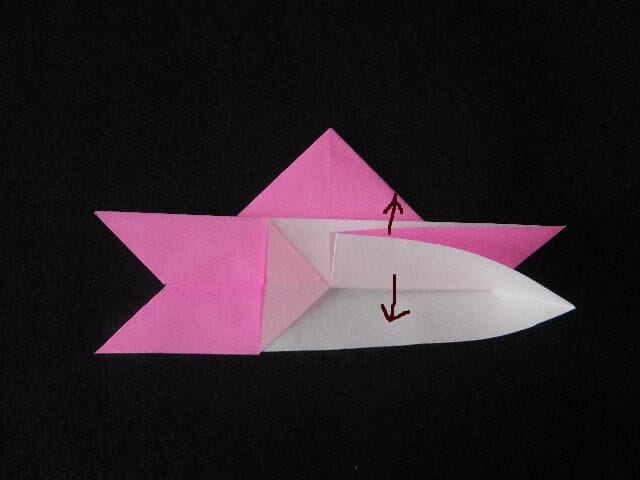
STEP 8. Fold it back along the dotted line.
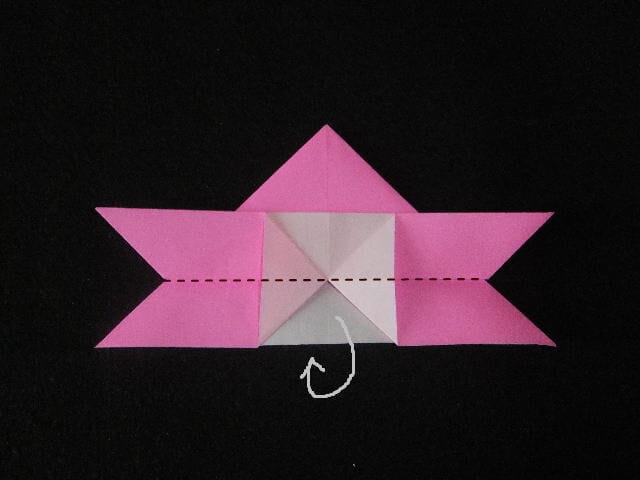
STEP 9. Following the existing creases, keep the folded section at the bottom and fold the front flap along the dotted line.

STEP 10. Fold so the bottom crease lines up with the vertical center line.

STEP 11. From the back, press the crease shown by the arrow. Then fold the dotted ● corner on the back diagonal the same way as in Step 9.

STEP 12. It now looks like a pinwheel. Insert your finger into the ● section and twist it in the direction of the arrow.
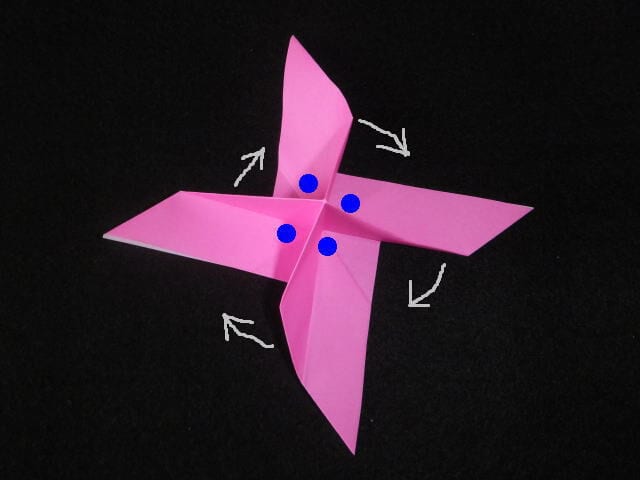
STEP 13. It's easier if you cup the model in your palm and twist it gently.

STEP 14. Once it narrows, hold it gently and shape the center.
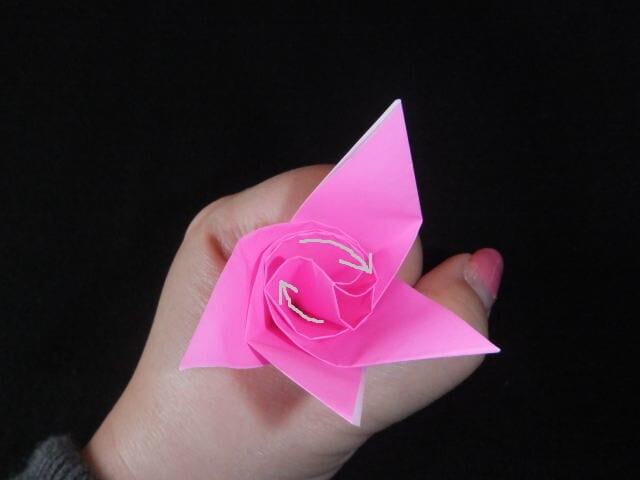
STEP 15. Fold each outer petal along the dotted line. Repeat on the other three.
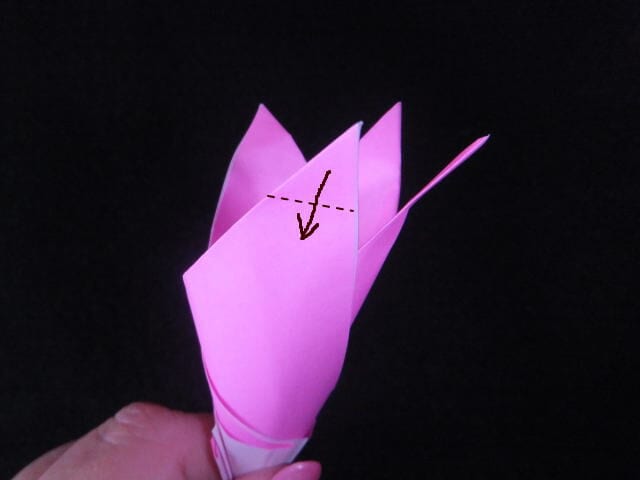
STEP 16. Glue the folded parts so they won't open, then spread the petals outward.
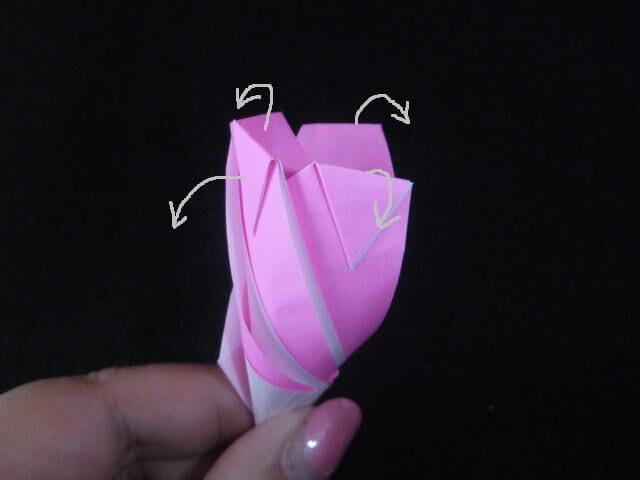
STEP 17. The basic shape is now formed.
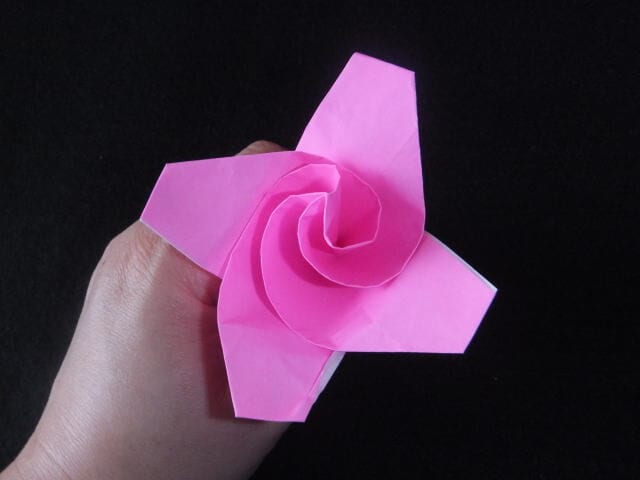
STEP 18. Curl the petal tips by wrapping them around a thin stick.
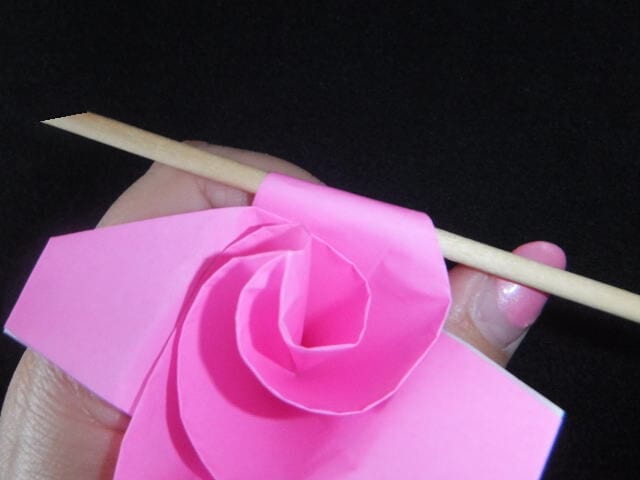
STEP 19. Adjust the shape and your rose is complete.
STEP 20. Try folding more in your favorite colors.
Folding Tips
Starting from Step 12, twist a little at a time while watching the shape take form. If it's tricky to get your fingers inside, simply pinch the center and give it a twist.
Folding several and adding stems and leaves makes a lovely bouquet. You can also flatten the base slightly, add a pin, and wear it as a brooch.




