
Winnie the Pooh (Complete Tutorial)
Some origami models are impressive; others are simply lovable. Winnie the Pooh falls firmly into the second group — a soft, round, honey-loving bear that everyone recognizes at a glance. This complete tutorial takes you from a plain square of paper all the way to a finished Pooh, following seventeen clear photo steps. The folding is kept deliberately gentle, so even if you are new to origami you should be able to keep up. You will start with simple crossing creases, build up the body and head, and finish by tucking the corners in and drawing on that famous friendly face. Grab a square of paper (yellow works nicely for Pooh), a pen for the details, and a quiet few minutes — by the end you will have a small bear with a lot of charm.
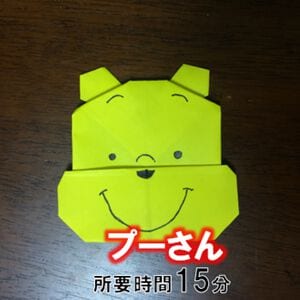
Here we will fold origami of the popular character "Pooh," a well-loved Disney favorite.
The steps are kept simple so that anyone can make it, so please use this as a reference.
How to Fold Winnie the Pooh
STEP 1. Fold it in half vertically and horizontally to make a crease.


STEP 2. Fold it so that the left and right edges are aligned with the center.


STEP 3. Fold it so that the top edge is centered.


STEP 4. Fold it as shown.


STEP 5. Turn it over and fold it so that the bottom edge is aligned with the top.


STEP 6. Fold it down at the dotted line.


STEP 7. Turn it over and bring the left and right corners up.


STEP 8. Fold the left and right as shown.


STEP 9. Fold the bottom corner to fit the edge.


STEP 10. Fold the bottom edge up.


STEP 11. Fold it diagonally along the dotted line.


STEP 12. Fold it so that the edges fit together.


STEP 13. Restore the part folded in step 11.


STEP 14. Fold it along the dotted line.


STEP 15. Fold it along the dotted line.


STEP 16. Fold the corner and insert it inside.


STEP 17. Turn it over, draw a face, and Pooh is complete.






