
Petal Fold
If you have ever tried a crane, a flapping bird, or almost any origami animal with a pointed head or tail, chances are you have already met the petal fold — even if you did not know its name. Think of it as the little move that turns a flat, open flap of paper into a slim pointed petal, and that petal becomes the neck, the beak, or the fin of the finished model.
It looks intimidating the first time you see it (all those diagonal creases unfolding and lifting at once), but it is really just three existing creases working together. In the nine steps below we start from a Square Base and build the fold slowly, one crease at a time, so you can feel exactly how the paper wants to collapse. Once it clicks, you will reach for it without thinking.
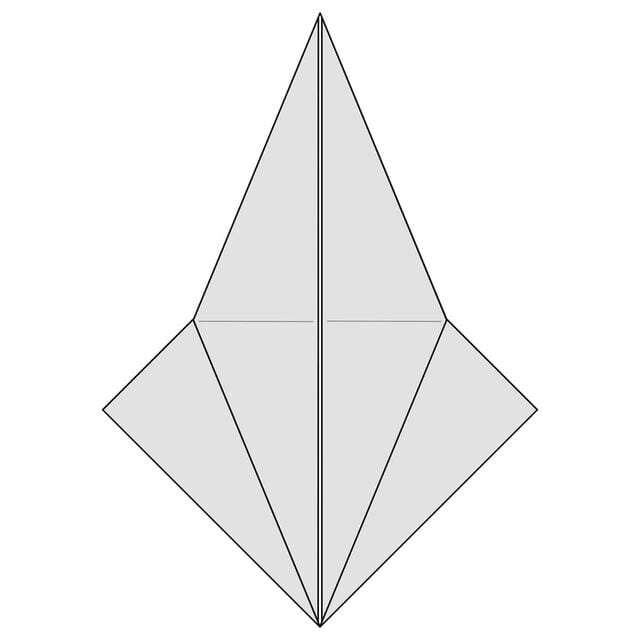
The petal fold is a fairly common fold and forms part of the Bird Base, used in many intermediate and advanced models.
STEP 1. For this example, start from a Square Base—the most common starting point for a petal fold. Fold the top-right flap of paper to the centre along the dotted line.
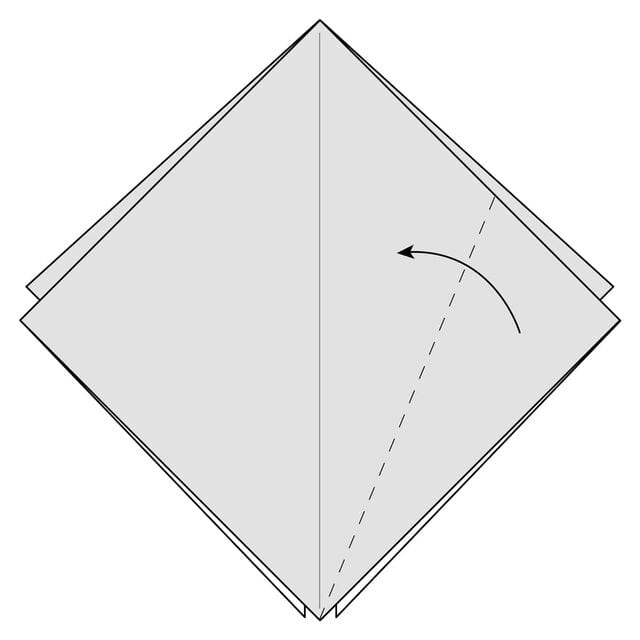
STEP 2. Crease this fold well, then unfold it.
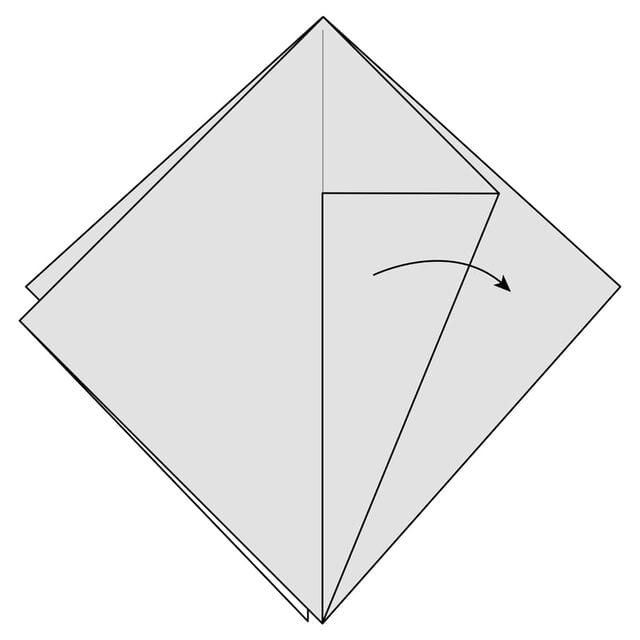
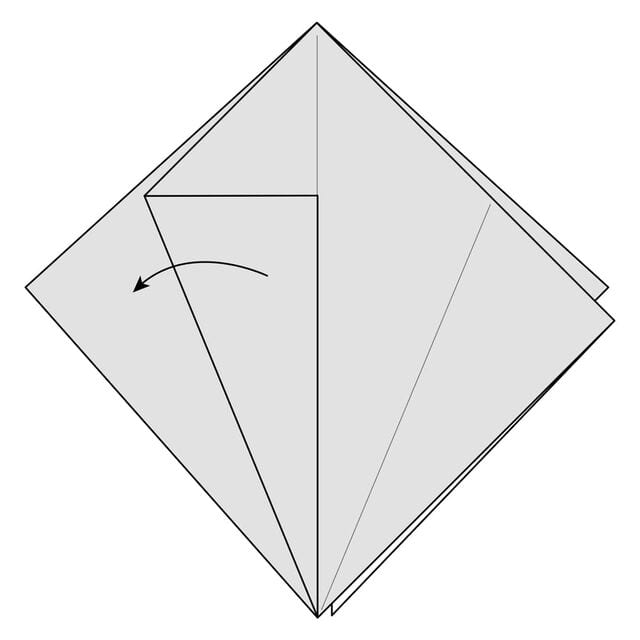
STEP 3. Fold the top-left flap of paper to the centre along the dotted line.
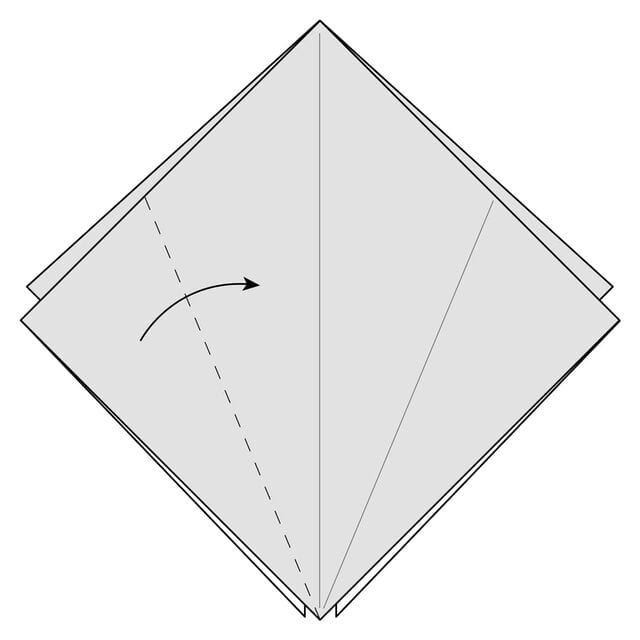
STEP 4. Crease this fold well, then unfold it.
STEP 5. Fold the top part of the model down along the dotted line. The endpoints of this line should line up with the tops of the two creases you just made.
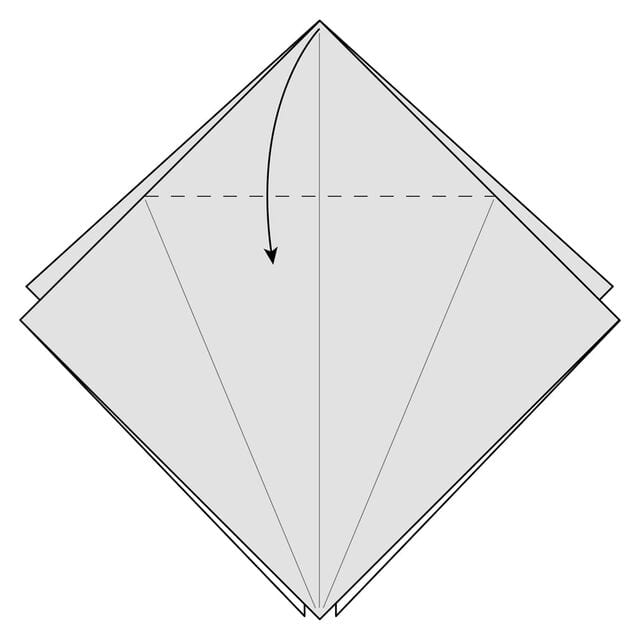
STEP 6. Crease this fold well, then unfold it.
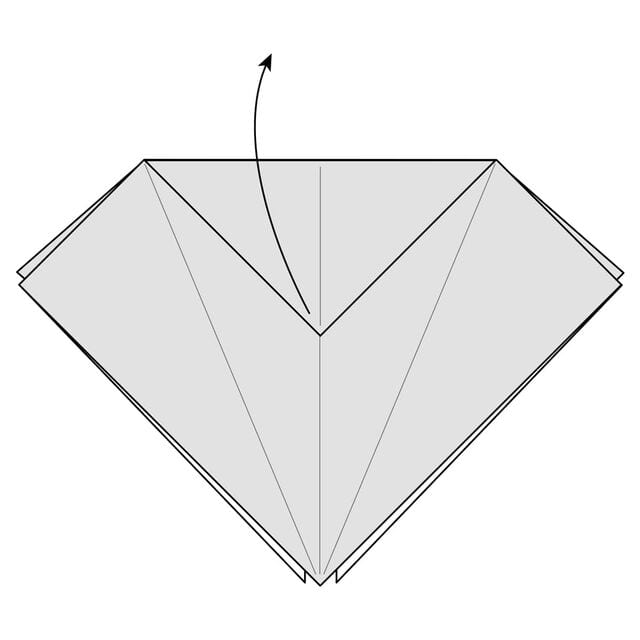
STEP 7. Open the top flap of paper, lifting it upward along the horizontal crease you just made.
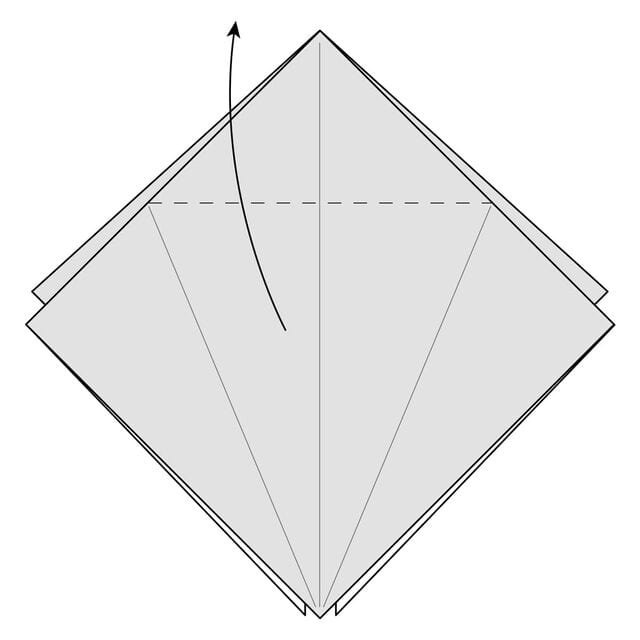
STEP 8. As you lift the paper, fold the sides inward along the two creases you made on each side.
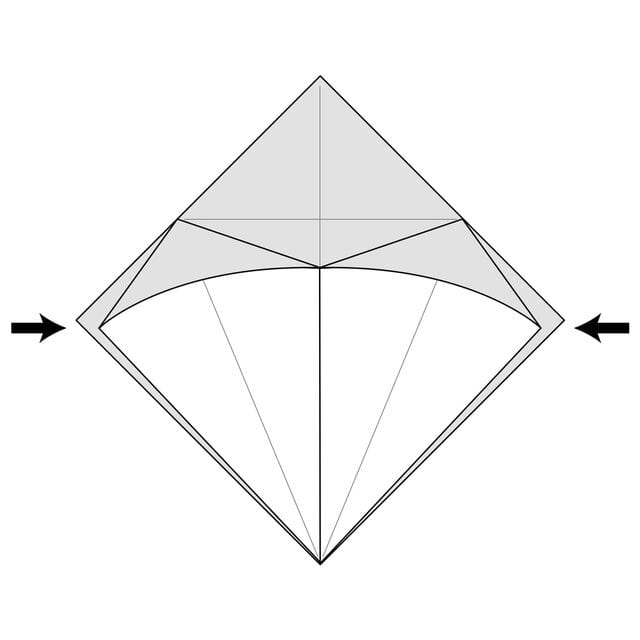
STEP 9. Lift the paper all the way up and flatten everything along the three creases you made. If the creases are sharp, the paper should fall into place easily.
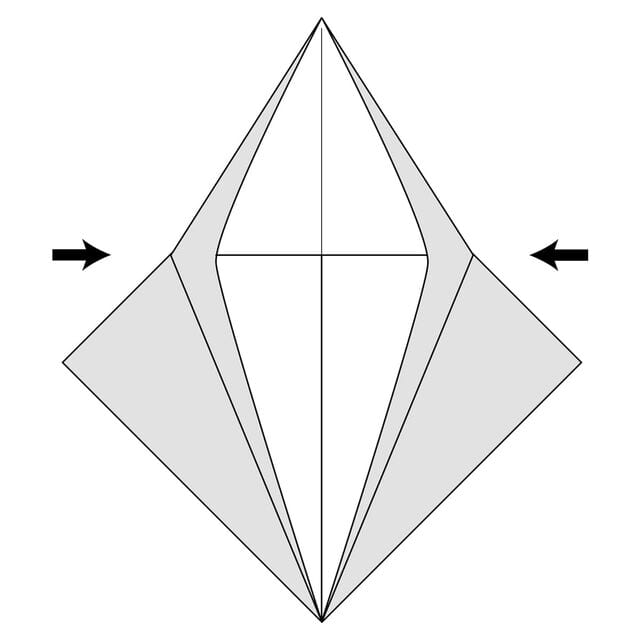
The completed Petal Fold.




