
Pineapple
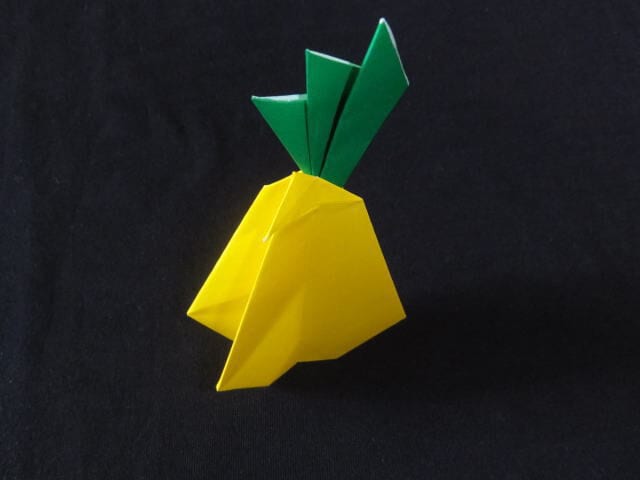
Some origami fruit wins you over with a single clever twist; the pineapple instead charms you with patient, rounded repetition. Its body starts from a plain square - triangle, triangle, then two pockets spread open into a square - before a few gentle pinches coax the paper into that familiar barrel shape. Nothing here is sharp or angular; everything curves, which is exactly why the finished fruit looks so convincingly plump.
The leaves are a separate small sheet folded into simple layers, and the whole model comes together with a dab of glue or a couple of staples - which makes it a lovely project for kids' tables and classroom displays. It is forgiving papercraft: easy enough to fold while chatting, yet satisfying enough that you will want a second one in a different colour. Add a drawn net pattern for realism, or skip it and let cheerful yellow paper do the talking.
How to Fold
STEP 1. Fold the paper in half into a triangle, white side facing up.
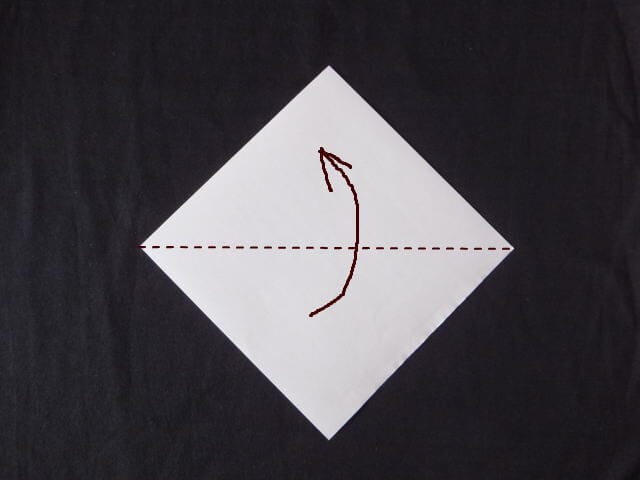
STEP 2. Fold it in half again.
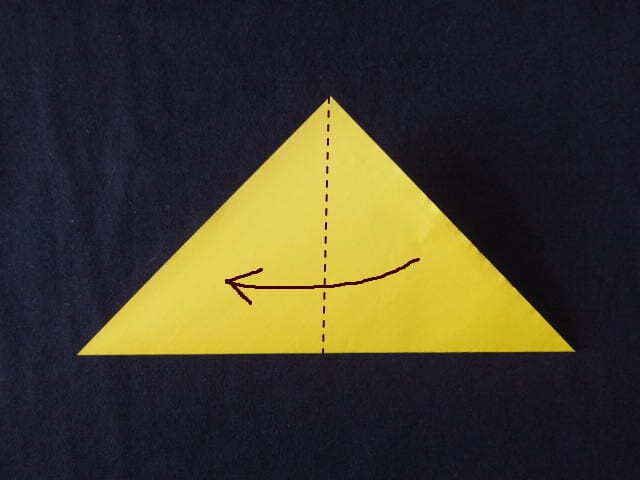
STEP 3. Once the paper is a quarter of its original size, put a finger inside the pocket and spread it out into a square.

STEP 4. After one side is spread into a square, spread the other side into a square as well.
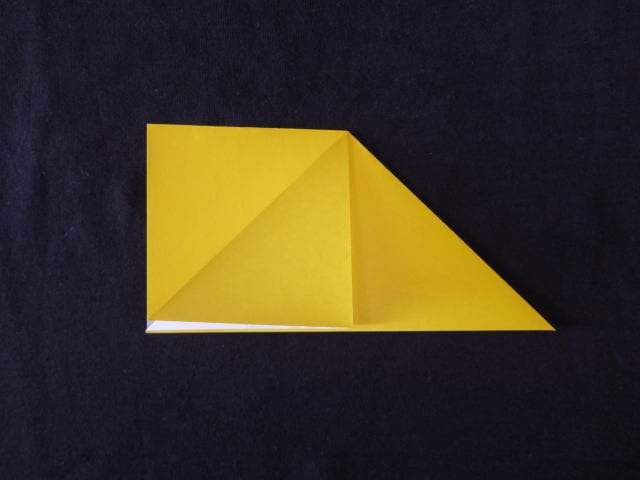
STEP 5. Turn the open side up and fold about 7mm up from the bottom edge.
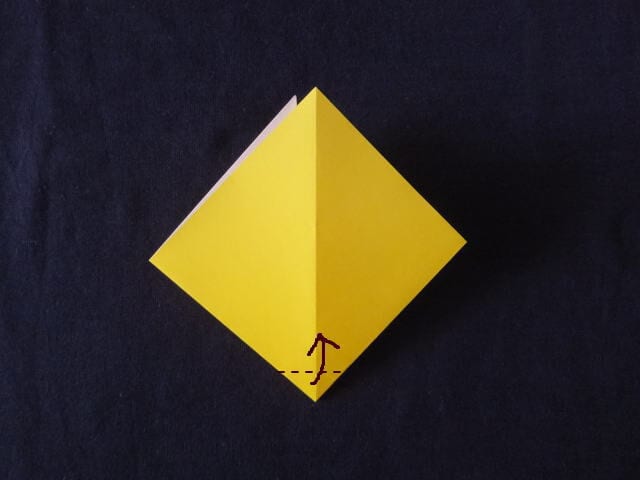
STEP 6. Unfold once, then pinch the central square crease made in step 5 into a mountain fold.
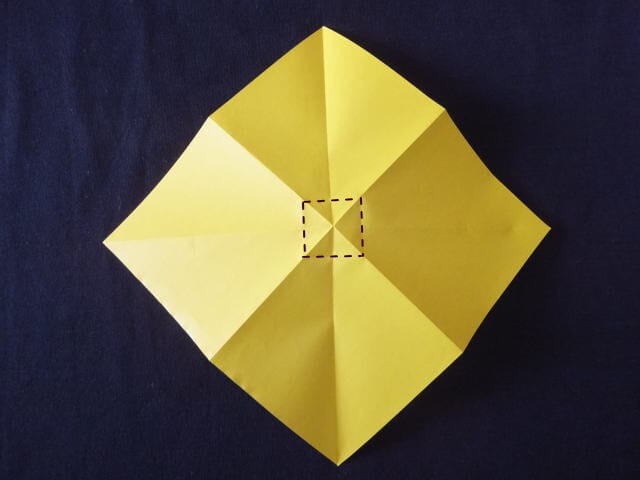
STEP 7. Pinch each of the four sides.
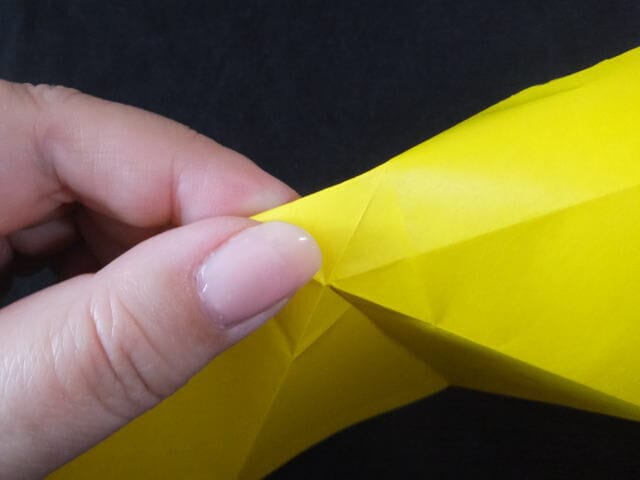
STEP 8. The mountain folds on all four sides are now firmly creased.
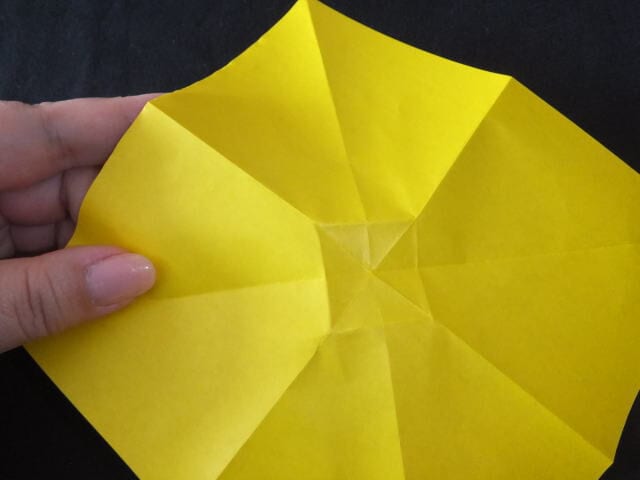
STEP 9. Press the outer parts inward so that the center stays in the middle.
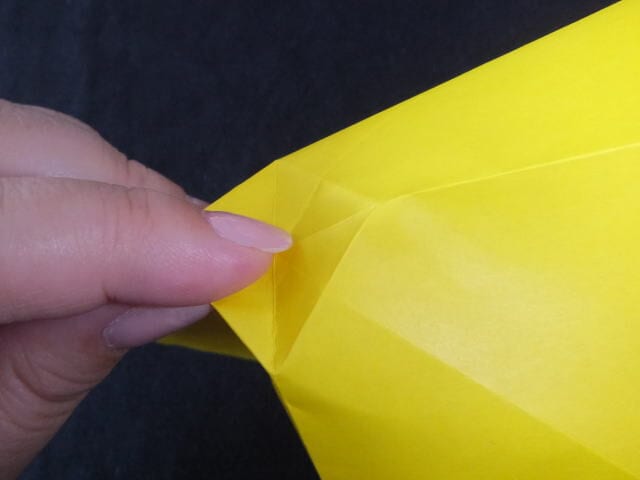
STEP 10. Holding the model from both sides keeps the folds clean.
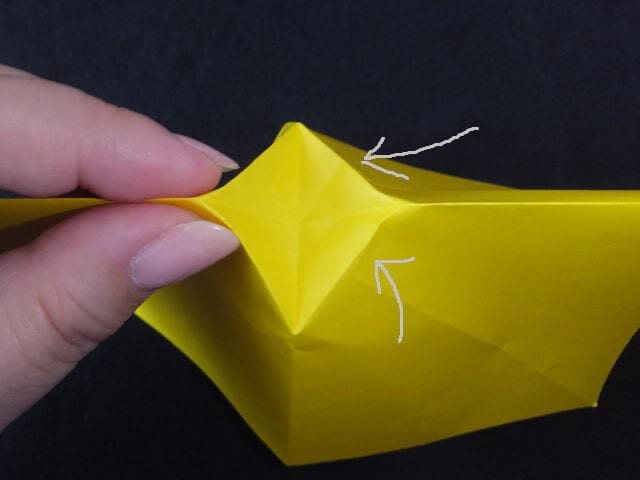
STEP 11. The center now folds together nicely.
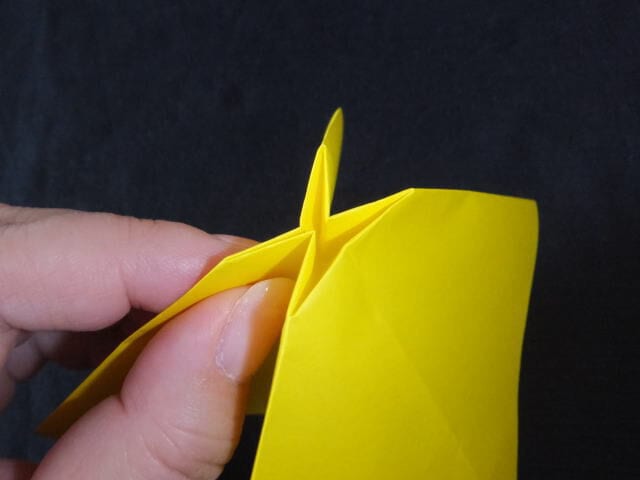
STEP 12. Fold both ends toward the center, then fold the back side the same way.
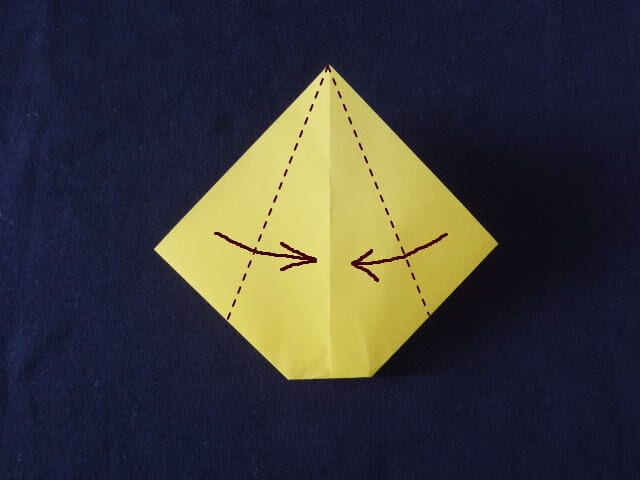
STEP 13. Put a finger inside the pocket and open it.
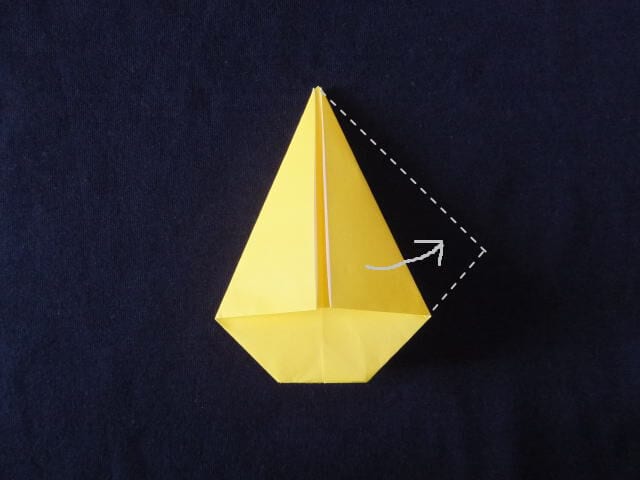
STEP 14. One point is opened. Open the other three in the same way.
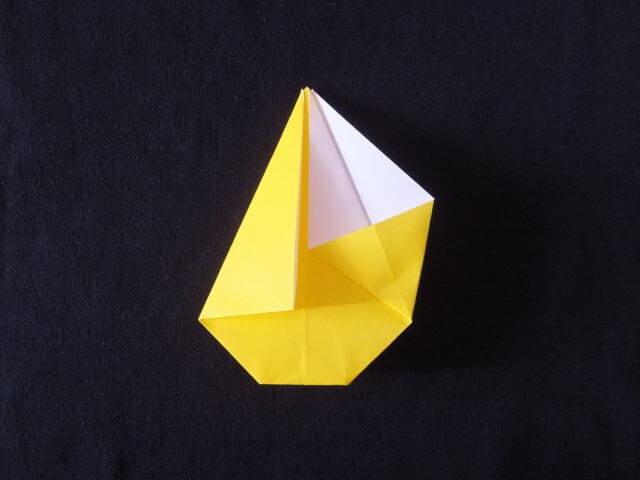
STEP 15. Fold the pointed part in half, then fold the back side the same way.
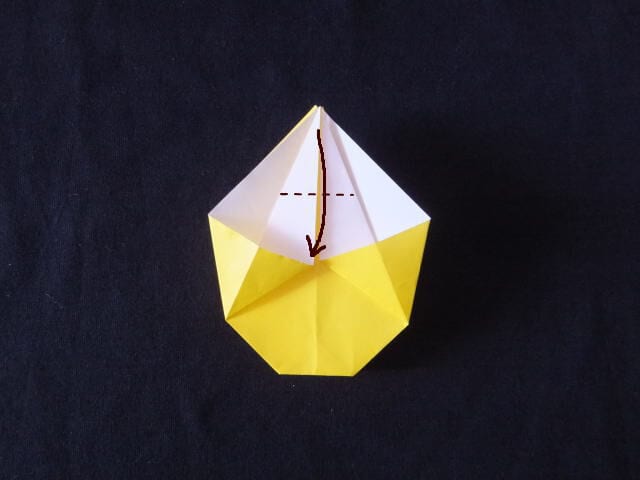
STEP 16. Fold both sides toward the center.
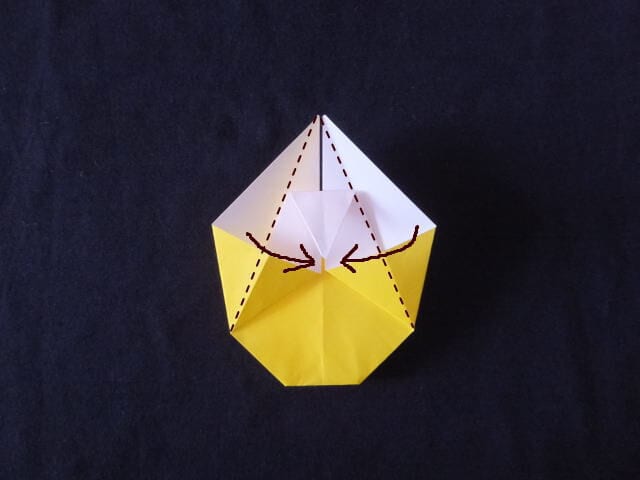
STEP 17. Fold the front side, then fold the back side the same way.
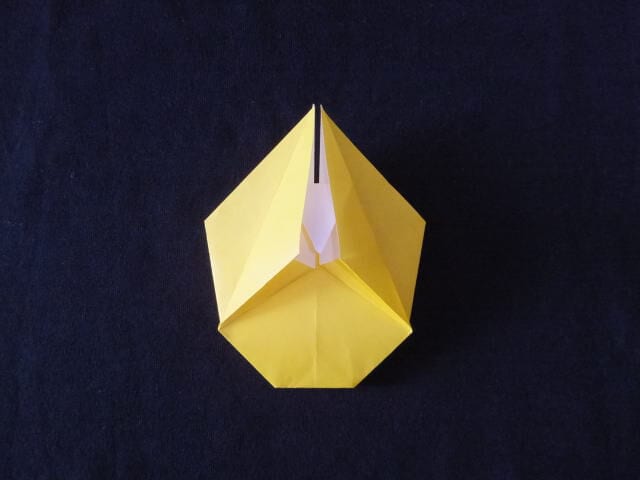
STEP 18. Fold the top layer in half vertically, then fold the back side the same way.
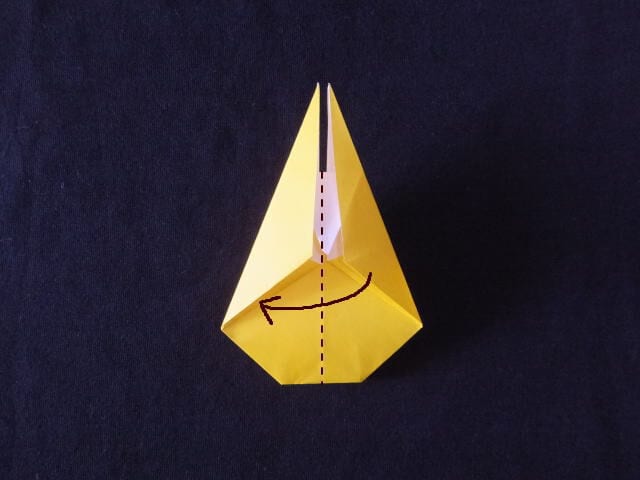
STEP 19. Fold the upper part down along the dashed line, then fold the back side the same way.
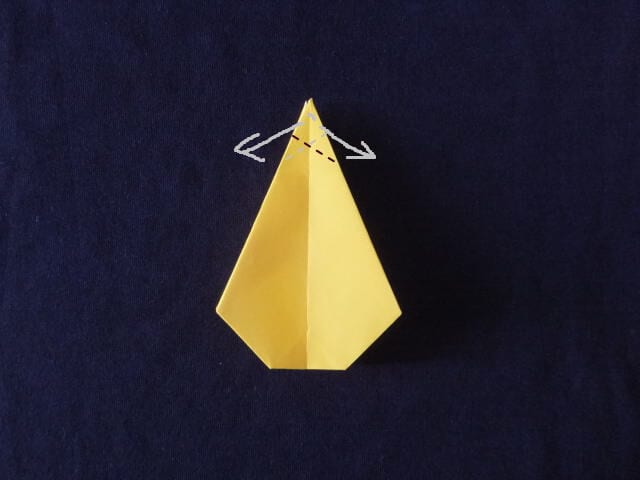
STEP 20. The pineapple body is now complete.
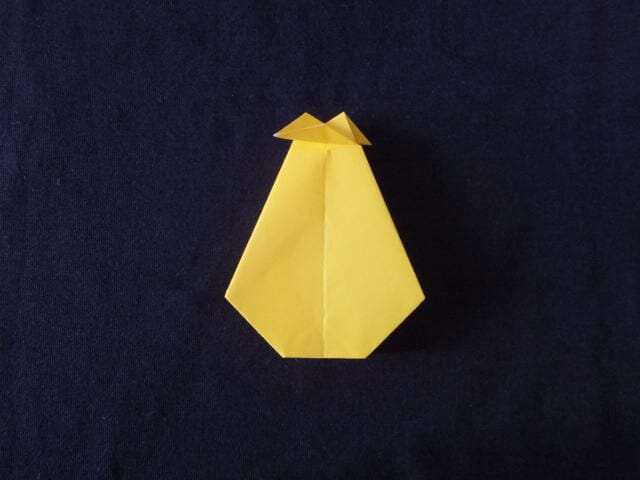
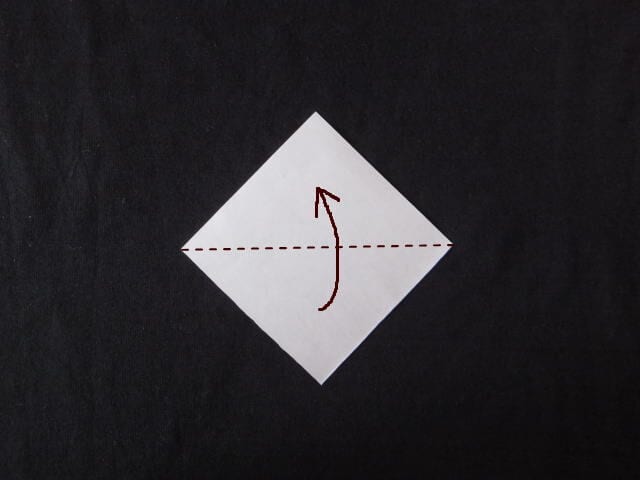
STEP 21. Fold the leaves: take a quarter-size sheet of origami paper and fold it in half into a triangle, white side facing up.
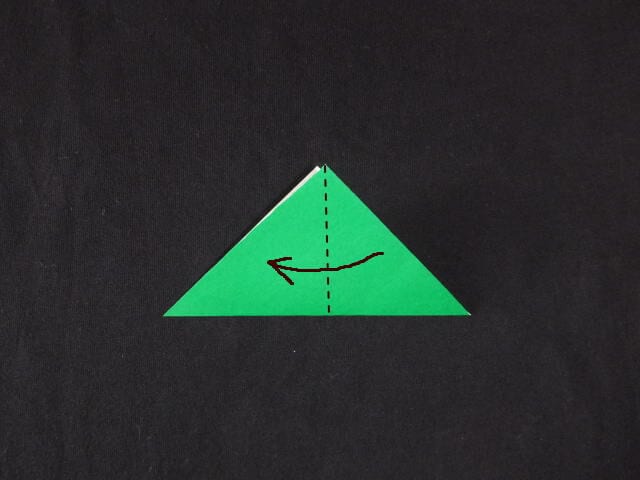
STEP 22. Fold it in half again.
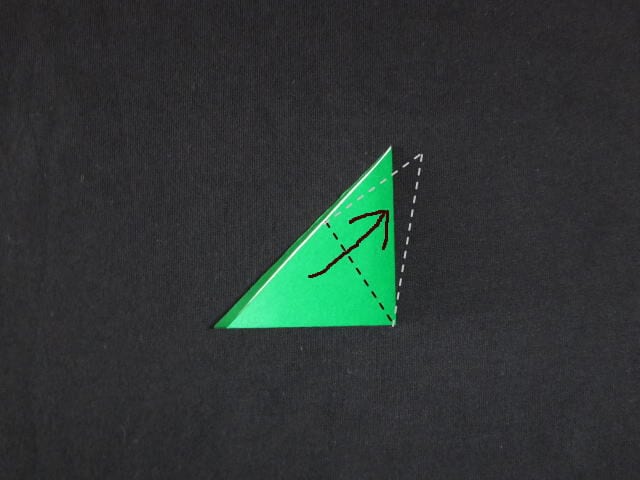
STEP 23. Fold one of the layers down along the dashed line.
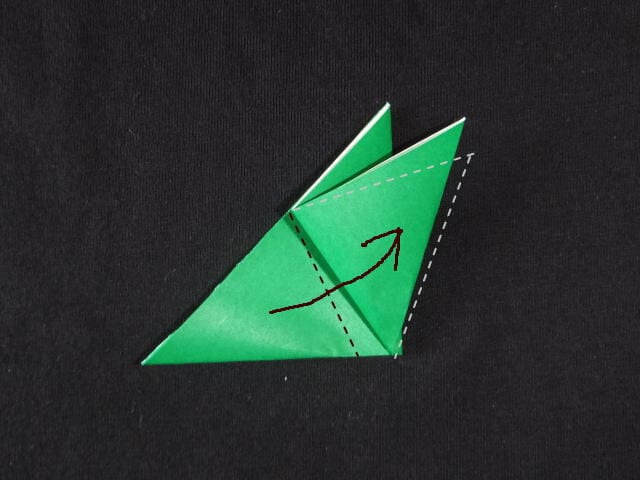
STEP 24. Fold the other layer down along the dashed line as well.
STEP 25. The leaves are ready.
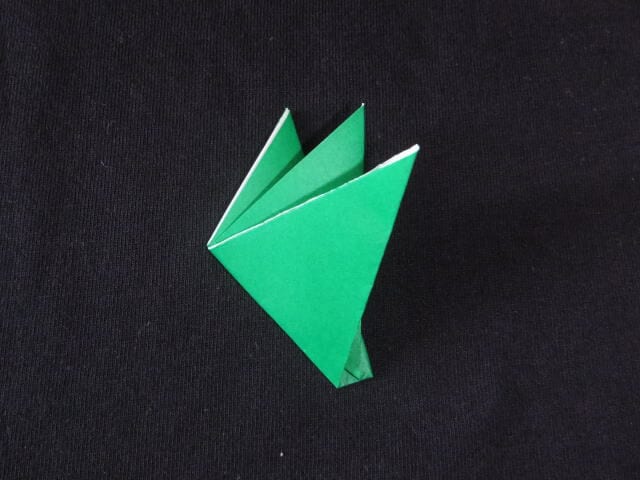
STEP 26. Tuck the leaves between the layers at the top of the body and fix them in place with glue or a stapler.
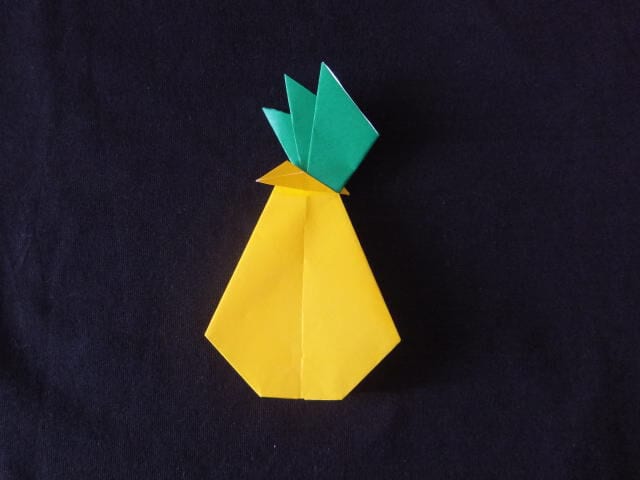
STEP 27. The finished pineapple can also be displayed standing upright.
Folding Tips
The lower part looks a little tricky to fold into the middle, but if the mountain folds in step 8 are creased firmly, it will fold together naturally.
You can also draw the net pattern of a pineapple on the body.
You don’t have to stick to real pineapple colours - folding it in bright, colorful paper is fun too.




