
2D Origami Lamp
Lamps are a surprisingly satisfying subject for flat origami. The shape is graphic enough to read at a glance, and once you fold out the little base at the bottom, the model actually stands up on a desk or shelf instead of lying flat like most 2D designs.
The catch is that this one begins with a 16x16 matrix base, so you will spend the first part of the tutorial creasing a fine grid before the lamp shape appears at all. That grid is what makes the finished silhouette crisp, so it is worth the effort: fold it patiently, keep every crease sharp, and come back to the crease pattern in the photos whenever you lose your place. If you have already folded a few matrix-based models, you will feel right at home here.
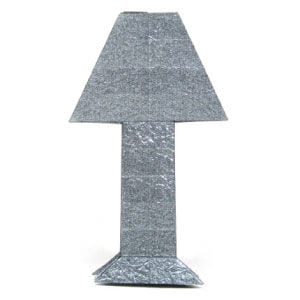
You can fold this lamp from any kind of paper, as long as the sheet is a true square, with all four sides equal and all four corners at 90 degrees. The sheet used here is a 15 cm x 15 cm square.
This is the front side of the paper.
And this is the back side.
How to Fold
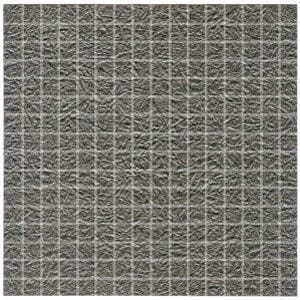
Step 1. Begin with the front side of the paper facing up, then fold a “16x16 matrix base”.
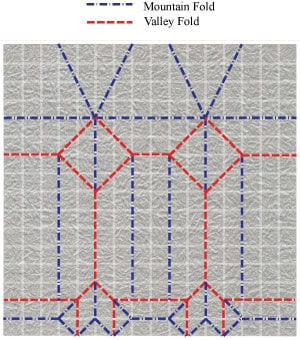
Step 2. The crease pattern (CP) for the lamp is shown on the left. Come back to this CP any time you lose your place.
Step 3. Prepare to apply two valley folds and two mountain folds.
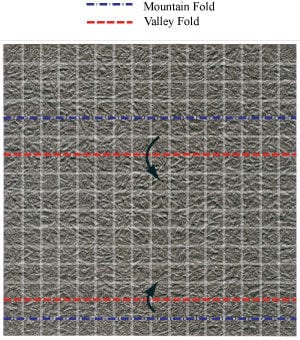
Step 4. Apply the two valley folds and two mountain folds from step 3, then get ready to turn the model over.
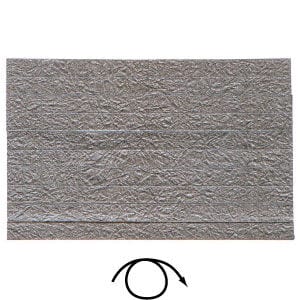
Step 5. Turn the model over and prepare to apply the crease pattern shown on the left. In the circular region, apply the same two mountain folds on the second layer as well.
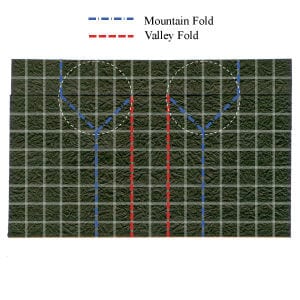
Step 6. Apply the crease pattern from step 5, then prepare to apply two valley folds in the order shown.
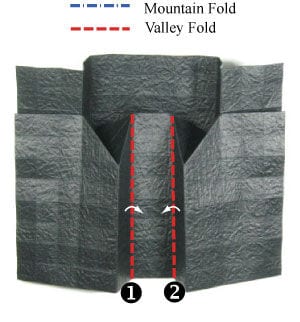
Step 7. Apply the two valley folds from step 6, then get ready to turn the model over.
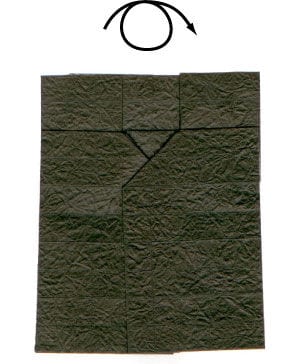
Step 8. Turn the model over and prepare to apply two “inside reverse folds”.
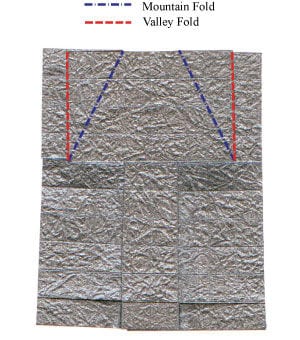
Step 9. Apply the two inside reverse folds from step 8, then get ready to turn the model over.
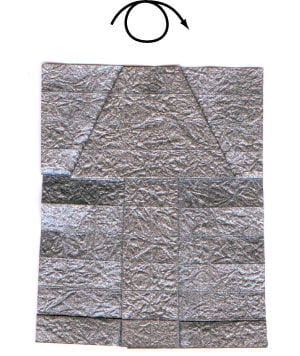
Step 10. Turn the model over and prepare to open the region circled with a dotted ellipse.
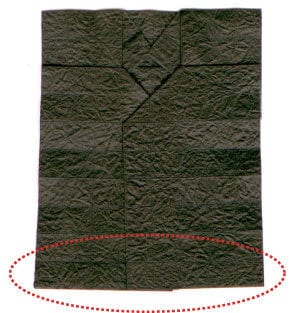
Step 11. Open the region circled in step 10, then prepare to apply the crease pattern shown on the left.
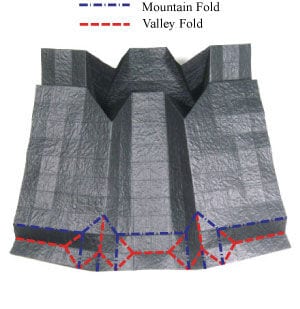
Step 12. Apply the crease pattern from step 11, then prepare to apply two valley folds and two mountain folds.
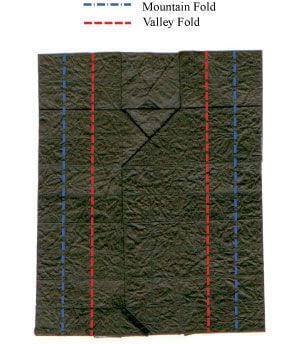
Step 13. Apply the two valley folds and two mountain folds from step 12, then prepare to apply a vertical “gate fold”.
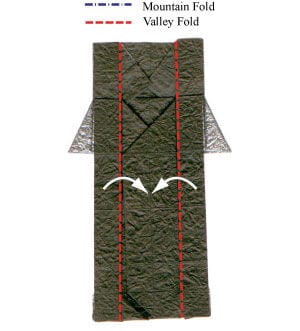
Step 14. Apply the vertical gate fold from step 13, then get ready to turn the model over.
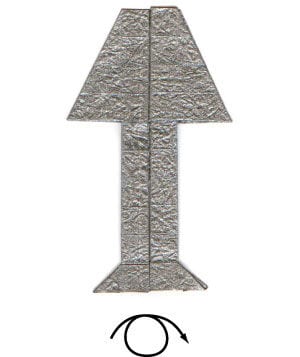
Step 15. Turn the model over and prepare to open the base so the lamp can stand on the ground.

Step 16. Let the lamp stand on the ground. Congratulations, your 2D origami lamp is finished!
After Folding
Even though this is a flat 2D model, the folded base lets it stand upright, so it works nicely as a small decoration on a desk, a shelf or a windowsill.
If the lamp feels a little floppy, try a slightly stiffer paper or a larger sheet: a bigger grid gives crisper pleats and a steadier base.
Once you are comfortable with this model, the same 16x16 matrix base is a great starting point for plenty of other crease-pattern designs.




