
Traditional Origami Pinwheel
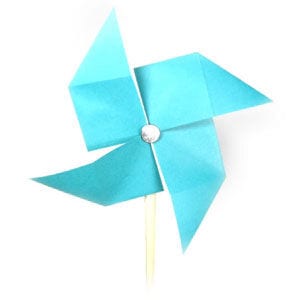
Those little paper pinwheels that burst into motion the moment you blow on them — this is the classic version, folded from a single square with nothing but creases. Once you know the shape you start seeing it everywhere: in spinning party favours, in garden whirligigs, in the toys kids hold out of car windows. The fold itself is friendly, too. A few halves, a pair of gate-folds, and eight valley folds that free up the four blades so they can catch the air. Mount it on a chopstick with a thumbtack and it turns into a real working toy rather than a flat model. All you need is one square of paper, a chopstick and a thumbtack. Blow on it, hold it out the window, or stick it in a potted plant and let the breeze do the work.
You can use any kind of paper for this origami pinwheel. Here I'm using a sheet of origami paper measuring 15cm x 15cm.
This is the front side of the paper.
This is the back side of the paper.
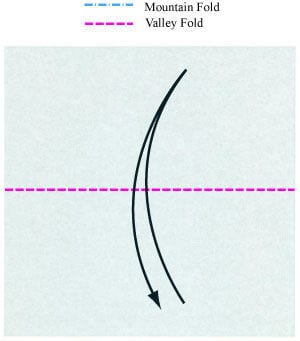
STEP 1.
Start with the back side of the paper facing up. Prepare to valley-fold the paper in half horizontally and then unfold.

STEP 2.
Valley-fold in half horizontally as described in step 1 and then unfold. Prepare to valley-fold in half vertically and then unfold.
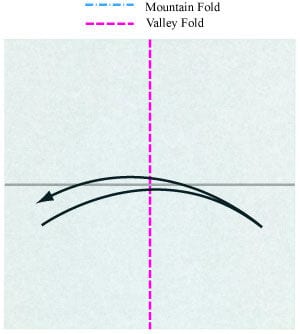
STEP 3.
Valley-fold in half vertically and then unfold. Prepare to apply a horizontal "gate-fold" and then unfold.
STEP 4.
Apply the horizontal "gate-fold" of step 3 and then unfold. Prepare to apply a vertical "gate-fold" and then unfold.
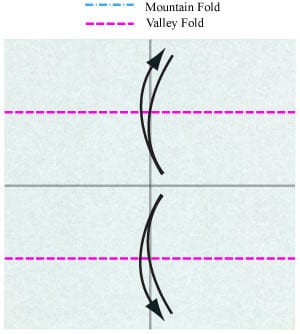
STEP 5.
Apply the vertical "gate-fold" and then unfold. You should now have six crease lines. Prepare to make eight valley folds.
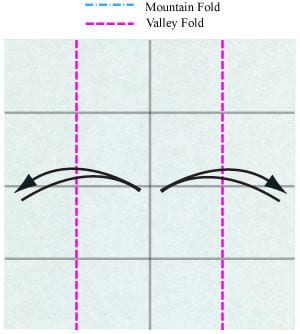
STEP 6.
Make the eight valley folds of step 5. Prepare to bend four flaps down, following the direction of the arrows.
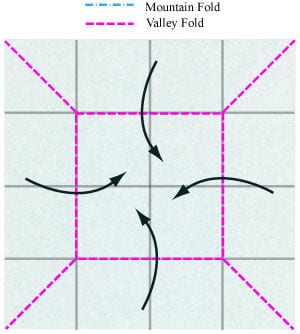
STEP 7.
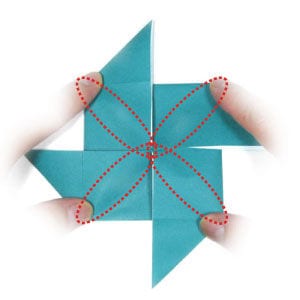
Bend the four flaps down following the arrow directions of step 6. Prepare to flatten the area enclosed by the four ellipses with your thumb.
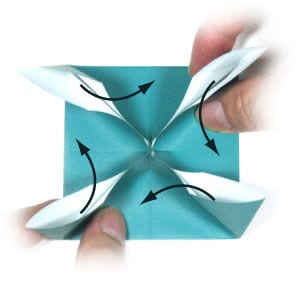
STEP 8.
Flatten the area enclosed by the four ellipses with your thumb, as shown in step 7.
STEP 9.
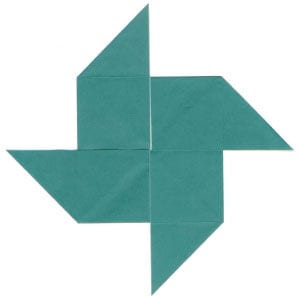
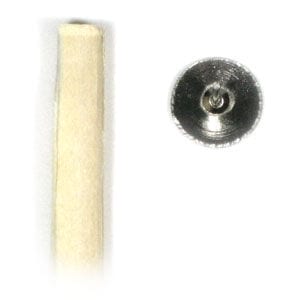
Get a chopstick and a thumbtack ready. Prepare to press the thumbtack into the center of the origami pinwheel.
STEP 10.
Start pressing the thumbtack down into the center of the origami pinwheel.
STEP 11.
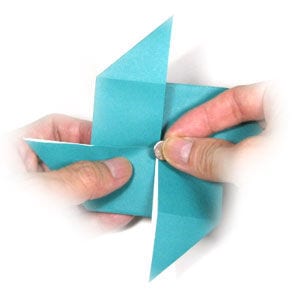
Finish pressing the thumbtack into the center of the origami pinwheel. You can make the hole slightly larger to reduce the friction between the thumbtack and the pinwheel.
STEP 12.
Press the thumbtack firmly into the chopstick.
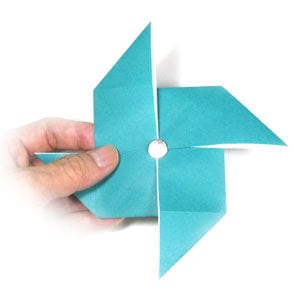
STEP 13.
Congratulations! You have completed a traditional origami pinwheel. Blow on it to make the blades spin.




