
Large Origami Dining Table
Most origami tables have pointy corners, but this large dining table is built without them — its soft, rounded edges give it a tidy, modern look. It's a bigger model than the standard version, so it makes a satisfying centerpiece for a paper room scene.
In this tutorial we work through 19 steps. You'll lay down a grid of creases, collapse them using a crease pattern, and fold the legs into place. It's a great next step once you're comfortable with basic valley- and mountain-folds — let's build a table.
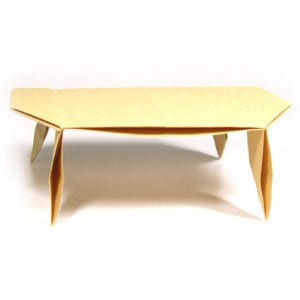
How to Fold a Large Origami Dining Table
This origami dining table is larger than other origami dining tables, and its distinctive feature is that it has no sharp corners. It’s a clean, rounded piece of paper furniture.
Before you start, you should know what a valley-fold and a mountain-fold are. If those two basics are familiar, you’ll have no trouble with this model.
If you’re ready, let’s get started.
The paper I’m using here is a 20 cm × 20 cm square — a good size for beginners. Once you’re comfortable, you can try smaller paper.
This is the front side of the paper. You can use any paper; I’m using one with the same color and texture on both sides, but a two-tone sheet works too.
This is the back side.
STEP 1: Prepare to mountain-fold in half vertically, then unfold.
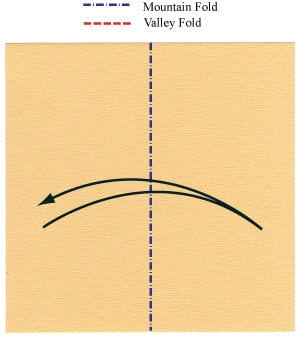
STEP 2: Mountain-fold in half vertically as before, then unfold. Apply a vertical gate-fold.
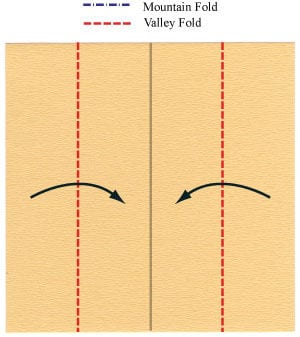
STEP 3: Apply the vertical gate-fold from step 2. Apply two vertical valley-folds.
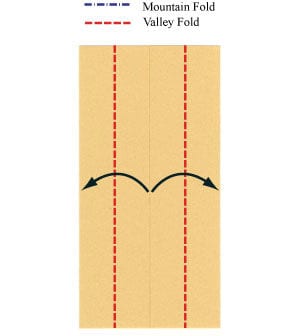
STEP 4: Apply the two vertical valley-folds from step 3. Open the paper.
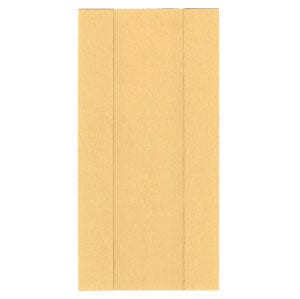
STEP 5: Open the paper. Valley-fold in half horizontally, then unfold.
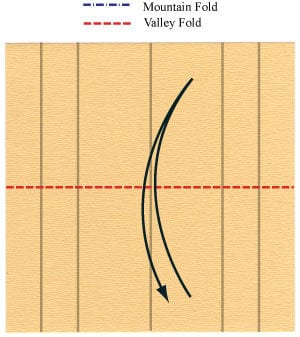
STEP 6: Valley-fold in half horizontally as before, then unfold. Turn the paper over.
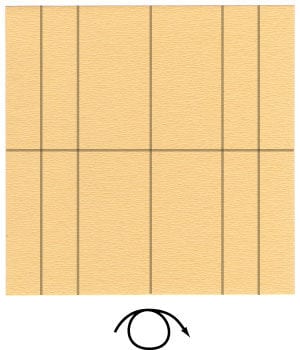
STEP 7: Turn the paper over. Apply a horizontal gate-fold.
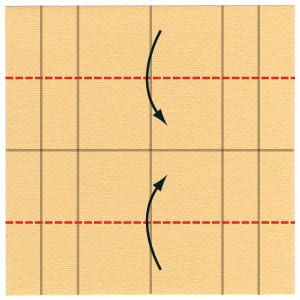
STEP 8: Apply the horizontal gate-fold from step 7. Apply two horizontal valley-folds.
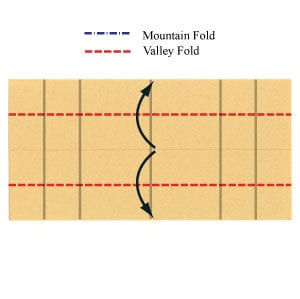
STEP 9: Apply the two horizontal valley-folds from step 8. Open the paper.
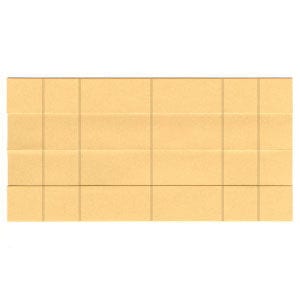
STEP 10: Open the paper. You should now see ten crease lines.
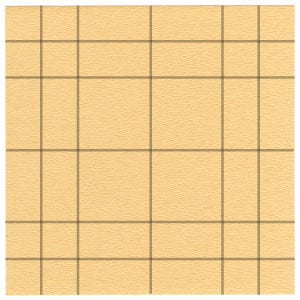
STEP 11: Apply the crease pattern (CP) enclosed in the dotted rectangle on the left.
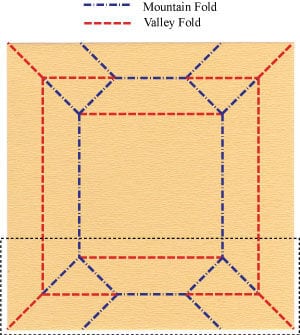
STEP 12: Apply the CP from step 11. Apply the upper-half CP from step 11.
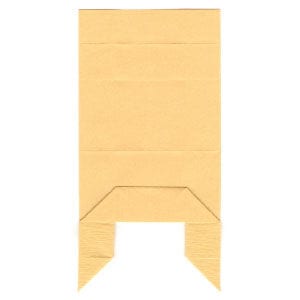
STEP 13: Apply the upper-half CP from step 11. Apply four valley-folds.
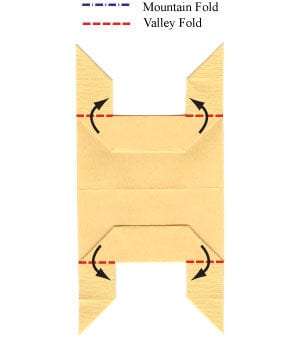
STEP 14: Apply the four valley-folds from step 13. Turn the dining table model over.
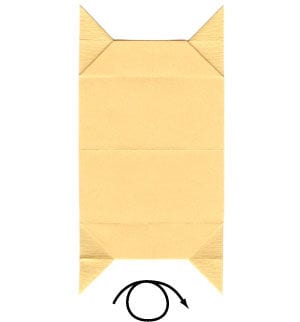
STEP 15: Turn the dining table model over. Rotate the model by 90 degrees.
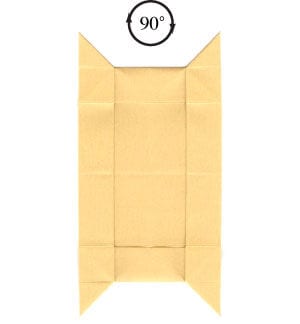
STEP 16: Rotate the model by 90 degrees. Apply four 90-degree valley-folds.
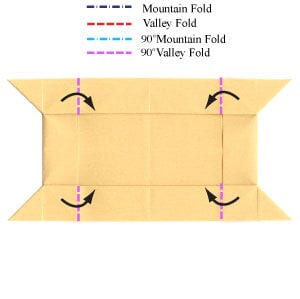
STEP 17: Apply the four 90-degree valley-folds from step 16. This is the bottom view of the dining table. Turn the model over.
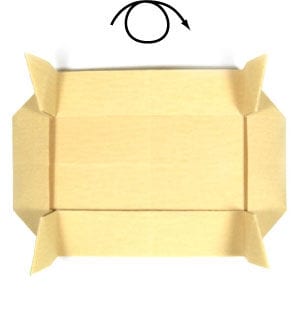
STEP 18: Turn the model over. This is the top view of the dining table.
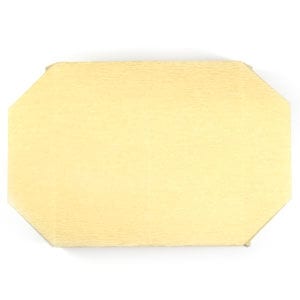
STEP 19: This is the perspective view. Congratulations — you’ve completed your large origami dining table!





