
Origami Magic Boat
If you have ever folded a simple paper boat, this one will feel like a stage trick on the water. The origami magic boat looks like an ordinary sailboat — until, with a couple of quiet folds, its sails slide into a brand-new position as if they moved on their own. That little flourish is why it is called "magic," and it never stops being satisfying to show off. The catch? This model starts from an 8x8 matrix base, so there is some careful pre-creasing before the fun part begins. Do not let that scare you off: every crease is shown in close-up photos, and once the grid is in place the boat comes together surprisingly fast. Take your time with the early steps and the payoff is a slim, elegant sailboat with a genuinely surprising finish.
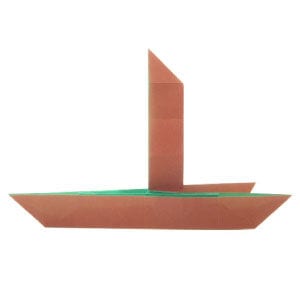
This page is for those who want to learn how to fold an origami magic boat.
This origami magic boat starts from an 8x8 matrix base. Its function is similar to the traditional magic boat, though the finished model looks a bit slimmer.
Before working on this model, you should be familiar with valley-folds and mountain-folds. If you know these two basic techniques, you will have no trouble folding the magic boat.
If you are ready, let's get started.
You may use any kind of paper for this model. It is a little easier if the front and back sides of the paper are slightly different, either in texture or in color.
Make sure your paper is square (all sides equal and all angles 90 degrees). The sheet I use here is 15cm x 15cm, a good size for those who are new to paper folding. Once you are familiar with the model, you can try a smaller sheet.
This is the front side of the paper. Any kind of paper works for this boat; here I use typical origami paper, whose front and back sides differ slightly in color.
This is the back side of the paper.
STEP 1
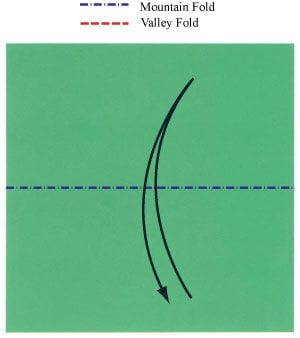
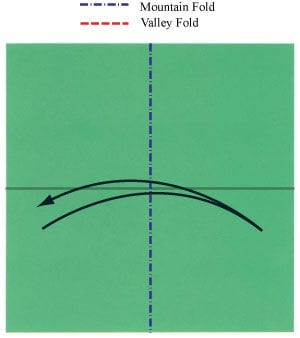
Start with the back side of the paper facing up. Make a horizontal mountain-fold, then unfold.
STEP 2
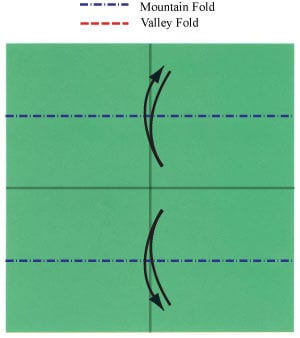
Make the horizontal mountain-fold from step 1, then unfold. Make a vertical mountain-fold, then unfold.
STEP 3
Make the vertical mountain-fold from step 2, then unfold. Make a horizontal gate-fold, then unfold.
STEP 4
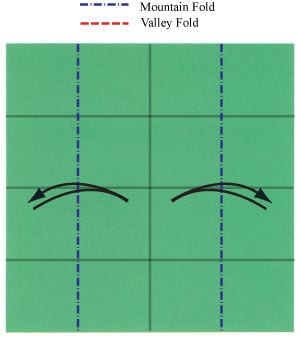
Make the horizontal gate-fold, then unfold. Make a vertical gate-fold, then unfold.
STEP 5
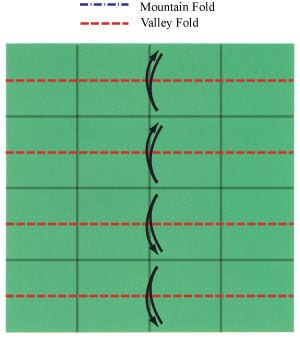
Make the vertical gate-fold from step 4, then unfold. Make four horizontal valley-folds, then unfold.
STEP 6
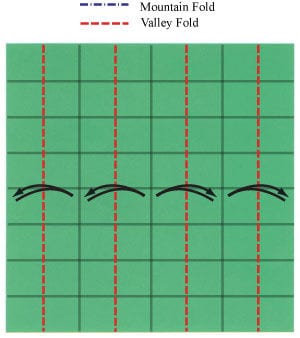
Make the four horizontal valley-folds from step 5, then unfold. Make four vertical valley-folds, then unfold.
STEP 7
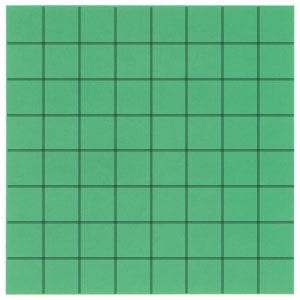
Make the four vertical valley-folds from step 6, then unfold. You have now completed an 8x8 matrix base.
STEP 8
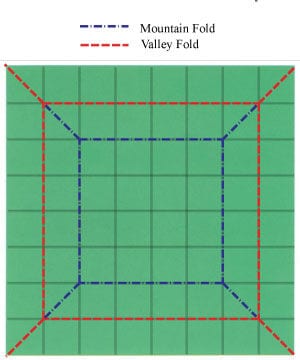
Make two valley-folds, then unfold as in step 7. Apply the crease pattern (CP) shown on the left.
STEP 9
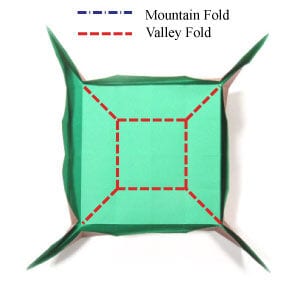
Apply the CP from step 8. Prepare to make eight valley-folds.
STEP 10
Apply the eight valley-folds prepared in step 9. Prepare to apply a diagonal mountain-fold.
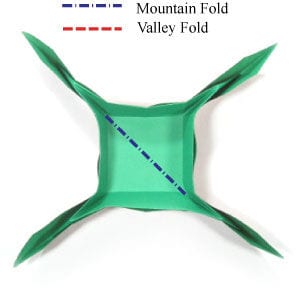
STEP 11
Begin applying the diagonal mountain-fold from step 10.
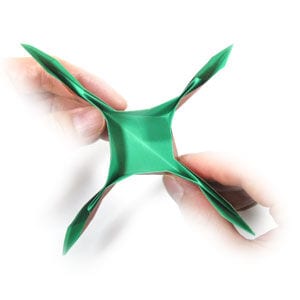
STEP 12
Finish applying the diagonal mountain-fold from step 10. Prepare to rotate the boat model by 45 degrees.
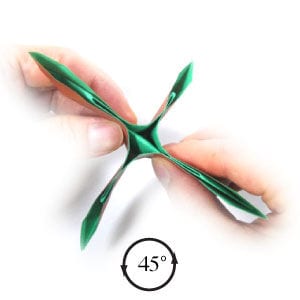
STEP 13
Rotate the boat model by 45 degrees. Prepare to rotate it by 90 degrees.
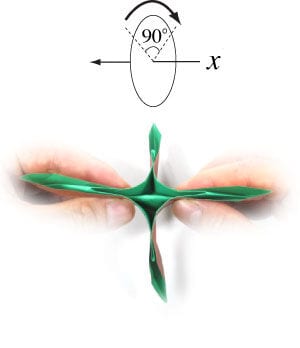
STEP 14
Rotate the boat model by 90 degrees. Prepare to rotate it by 45 degrees.
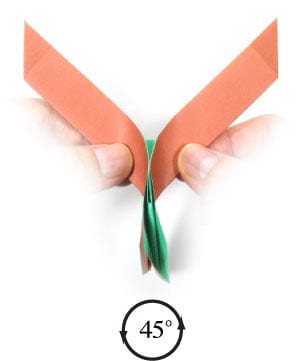
STEP 15
Rotate the boat model by 45 degrees. Prepare to lay the boat model down.
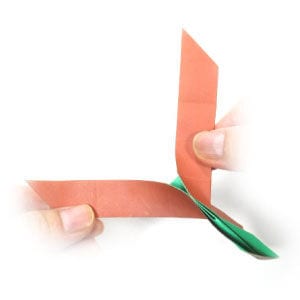
STEP 16
Lay the boat model down. Prepare to apply a valley-fold.
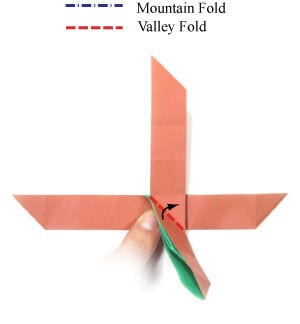
STEP 17
Apply the valley-fold from step 16. Here is where the name “Magic Boat” comes from: as you can see, the mainsail of the boat is shown in the left picture. Prepare to apply another valley-fold.
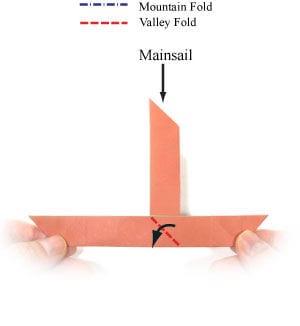
STEP 18
Apply the valley-fold from step 17. Prepare to repeat the valley-fold on the back side.
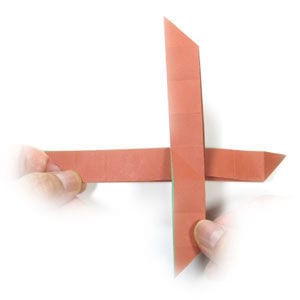
STEP 19
Repeat the valley-fold on the back side. Now the mainsail has moved into its new position.
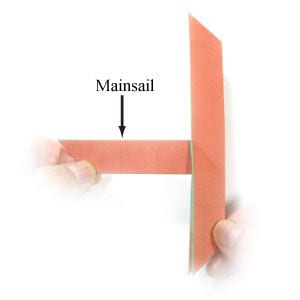
STEP 20
Congratulations! You have completed an origami magic boat.




