
Dragon
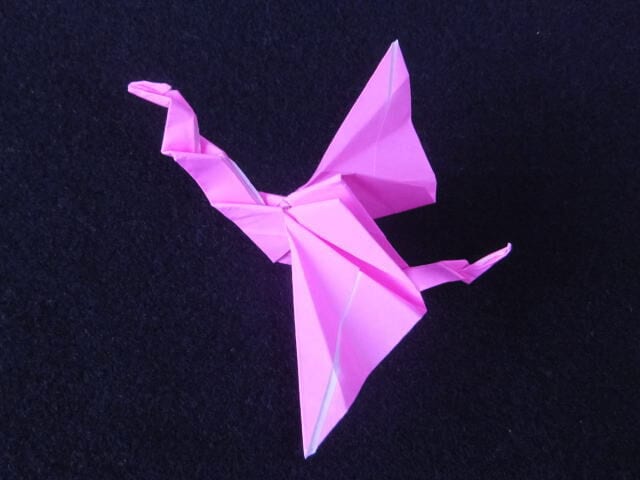
There is something irresistible about a paper dragon. Unlike the patient, geometric folds behind so many mythic designs, this one keeps things friendly: the trickiest section is really just a handful of back-and-forth folds repeated a few times, which is how the neck and tail get their lively curves.
That makes it a fantastic project for a stormy afternoon or a gift for someone who loves knights and castles. The finished dragon spreads its wings wide and carries real momentum in its pose — and because the shaping is so forgiving, the same model can look elegant in silver, fierce in dark red, or properly legendary in gold. Whatever colour you choose, just remember the golden rule the guide itself stresses: sharp, clean creases are half the magic.
Way of folding
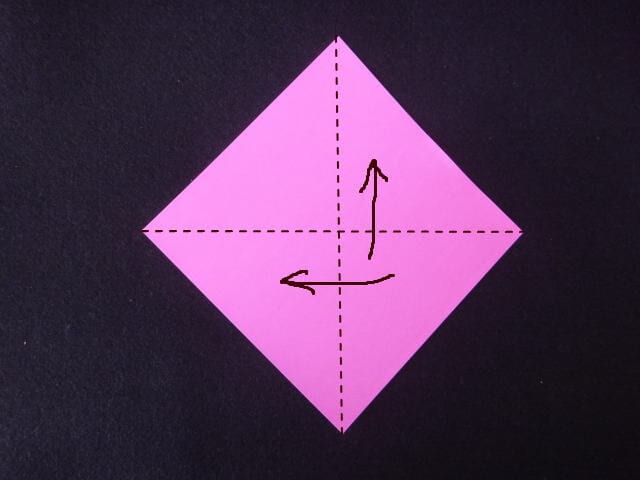
STEP 1. With the colored side up, fold vertical and horizontal creases on the triangle.
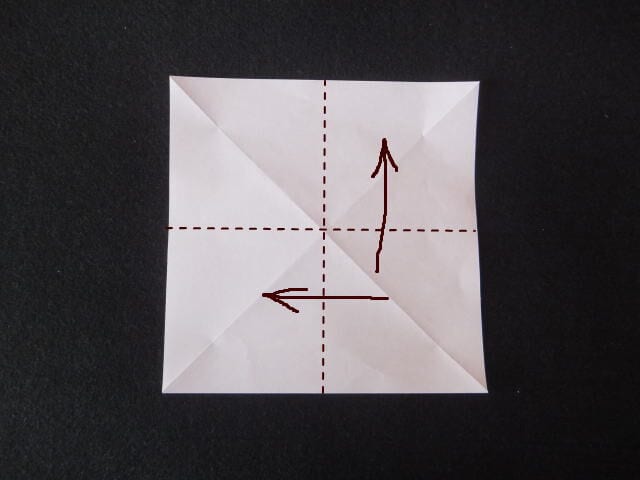
STEP 2. Next, turn the white side up and crease the square both vertically and horizontally.
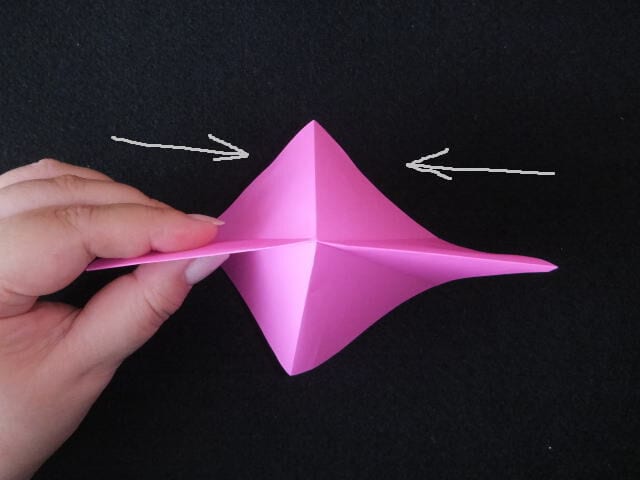
STEP 3. Pinch the folded square creases, push them inward from both sides toward the center, and fold the paper into a square.
STEP 4. Point the open side down and press a crease along the dotted line.
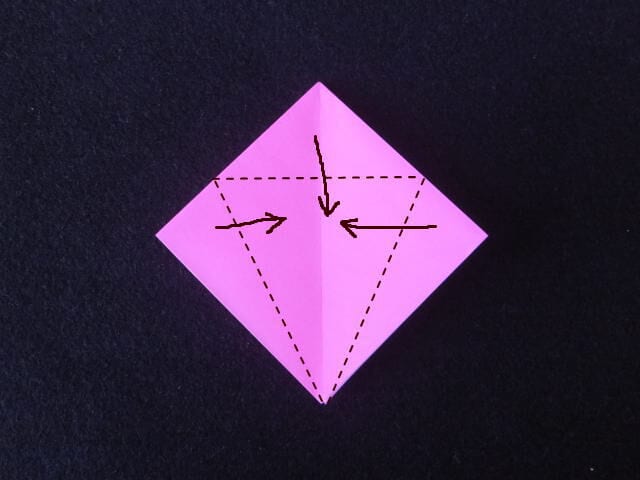
STEP 5. Open the paper out along the creases you made in step 4.
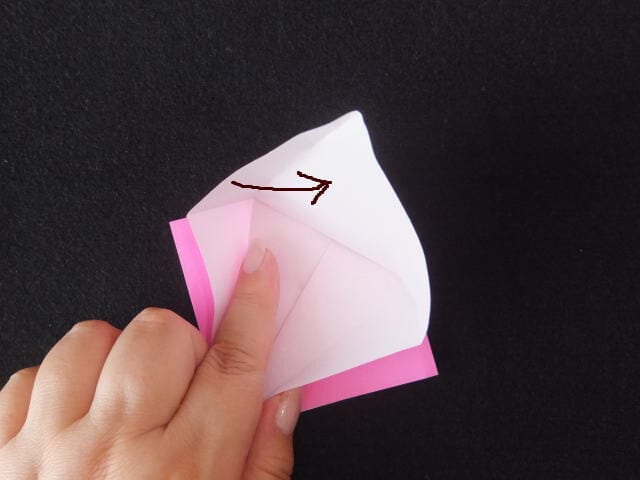
STEP 6. Open one side, then open the other side in the same way, holding the crease firmly.
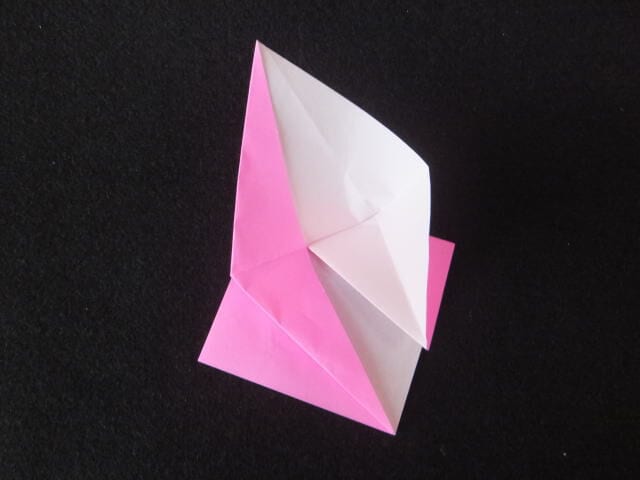
STEP 7. Once the front is folded, fold the back side in the same way.
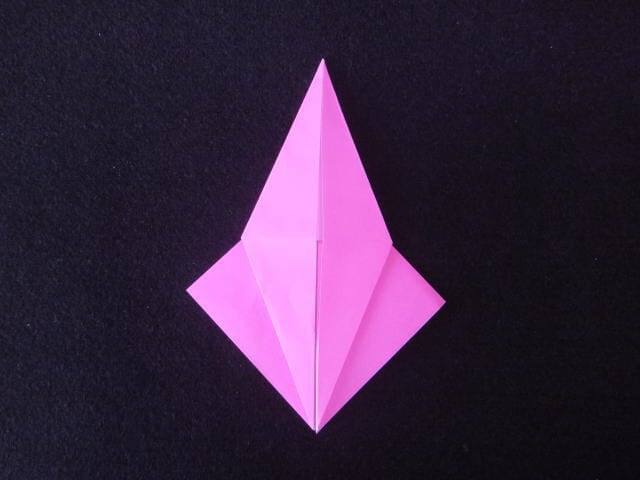
STEP 8. From the unopened upper side, fold toward the center along the dotted line.
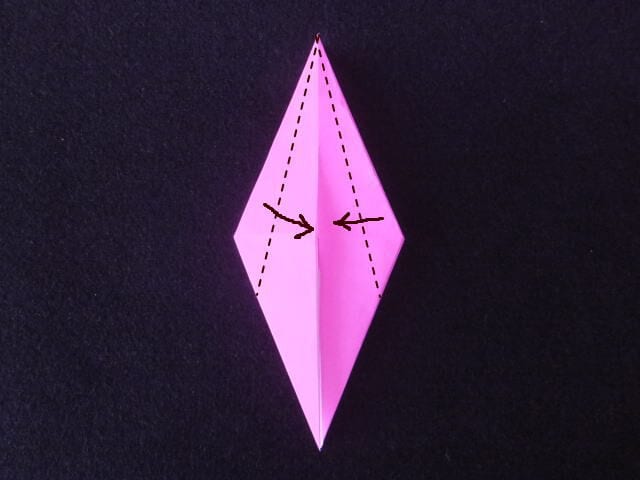
STEP 9. Once folded, turn the model over.
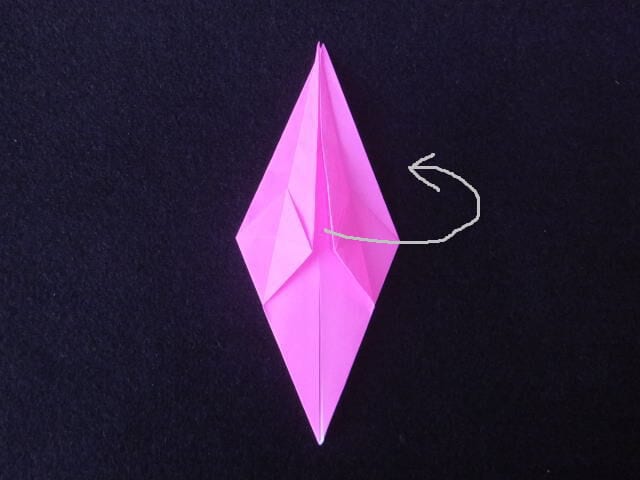
STEP 10. Fold the top layer up along the crease line.
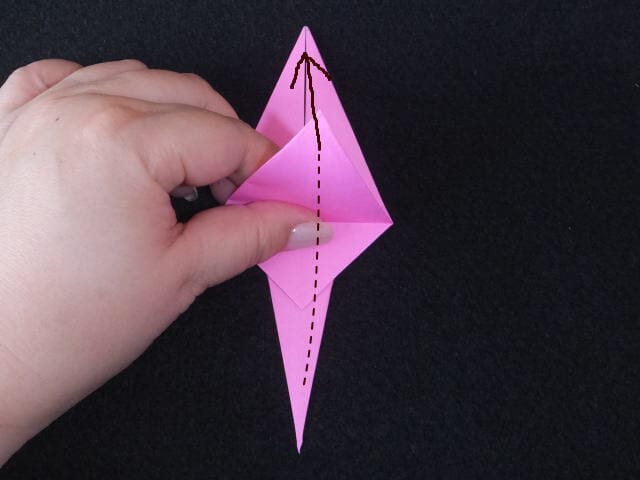
STEP 11. As shown, fold it sideways from the center up toward the top.
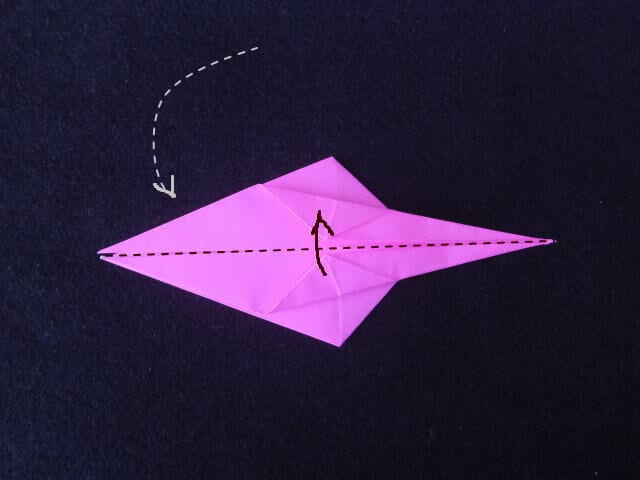
STEP 12. Halfway through the fold, pinch the crease at the center with your fingers.
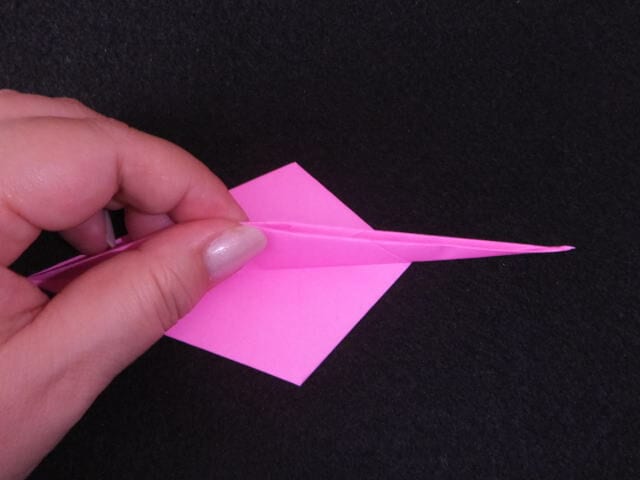
STEP 13. Fold the back side into the same shape, then flip the model upside down.
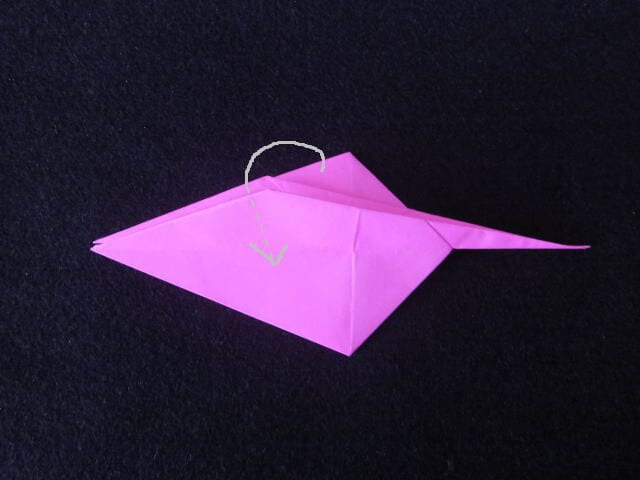
STEP 14. Open the wings out sideways from the fold line.
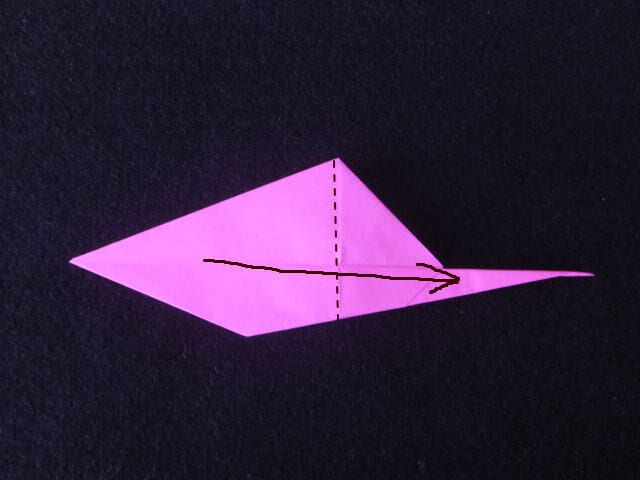
STEP 15. Open the wing on the left side over to the back.
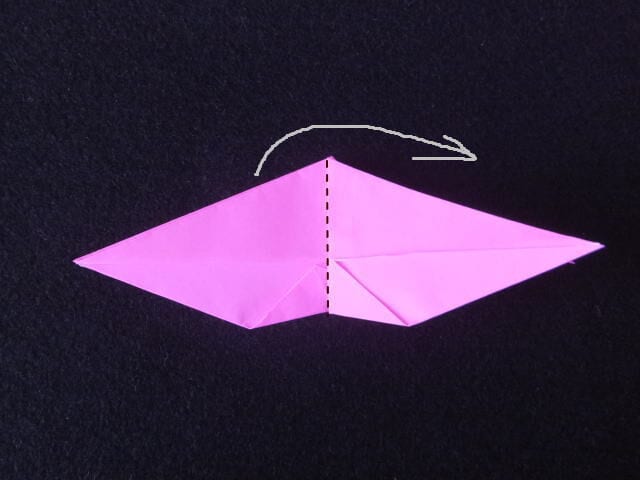
STEP 16. Fold the upper wing from the dotted line so that the ● marks meet.
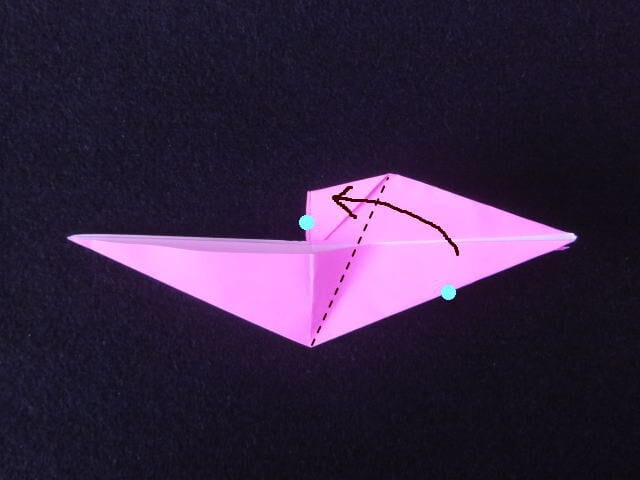
STEP 17. Once the top is folded, fold the back side in the same way.
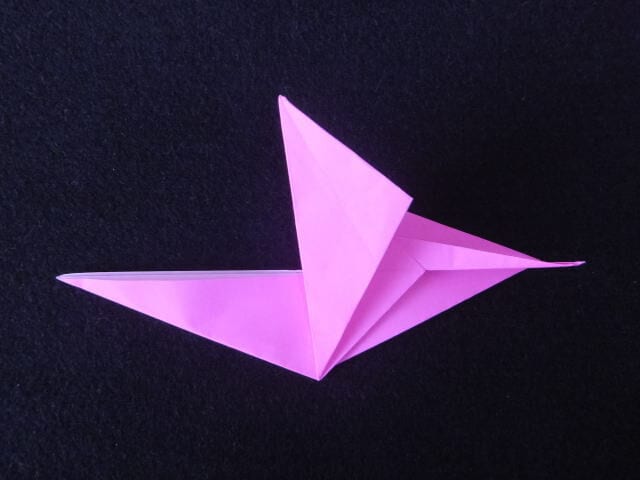
STEP 18. The thicker end is the head and the thinner end is the tail. Fold the head side along the dotted line, then fold the back side in the same way.
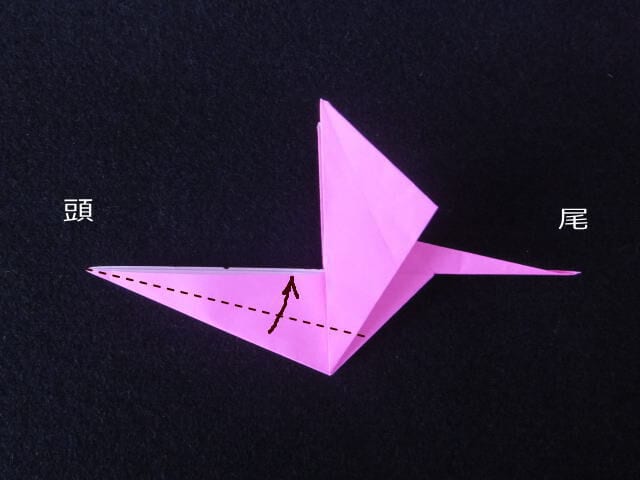
STEP 19. Press a crease along the dotted line.
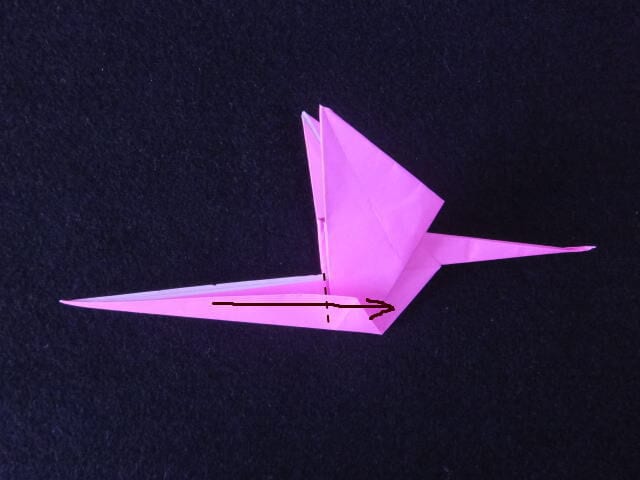
STEP 20. After creasing, unfold it back to its original position, then fold it in half as shown.
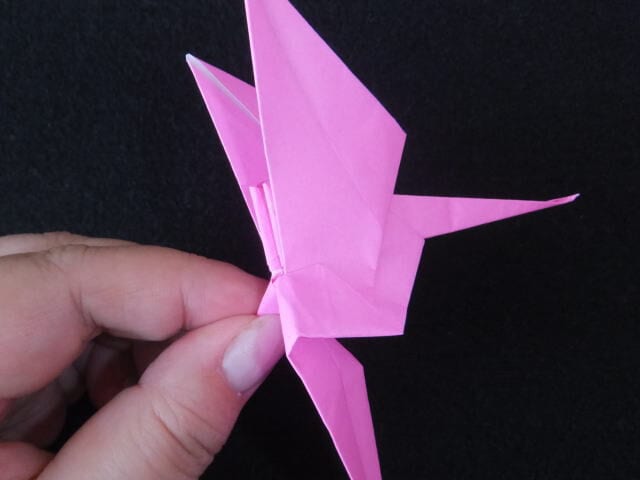
STEP 21. Once folded, fold it in half again to restore the original shape.
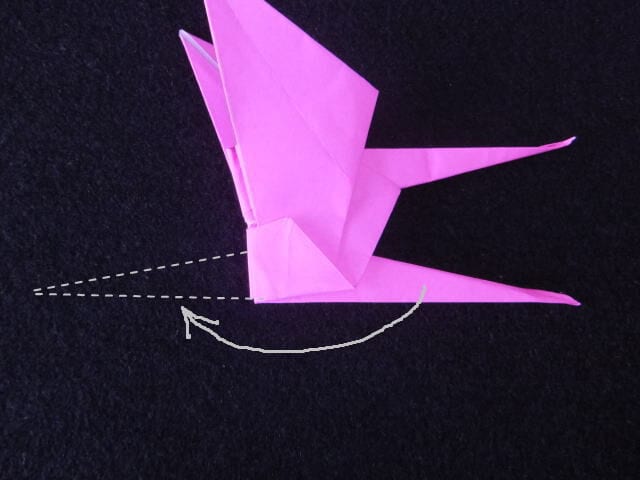
STEP 22. From here, repeat the folds of steps 19 to 21 about two or three times.
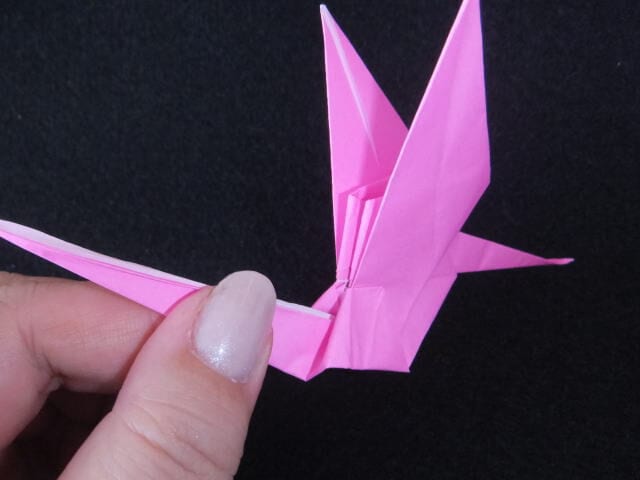
STEP 23. Fold it over toward the tail side.
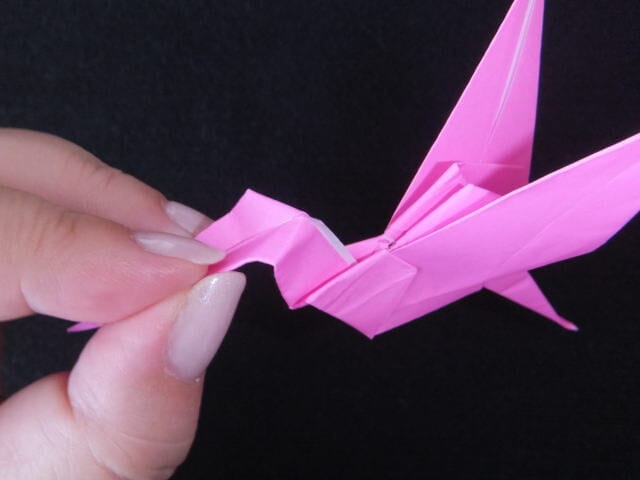
STEP 24. Fold the head side back and forth two or three times in the same way, then fold the head in half and fold the front tip in to finish it off.
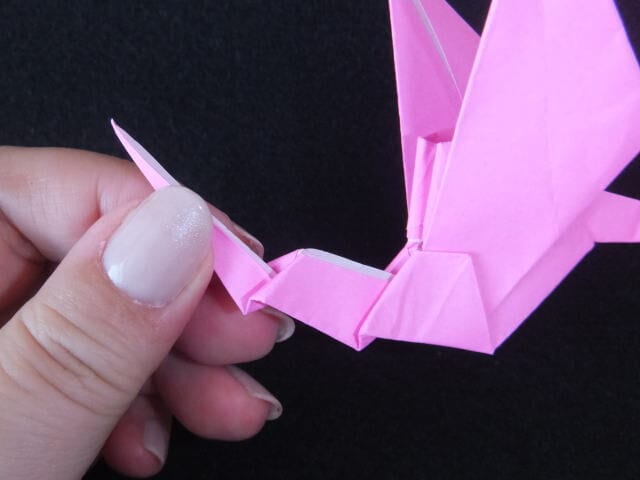
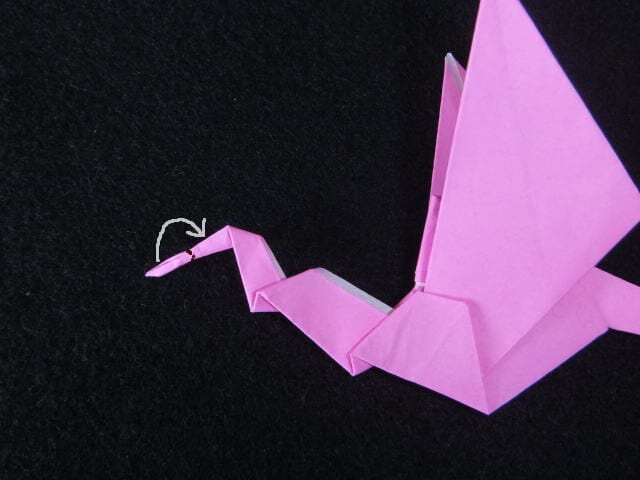
STEP 25. Fold the tail back and forth in the same way as the head.
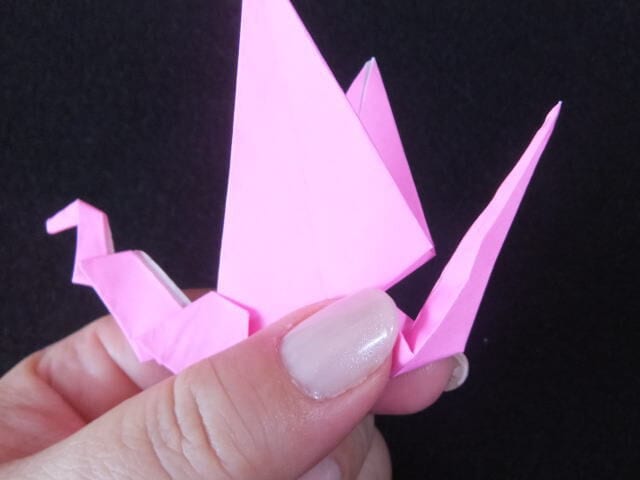
STEP 26. Point the front tip upward.
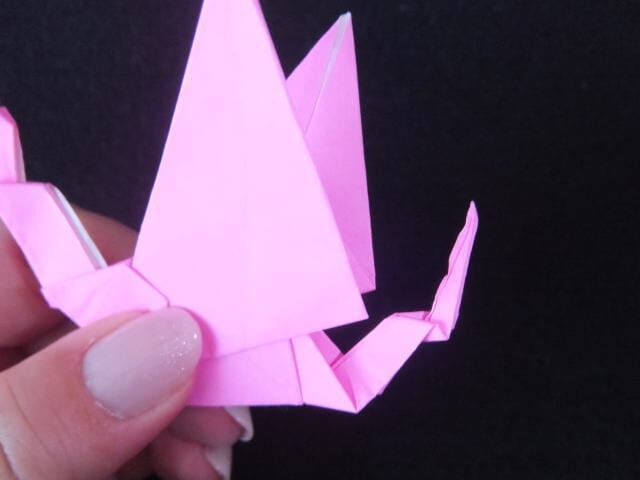
STEP 27. Fold the wings down along the dotted line.
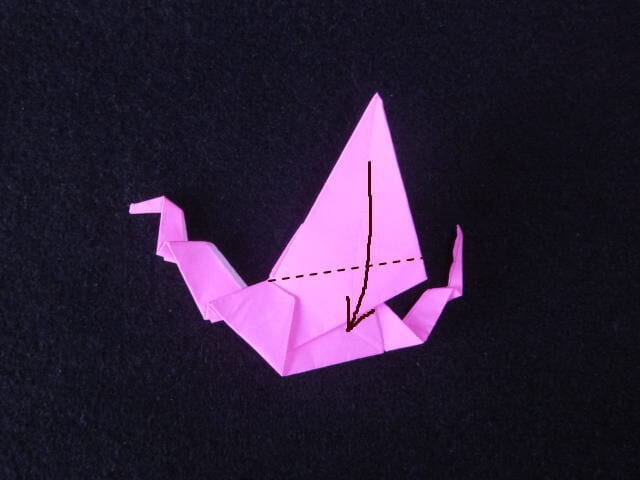
STEP 28. Fold them up along the dotted line so that the creases align.
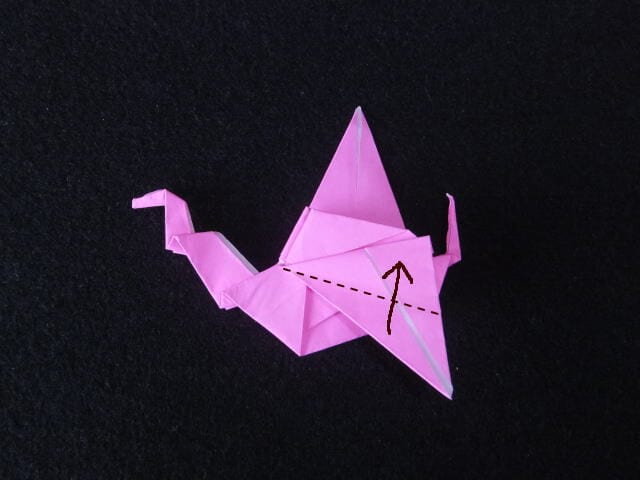
STEP 29. Fold them down again along the dotted line.
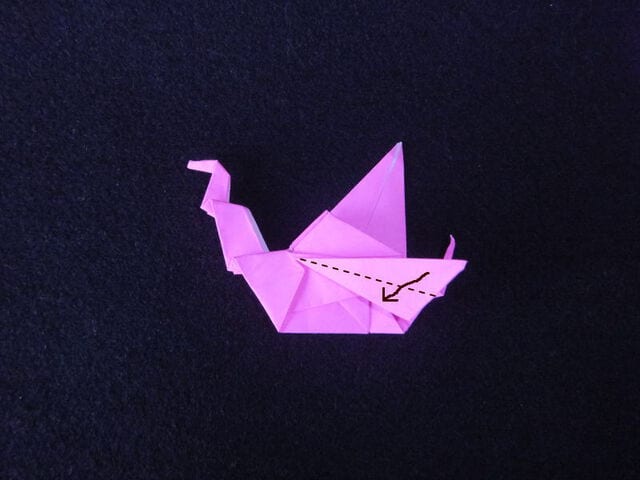
STEP 30. Fold the other side in the same way.
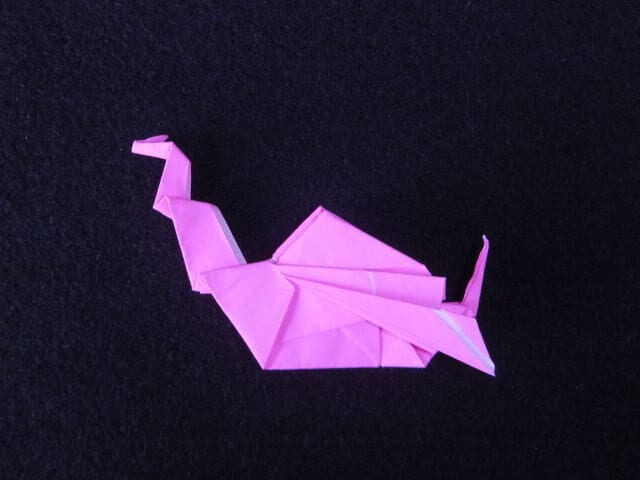
STEP 31. Viewed from above: spread the folded wings and shape them.
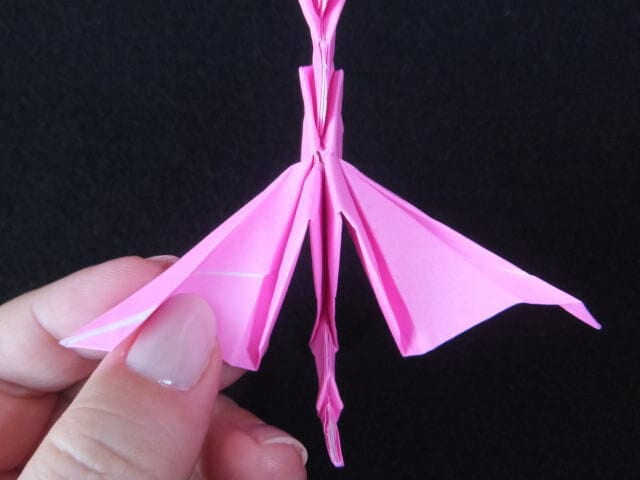
STEP 32. Your dynamic dragon is complete!
[Points when folding]
Above all, crisp, accurate creases are the key to folding a cool-looking dragon.
The middle folds overlap a great deal, so press them down extra firmly.
Why not fold a majestic dragon from special gold origami paper?




