
Origami Shrimp Sushi
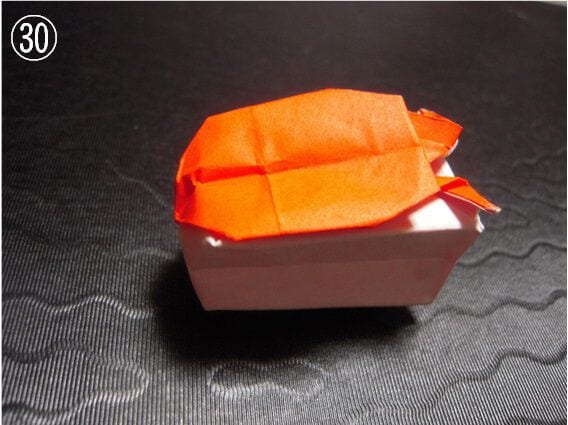
Some origami models belong on a shelf, but this one belongs on a little paper plate next to a folded teacup and a pair of chopsticks. The charm is how instantly readable it is: a rounded pillow of rice with a striped shrimp draped over the top, the sort of thing you spot in a sushi-shop window and immediately want to reach for.
What makes it satisfying to fold is how much technique is packed into so little paper. There is a layer-building setup that pays off later, plenty of crisp accordion pleating, and a final puff of air that turns something flat into something that genuinely looks good enough to eat. Fold two or three, arrange them on a plate, and lunch is served.
Shrimp sushi is one of those origami models people smile at before they work out what it is: a soft white pillow of "rice" with a striped shrimp folded over the top. Everything comes from one square sheet — no cutting, no glue — and the last puff of air is what gives it that just-served, rounded look.
How to fold origami shrimp sushi
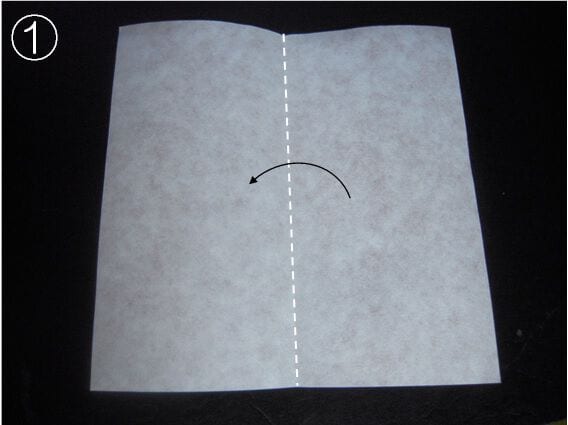
STEP 1. Fold the square in half.
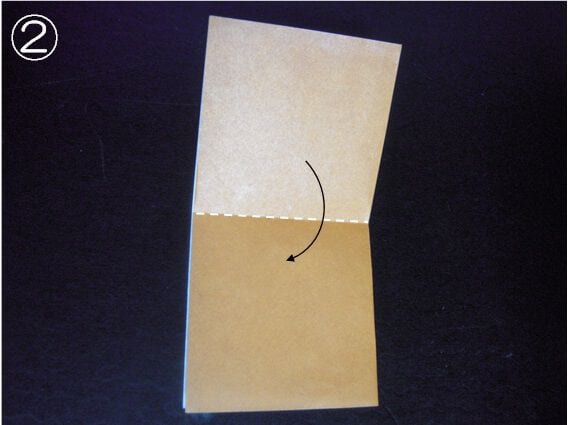
STEP 2. Fold it in half again.
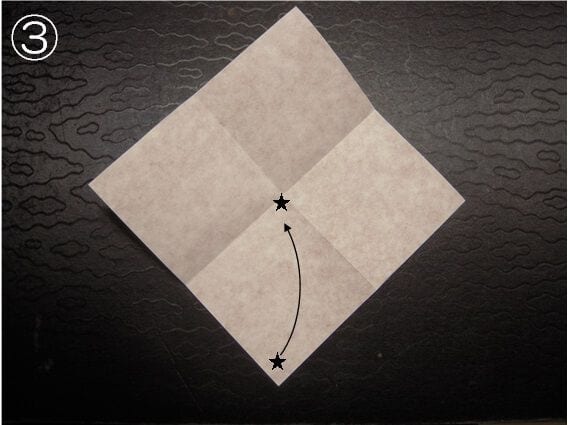
STEP 3. Unfold everything, then fold so that the two ★ marks meet.
STEP 4. Turn the paper over. Of the three ★ corners, fold the middle one in so that it lines up with the others.
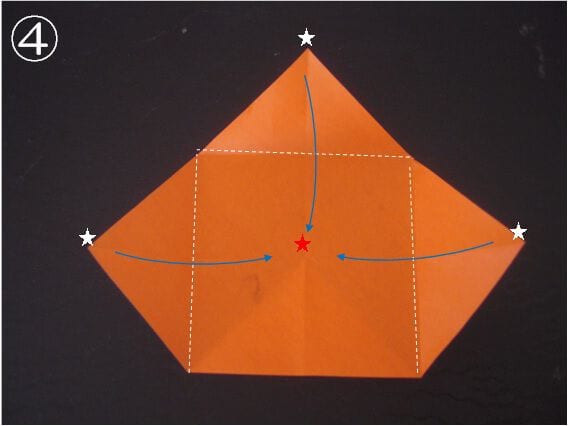
STEP 5. It should look like this.
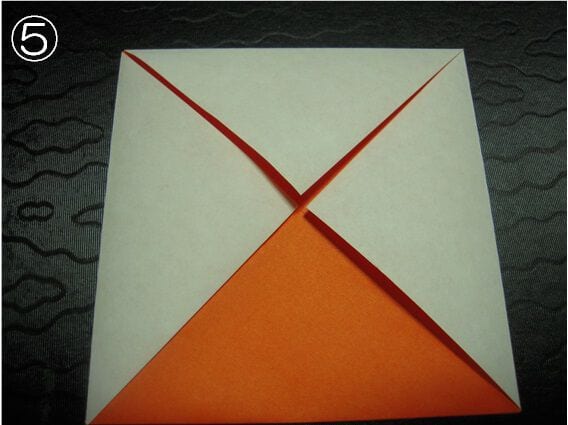
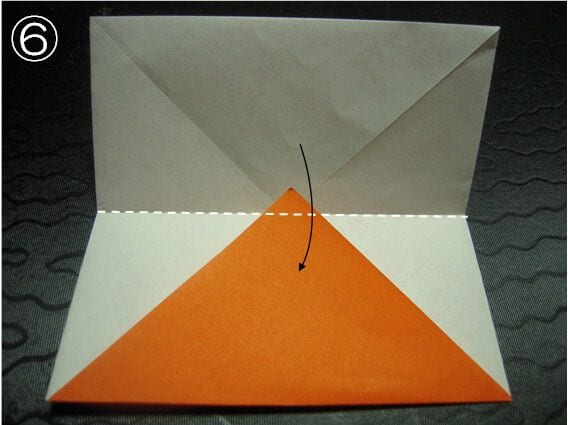
STEP 6. Turn it over and fold it in half.
STEP 7. Press along the ▲ line and fold that part inside.
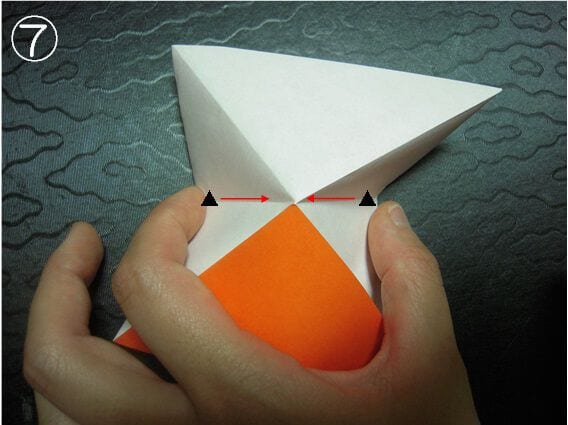
STEP 8. You now have a triangle like this.
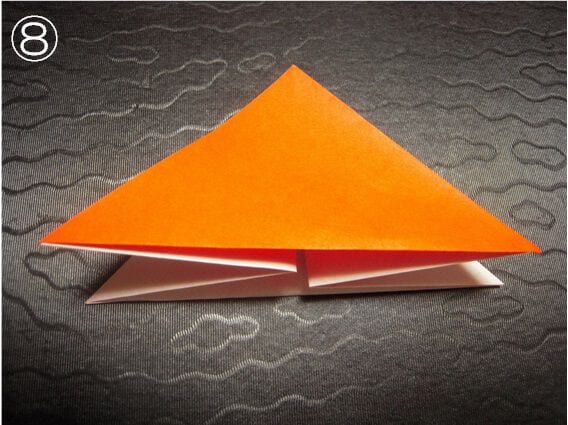
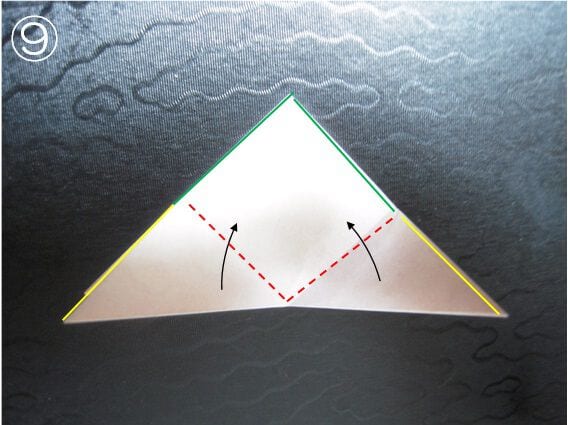
STEP 9. Turn it over and fold so that the yellow line lands on the green line.
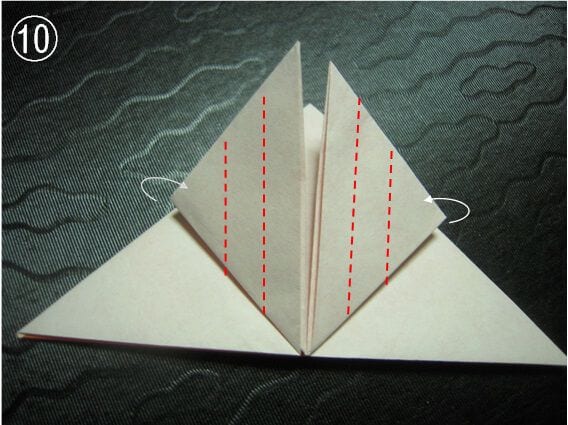
STEP 10. Fold the edge in so that it meets the dotted line.
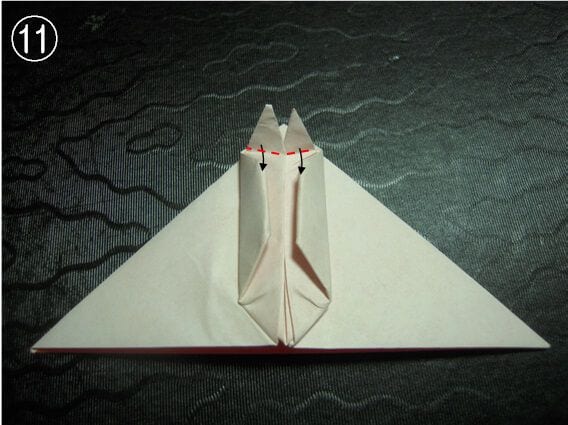
STEP 11. Fold it back down along the dotted line.
STEP 12. Tuck the tip in.
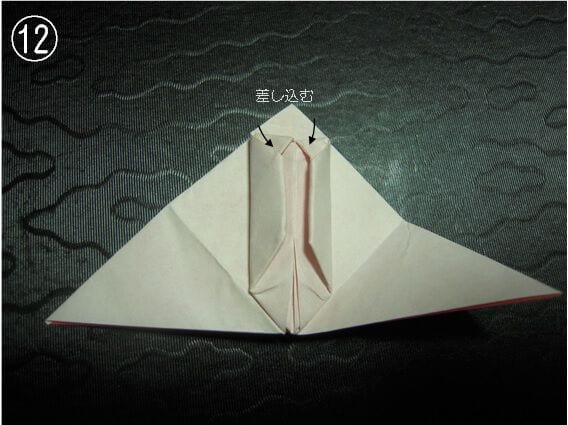
STEP 13. Fold upward along the dotted line, then unfold again to leave a crease.
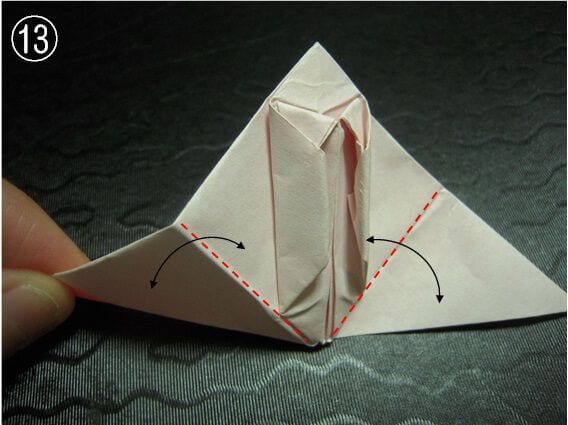
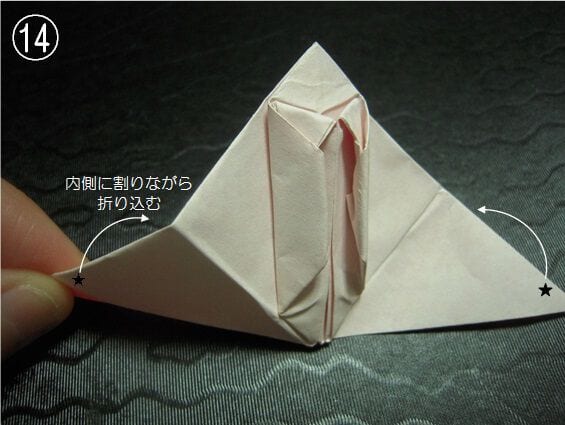
STEP 14. Hold the ★ point and fold it inside, folding the model in half.
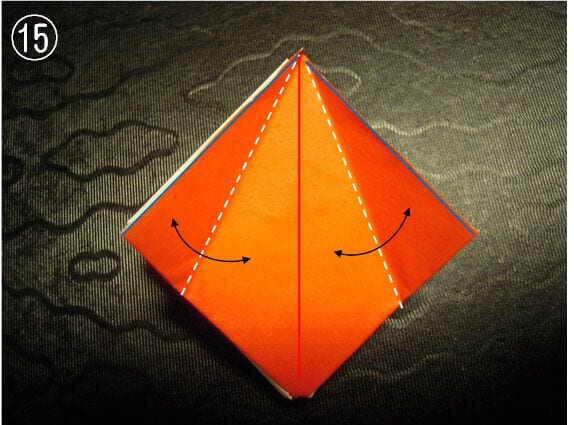
STEP 15. Turn it over and fold the flap back so that the blue line lines up with the red line.
STEP 16. Pinch one of the ★ sections and fold it downward.
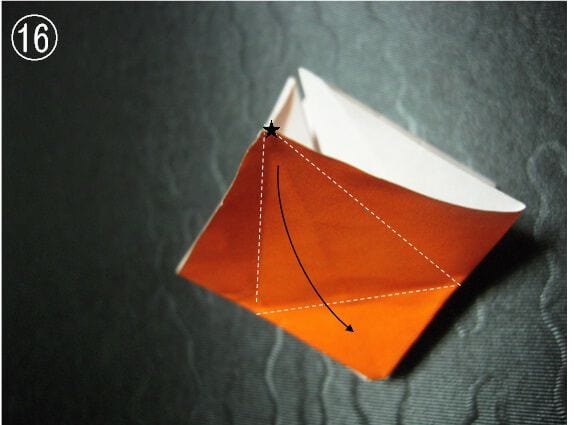
STEP 17. Carry on folding it in the same direction.
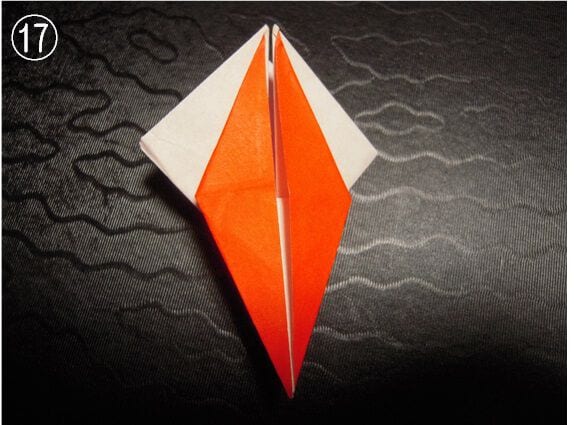
STEP 18. Turn the model over and open the page.
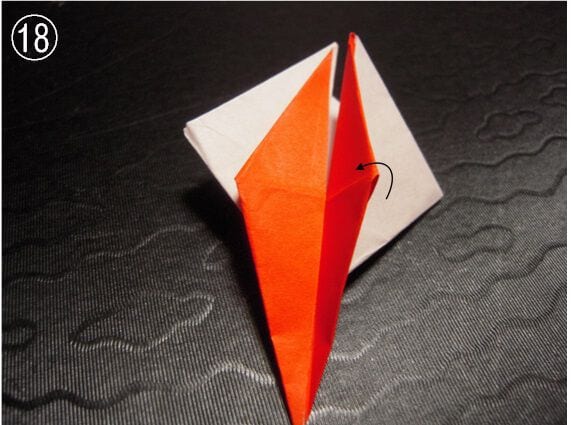
STEP 19. Fold it in so that the edge meets the dotted line.
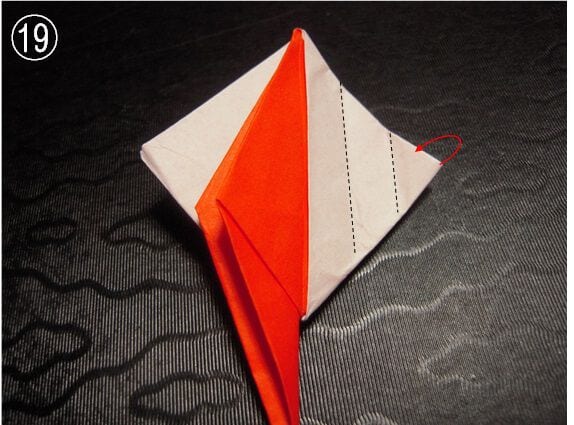
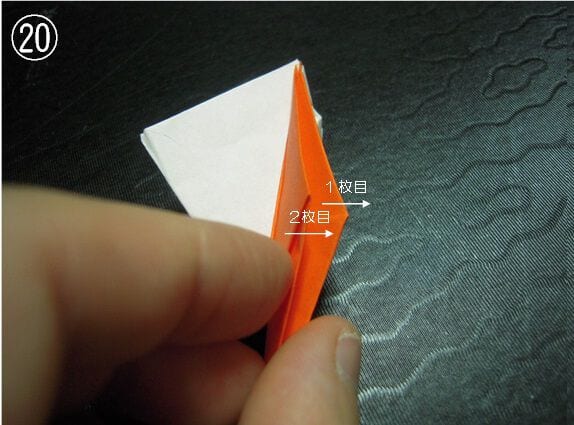
STEP 20. Turn two layers of paper over to the other side.
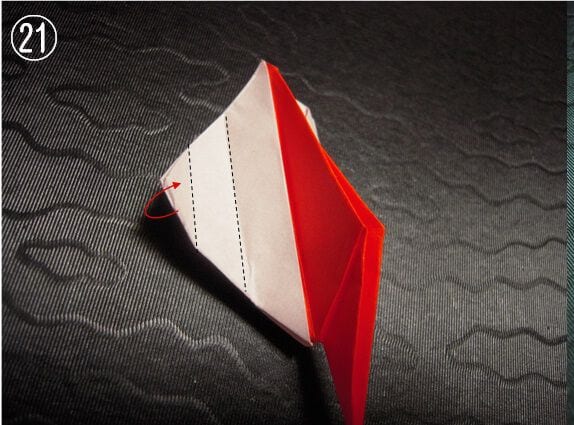
STEP 21. Fold along the dotted line.
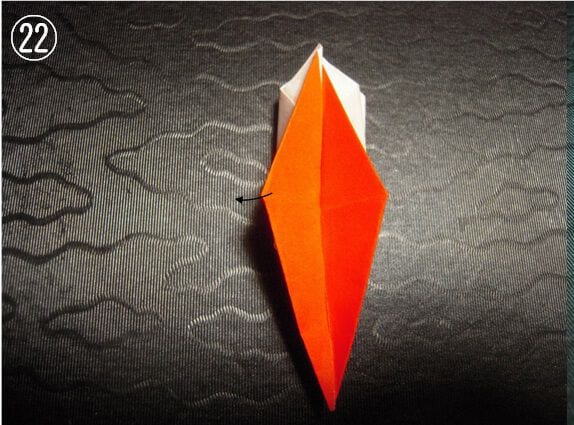
STEP 22. Turn one layer over — you are almost finished!
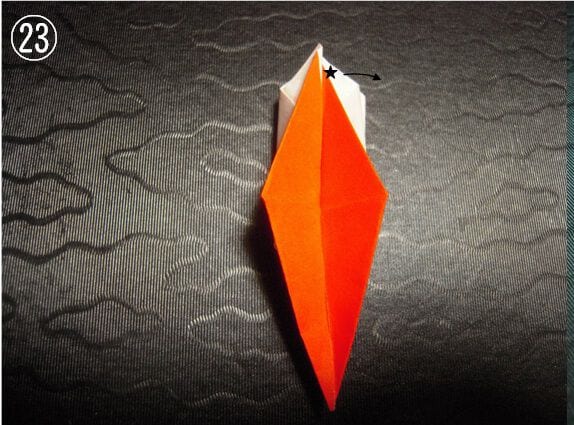
STEP 23. Hold the ★ part and pull it out sideways.
STEP 24. It opens out like this.
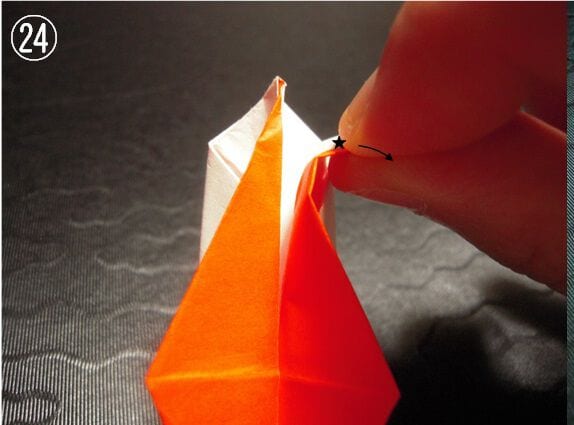
STEP 25. Fold it over, folding the model in half.
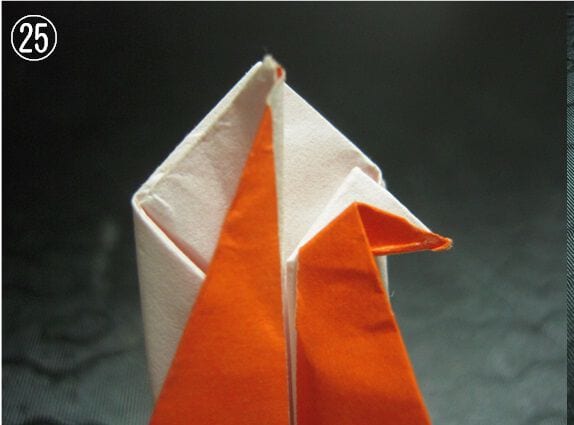
STEP 26. Fold the other side in exactly the same way.
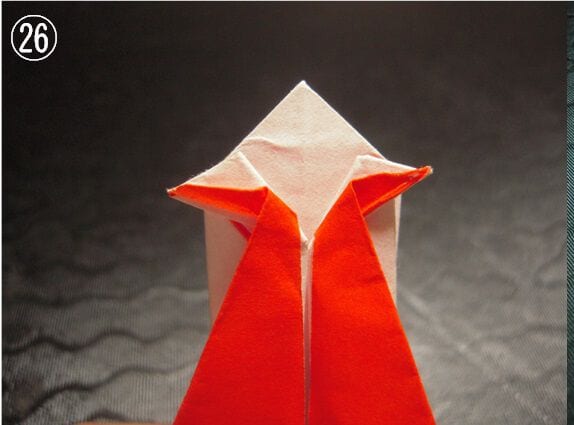
STEP 27. Fold the tip up.
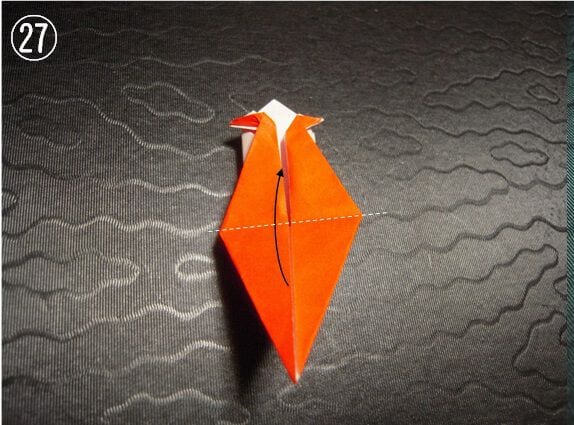
STEP 28. Fold the tip of the folded triangle inward along the dotted line, working through the layers one at a time.
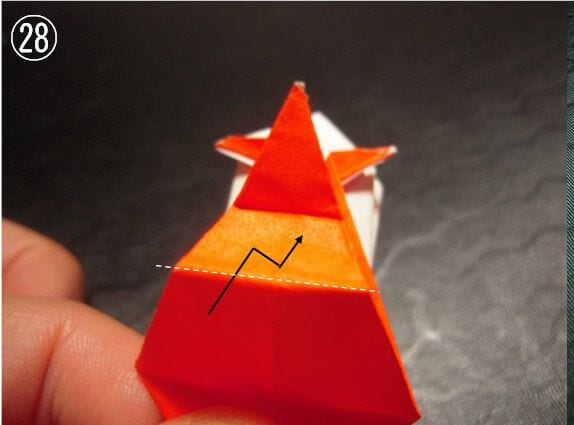
STEP 29. Fold the corners inward.
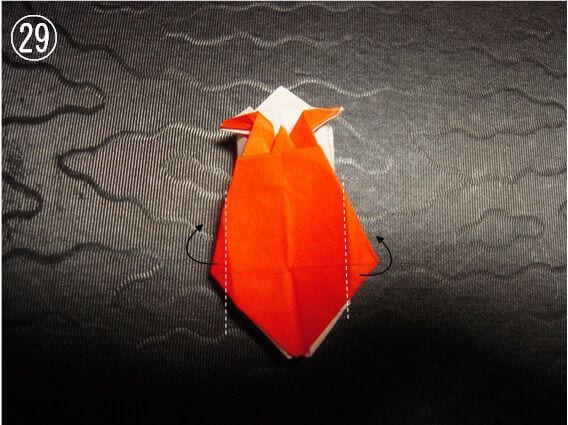
STEP 30. All done — puff up the rice part and your origami shrimp sushi is ready to serve!
Tips for folding
The paper gets thicker with every layer and stiffer with every step, and the section that "rolls up" is the thickest of all. Press each crease down firmly with a ruler before moving on, and your shrimp will hold its shape much better.




