
Origami Elf's Face
An elf's face is one of those folds that looks impressive but is really just patience plus a good crease pattern. This one starts from an 8x8 matrix base — a dense grid of pre-creases that does most of the hard work before you even begin shaping.
Once the grid is down, the magic is in the inside reverse-folds that pull the pointy ears out from the sides. Work the back the same way so it looks good from every angle, give it a little turn to set the face just right, and finish with a drawn-on (or googly) pair of eyes and a smile. It's a fun, slightly advanced make that's perfect for the holidays — pop it on the tree or tape it to a card.
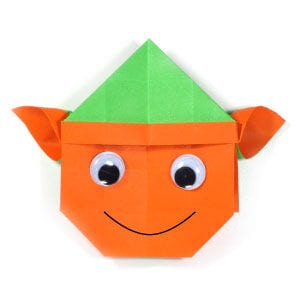
This page is for those who want instructions to fold an origami Elf's face.
The face of origami Elf starts from a 8x8 matrix base. One special folding technique involved with this model is inside reverse-fold.
Before working on this model, you need to know what valley-fold and mountain-fold are. If you know these two folding techniques, then you will have no problem making an origami Elf's face.
If you are ready, then let's get started.
The paper I am using here is a double-sided origami paper with 15cm x 15cm square dimension.
This is the front side of paper.
This is the back side of paper.
STEP 1.
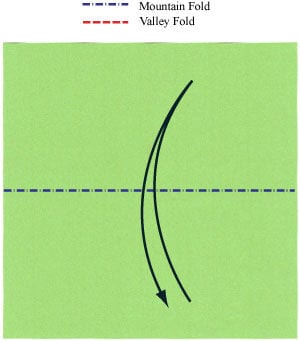
Let's start with the front side of the paper facing up. Prepare to apply a horizontal “mountain-fold” and then “unfold”.
STEP 2.
Apply the horizontal “mountain-fold” of the step #1 and then “unfold”. Prepare to apply a vertical “mountain-fold” and then “unfold”.
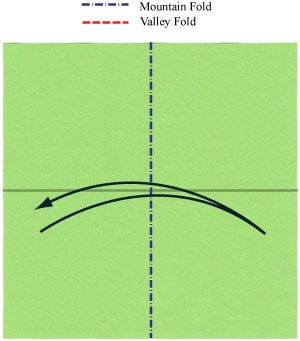
STEP 3.
Apply the vertical “mountain-fold” of the step #2 and then “unfold”. Prepare to apply a horizontal “gate-fold” and then “unfold”.
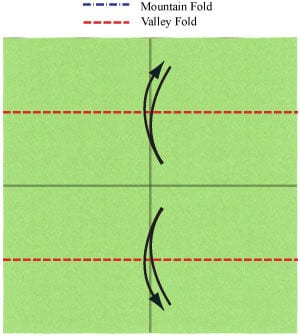
STEP 4.
Apply the horizontal “gate-fold” of the step #3 and then “unfold”. Prepare to apply a vertical “gate-fold” and then “unfold”.
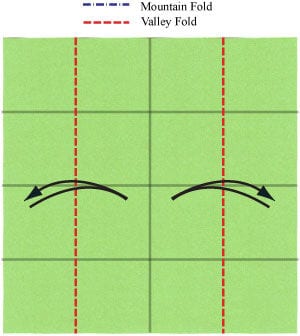
STEP 5.
Apply the vertical “gate-fold” of the step #4 and then “unfold”. Prepare to apply four horizontal “valley-folds” and then “unfold”.
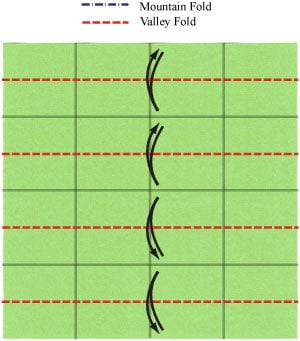
STEP 6.
Apply four horizontal “valley-folds” of the step #5 and then “unfold”. Prepare to apply four vertical “valley-folds” and then “unfold”.
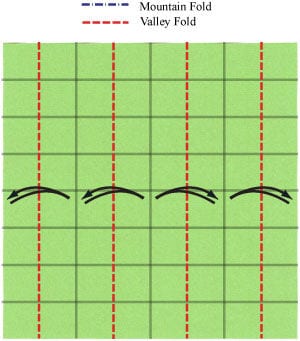
STEP 7.
Apply four vertical “valley-folds” of the step #6 and then “unfold”. You have completed making a “8x8 matrix base”.
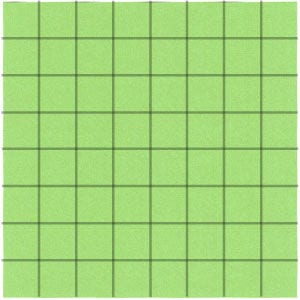
STEP 8.
Prepare to apply a horizontal “valley-fold”.
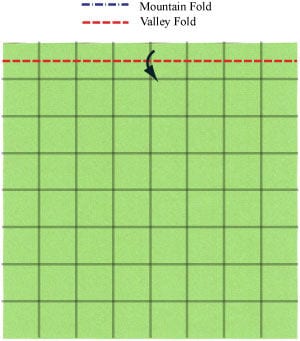
STEP 9.
Apply the horizontal “valley-fold” of the step #8. Prepare to turn the paper over.
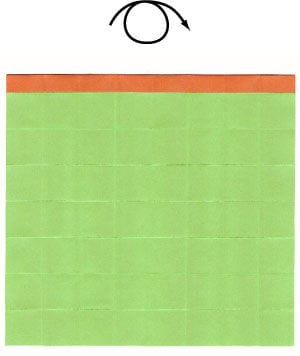
STEP 10.
Turn the paper over. Prepare to apply a horizontal “valley-fold”.
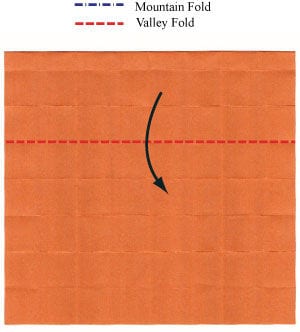
STEP 11.
Apply the horizontal “valley-fold” of the step #10. Prepare to turn the paper over.
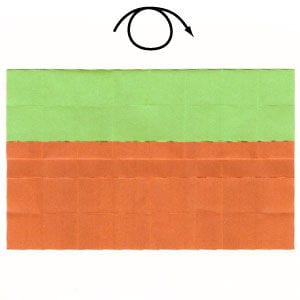
STEP 12.
Turn the paper over. Prepare to apply two “valley-folds”.
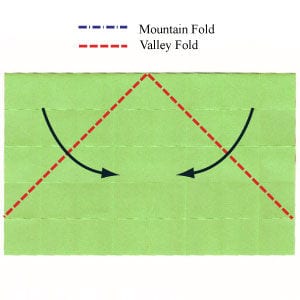
STEP 13.
Apply two “valley-folds” of the step #12. Prepare to lift the left front-most layer.
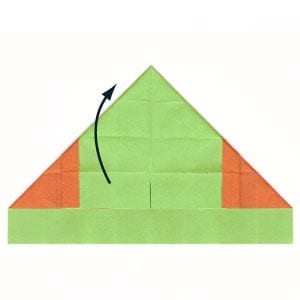
STEP 14.
Lift the left front-most layer. Prepare to apply a “valley-fold”.
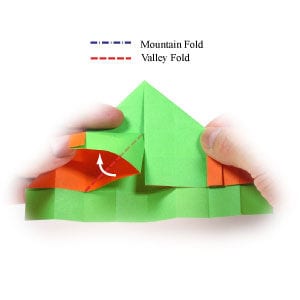
STEP 15.
Apply the “valley-fold” of the step #14. Prepare to apply an “inside reverse-fold”.
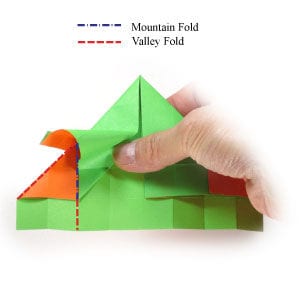
STEP 16.
Apply the “inside reverse-fold” of the step #15. Prepare to repeat the steps #13-16 to the right side.
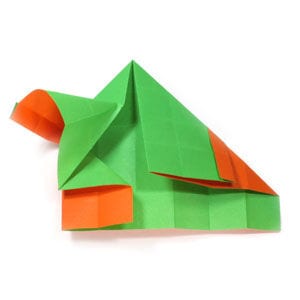
STEP 17.
Repeat the steps #13-16 to the right side. Prepare to apply two “valley-folds”.
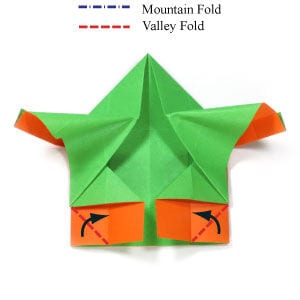
STEP 18.
Apply two “valley-folds” of the step #17. Prepare to turn the model over.
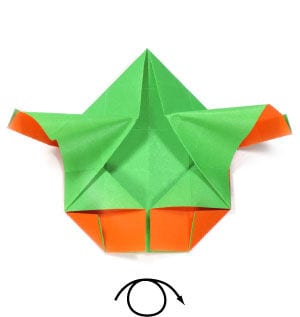
STEP 19.
Turn the model over. Prepare to rotate the model by 45 degrees.
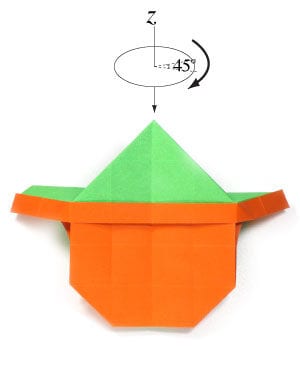
STEP 20.
Rotate the model by 45 degrees. Prepare to apply a “valley-fold”.
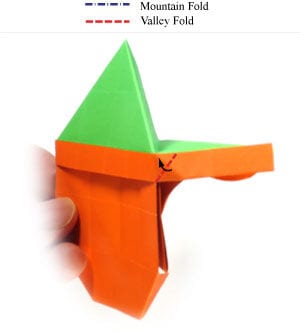
STEP 21.
Apply the “valley-fold” of the step #20. Prepare to rotate the model by 135 degrees.
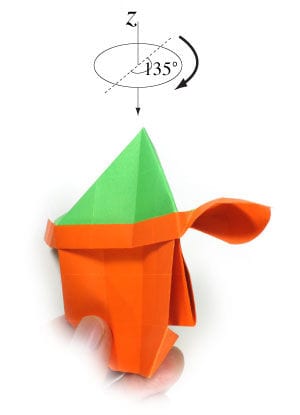
STEP 22.
Rotate the model by 135 degrees. Prepare to apply a horizontal “valley-fold”.
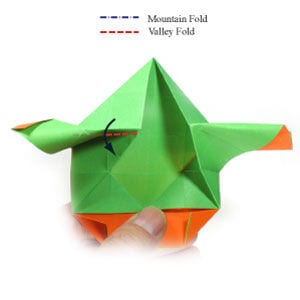
STEP 23.
Apply the horizontal “valley-fold” from the previous step. Insert the finger into the ear to make it smooth. Prepare to turn the model over.
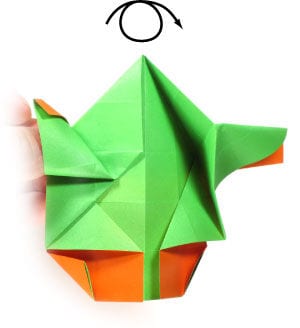
STEP 24.
Turn the model over. You can see the elf's ear on the right. Prepare to rotate the model by 45 degrees.
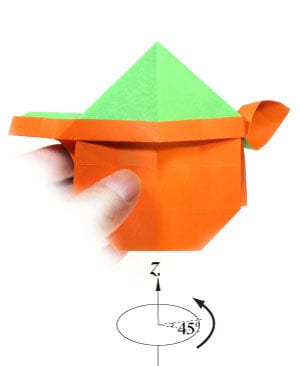
STEP 25.
Rotate the model by 45 degrees. Prepare to repeat the steps #20-24.
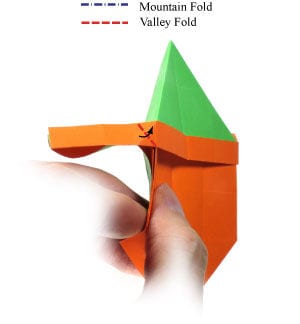
STEP 26.
Repeat the steps #20-24. Prepare to draw eyes and mouth.
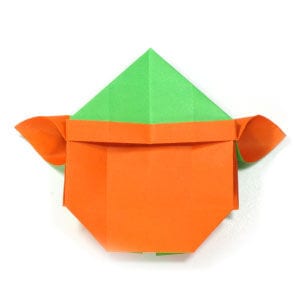
STEP 27.
Draw eyes and mouth. Here I put googly eyes instead. Congratulations! You have completed making an origami elf's face.




