
Origami Butterfly Based on Open Sink-Fold
A butterfly might be the most rewarding thing you can fold from a single square of paper. This one isn't the usual five-minute model — it leans on a couple of proper techniques (the open sink-fold and the inside reverse-fold) that unlock a surprisingly lifelike shape with flared, symmetrical wings.
Don't let the 29 steps intimidate you. If you're comfortable with basic valley- and mountain-folds, you already have everything you need — the rest is just repeating those moves with care. Pick a paper you love, maybe a different color on each side so the wings flash as they open, and enjoy the process. By the final step you'll have a little butterfly that looks ready to flutter off the page.
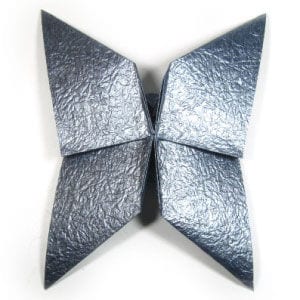
This page is for anyone who wants instructions for folding an origami butterfly (part I).
This origami butterfly starts from a balloon base. The essential folding technique you will learn from this model is the open sink-fold. You will also apply the inside reverse-fold many times.
Before working on this model, you need to know what a valley-fold and a mountain-fold are. If you know these two folding techniques, then you will have no problem making the origami butterfly.
If you are ready, then let’s get started.
You can use any kind of paper to fold this origami butterfly. Here I am using the same color paper for both the front and back sides, but you can use single-sided colored paper without any problem. Make sure the paper you use is a square (all sides equal and all angles equal to 90 degrees). The paper I am using here is a 14 cm x 14 cm square.
This is the front side of the paper.
This is the back side of the paper.
STEP 1.
Let us start with the “balloon base”. If you don’t know what a balloon base is, follow the link above to prepare this base. If you already have the balloon base ready, prepare to rotate it by 180 degrees.
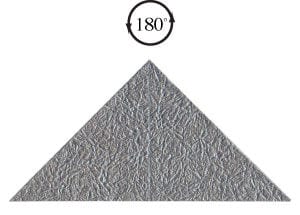
STEP 2.
Rotate the base by 180 degrees. Prepare to apply a horizontal valley-fold at one-third of the height from the bottom.
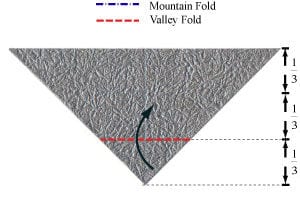
STEP 3.
Apply the horizontal valley-fold from step 2. This fold is actually easy to apply, since the top of the triangle should be located at the center of the height. Prepare to unfold.
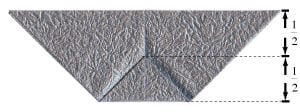
STEP 4.
Unfold the previous valley-fold from step 3. Prepare to apply an “open sink-fold” using the crease line you just made.
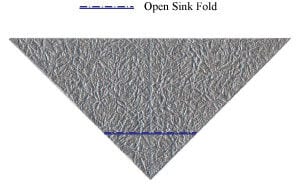
STEP 5.
Apply the “open sink-fold” according to step 4. If you don’t know what an “open sink-fold” is, follow the link above to learn this important folding technique.
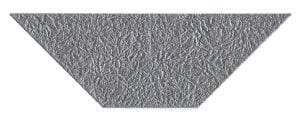
STEP 6.
This is what you get after applying the “open sink-fold”. Let us turn the model over.
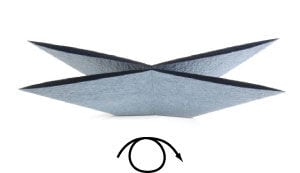
STEP 7.
Turn the model over. You can clearly see the effect of the “open sink-fold” here. Let us prepare to turn the model over again to continue our work.
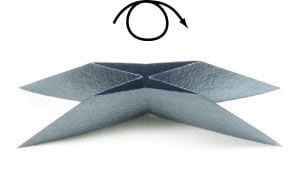
STEP 8.
Turn the model over. Prepare to apply an “inside reverse-fold”.
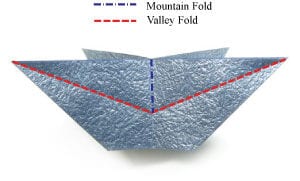
STEP 9.
Apply the “inside reverse-fold” from step 8. Prepare to rotate the model by 180 degrees.
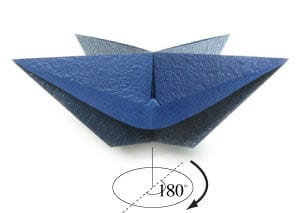
STEP 10.
Rotate the model by 180 degrees. Prepare to apply an “inside reverse-fold”.
STEP 11.
Apply an “inside reverse-fold”. Prepare to look at the model from the top.
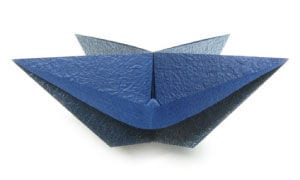
STEP 12.
Let’s look at the model from the top. Prepare to turn the model over.

STEP 13.
Turn the model over. Prepare to rotate the model by 90 degrees.
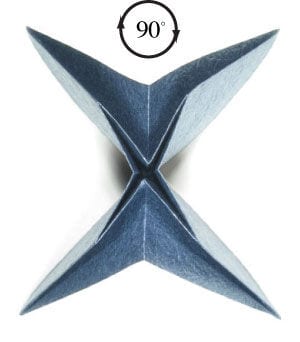
STEP 14.
Rotate the model by 90 degrees. Prepare to lay the model down by rotating it a further 90 degrees.
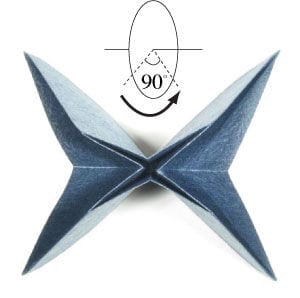
STEP 15.
Lay the model down by rotating it a further 90 degrees. Prepare to apply a valley-fold and then unfold.
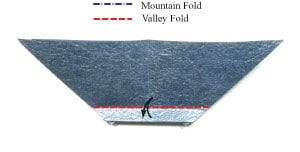
STEP 16.
Apply a valley-fold and then unfold. Prepare to rotate the model 90 degrees clockwise.
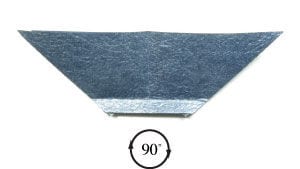
STEP 17.
Rotate the model 90 degrees clockwise. Prepare to apply a valley-fold.
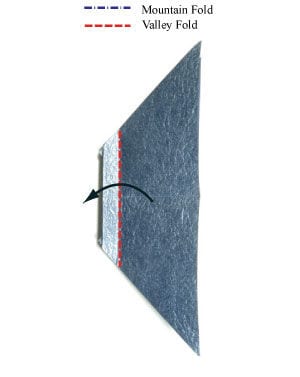
STEP 18.
Start applying the valley-fold from step 17.
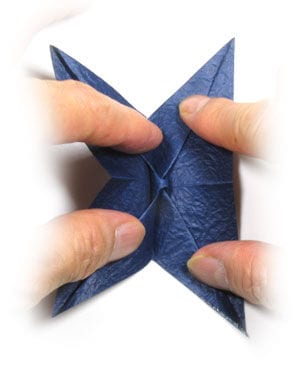
STEP 19.
Finish applying the valley-fold from step 17. Now, expand the center region encircled by a dotted ellipse.
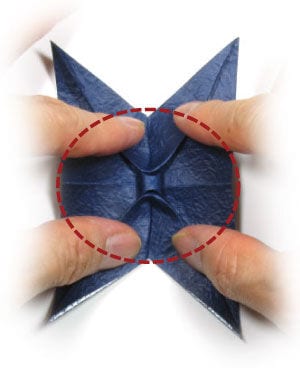
STEP 20.
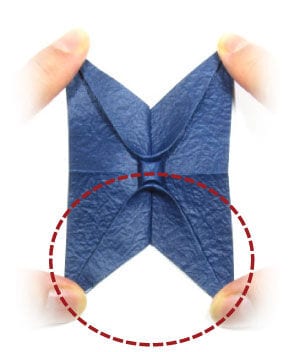
Finish expanding the center region. Prepare to expand the region encircled with a dotted ellipse.
STEP 21.
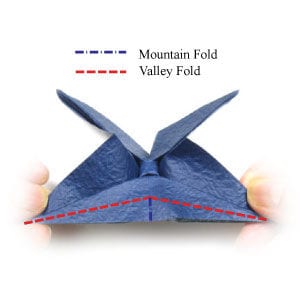
Expand the region encircled with a dotted ellipse from step 20. Prepare to apply an “inside reverse-fold”.
STEP 22.
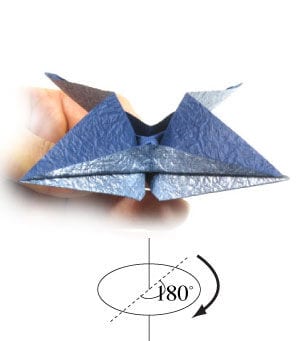
Apply the “inside reverse-fold” from step 21. Prepare to rotate the model by 180 degrees.
STEP 23.
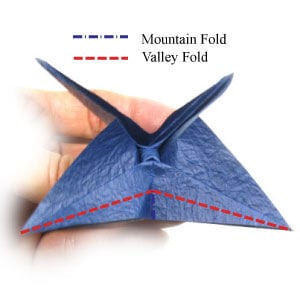
Rotate the model by 180 degrees. Prepare to apply an “inside reverse-fold”.
STEP 24.
Apply the “inside reverse-fold” from step 23.
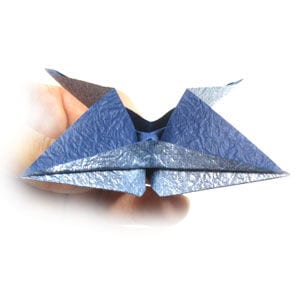
STEP 25.
Lay the model down. Flatten out the center region encircled with a dotted ellipse.
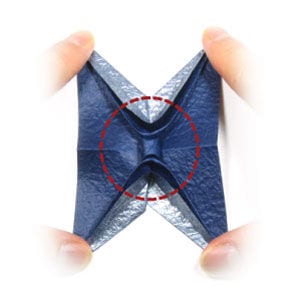
STEP 26.
Flatten out the center region. Prepare to turn the model over.
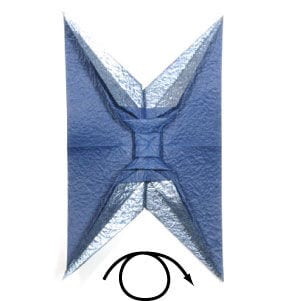
STEP 27.
Turn the model over. Prepare to apply a 90-degree valley-fold.
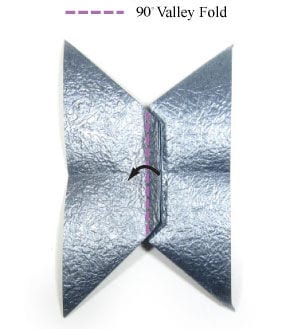
STEP 28.
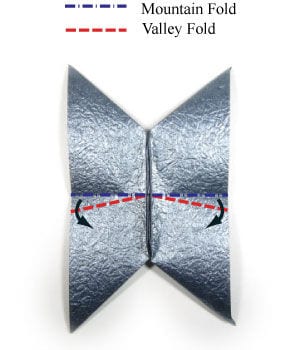
Apply the 90-degree valley-fold from step 27. Prepare to apply a mountain-fold and then a valley-fold on both the left and right wings.
STEP 29.
Apply the mountain- and valley-folds on both the left and right wings according to step 28. Congratulations! You have completed an origami butterfly based on the “open sink-fold”.




