
Closed-Open Sink Fold in Origami
The closed-open sink fold is the fancy older sibling of the sink folds - it does two different things at once, one on each side of the paper. On the left you get a closed sink; on the right, an open sink. That combination lets you tuck paper away in a way neither move could do alone, and it's the kind of technique that makes box-like and geometric models look impossibly clean.
This tutorial walks through all ten steps on a balloon base and a square base, so you can see exactly how the double symbol translates into real folds. If you already know the closed and open sink folds, you are ready - grab a square of paper, ideally one you don't mind opening up, and follow along.
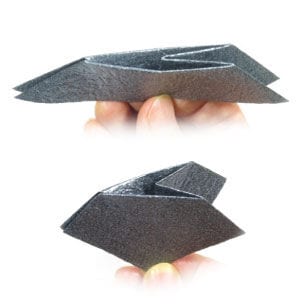
The closed-open sink fold is a combination of two techniques: a closed sink fold applied to the left side of the model and an open sink fold applied to the right. Before learning this move, it helps to know what the closed sink fold and the open sink fold look like on their own. In this tutorial, I will use both a square base and a balloon base to show what the closed-open sink fold does to a model.
The “closed-open sink fold” symbol is drawn as a “closed sink fold” line on the left and an “open sink fold” line on the right. Here we are applying the fold to both a balloon base and a square base.
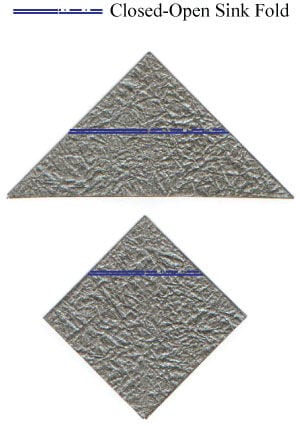
If we apply the “closed-open sink fold”, both the balloon and square bases turn into a base without a head. The instructions below show how to apply the closed-open sink fold in detail.
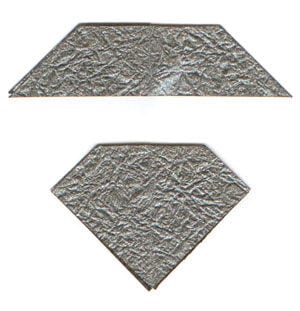
STEP 1.
We can start with either a “balloon base” or a “square base”. Here the “closed-open sink fold” is represented by a double line shown on the left.
STEP 2.
Here a valley fold is applied along the “closed-open sink fold” line on both the balloon and square bases. Prepare to open the paper.
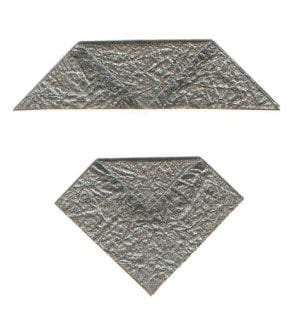
STEP 3.
Open the paper. This is the crease pattern (CP) of the closed-open sink fold. Prepare to apply the CP.
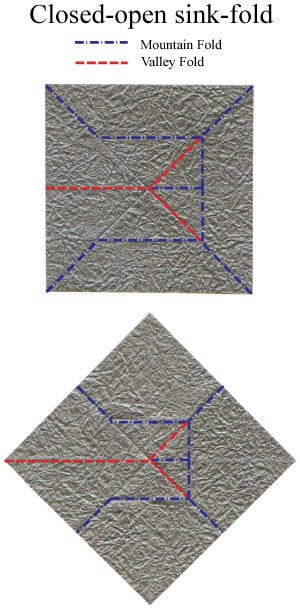
STEP 4.
Apply the CP from step 3. You have just finished applying an “open sink fold” on the right. Prepare to rotate the model by 180 degrees.
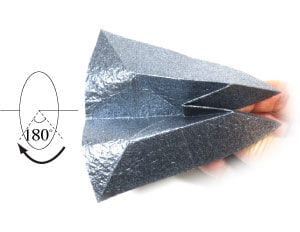
STEP 5.
Rotate the model by 180 degrees. Prepare to apply one valley fold and one mountain fold.
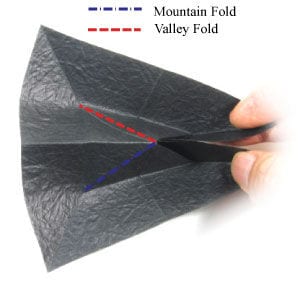
STEP 6.
Instead of applying one valley fold and one mountain fold as in the previous step, we can swap the two folds so that the mountain fold sits above the valley fold.
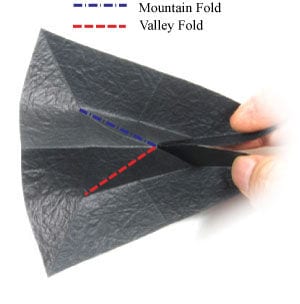
STEP 7.
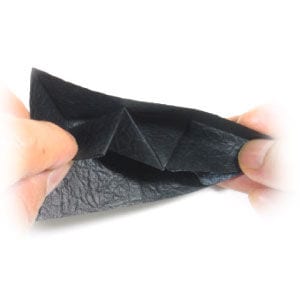
Apply one valley fold and one mountain fold as in step 5.
STEP 8.
Or apply one valley fold and one mountain fold as in step 6. As you can see here, you have two alternative ways to apply a closed sink fold on the left.
STEP 9.
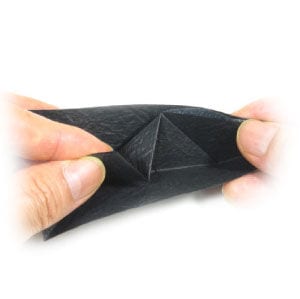
Complete the closed-open sink fold by closing the model. Prepare to rotate the model by 180 degrees.
STEP 10.
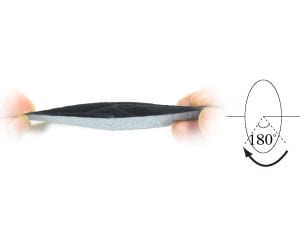
Rotate the model by 180 degrees. Now you have completed the closed-open sink fold.





