
Fruit Origami Base
Ever noticed how the juiciest-looking paper fruits all seem to share a secret? It's the fruit origami base — a compact little fortress of paper that quietly holds its shape while you transform it into apples, pears, or anything else your imagination can peel. If you have already folded the classic square base, you are ninety percent of the way there; this tutorial simply takes that familiar starting point and shows how a few valley folds and squash folds can coax it into something rounder and fruitier.
Don't worry if the steps look repetitive at first — that rhythm is the whole trick. Crease, squash, flip, repeat. By the final step you will be holding a tidy base that stands up on its own, and you will wonder why you didn't learn it sooner.
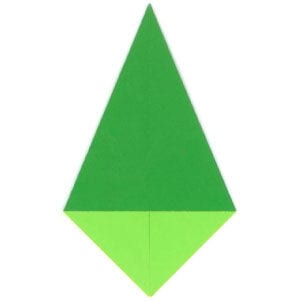
This page is for those who want to learn how to fold a fruit origami base.
The fruit origami base is derived from the well-known square base, and it can also be derived from the balloon base.
Before working on this model, you need to know what valley folds and mountain folds are. If you know these two folding techniques, then you will have no problem folding the fruit origami base.
If you are ready, then let’s get started.
The paper I am using here is a typical origami paper with 15cm x 15cm size.
This is the front side of the paper.
This is the back side of the paper.
STEP 1.
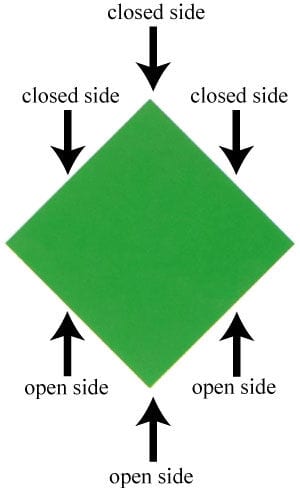
Start with a “square base”. Make sure that the open side is at the bottom of the square base.
STEP 2.
Prepare to apply two valley folds and then unfold.
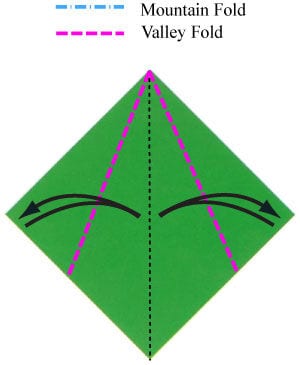
STEP 3.
Apply the two valley folds of step 2 and then unfold. Prepare to apply a “squash fold”.
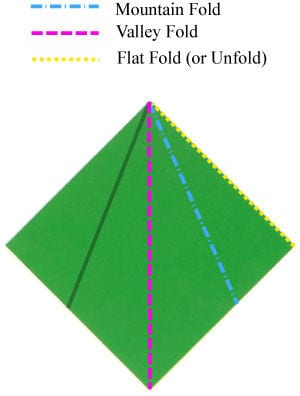
STEP 4.
Apply the “squash fold” of step 3. Prepare to apply a vertical valley fold.
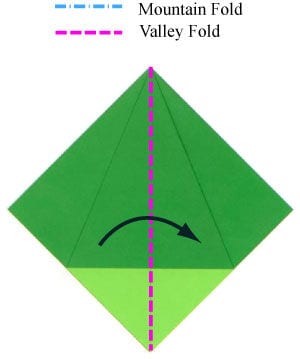
STEP 5.
Apply the vertical valley fold of step 4. Prepare to apply a “squash fold”.
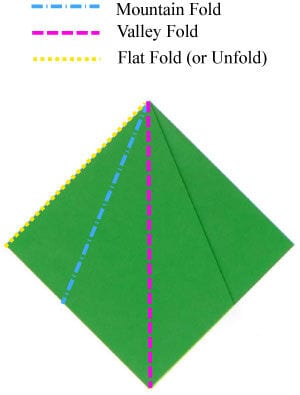
STEP 6.
Apply the “squash fold” of step 5. Prepare to turn the model over.
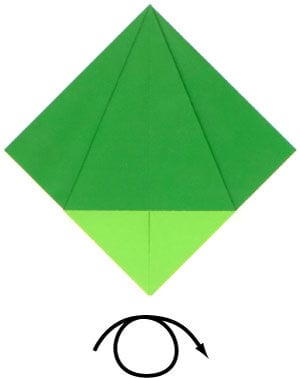
STEP 7.
Turn the model over. Prepare to apply two valley folds and then unfold.
STEP 8.
Apply the two valley folds of step 7 and then unfold. Prepare to apply a “squash fold”.
STEP 9.
Apply the “squash fold” of step 8. Prepare to apply a vertical valley fold.
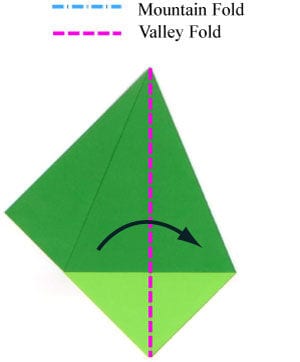
STEP 10.
Apply the vertical valley fold of step 9. Prepare to apply a “squash fold”.
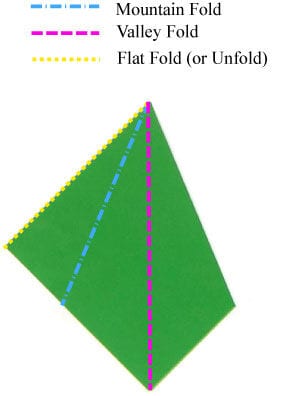
STEP 11.
Apply the “squash fold” of step 10. Congratulations! You have just completed the fruit origami base.




