Easy Origami Paper Heart
A paper heart might be the most universal little origami there is — instantly recognizable, endlessly giftable, and surprisingly satisfying to fold. This version keeps things friendly: it starts from the square base you may already know and eases you into one new move, the inside reverse fold, which turns out to be useful in all sorts of later projects. The best part is the choice built into it: you can stop partway for a heart on a single side, or carry on to give it a clean heart on both faces. Grab a square of red, pink, or any color you love, and in about fifteen minutes you will have a handful of charming hearts ready for a card, a garland, or a tiny surprise tucked into someone's pocket.
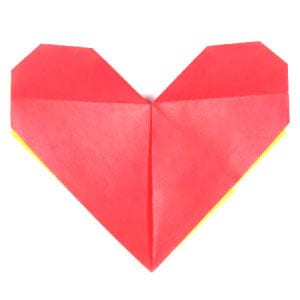
This page is for anyone who wants to fold a simple origami paper heart.
This origami heart is an easy model to fold. The one special folding technique you will learn here is the inside reverse fold.
Are you ready? Let us get started.
You can use any kind of paper to fold this origami heart. Here I am using a standard 15 cm x 15 cm sheet of origami paper.
This is the front (colored) side of the paper.

This is the back (white) side of the paper.

STEP 1
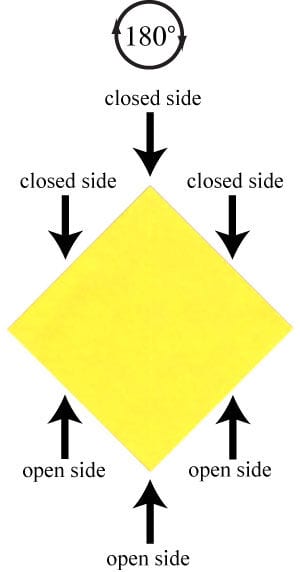
Start with a square base. If you do not know how to fold one, make a square base first. Prepare to rotate the square base by 180 degrees.
STEP 2
Rotate the square base by 180 degrees. Prepare to apply a valley fold on the front-most layer.
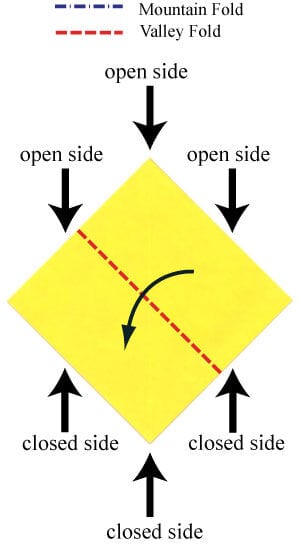
STEP 3
Apply the valley fold from Step 2 on the front-most layer. Prepare to apply another valley fold.
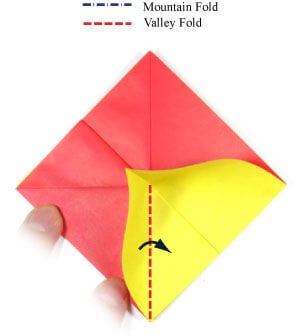
STEP 4
Apply the valley fold from Step 3. Prepare to merge the two corner points.
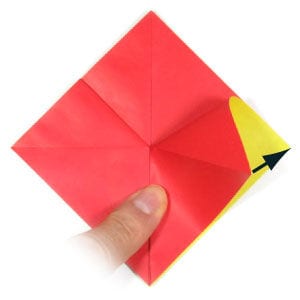
STEP 5
Merge the two corner points. Prepare to press the region encircled by a dotted ellipse.

STEP 6
Press the region encircled by the dotted ellipse as shown in Step 5. Prepare to turn the origami heart model over.
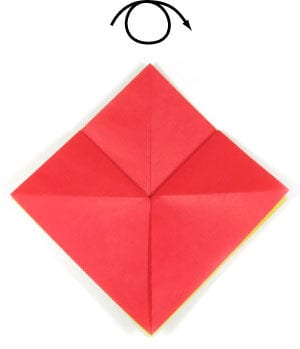
STEP 7
Turn the origami heart model over. Prepare to apply a valley fold.
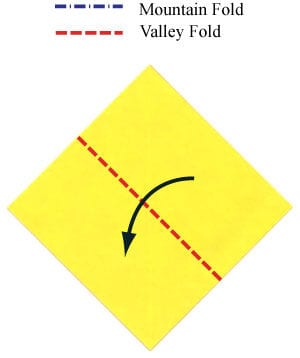
STEP 8
Apply the valley fold from Step 7. Prepare to apply another valley fold.
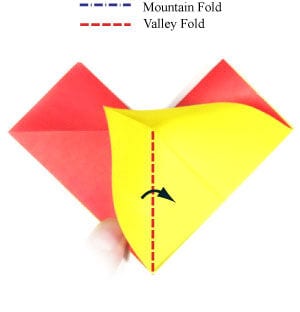
STEP 9
Apply the valley fold from Step 8. Prepare to press the region encircled by a dotted ellipse.

STEP 10
Press the region encircled by the dotted ellipse. Prepare to apply four mountain folds.
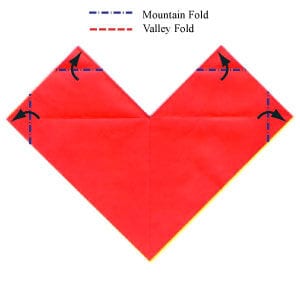
STEP 11
Apply the four mountain folds from Step 10. If you only need a heart on the front side, you are done here. If you want a heart on both sides, let us continue. Prepare to turn the origami heart model over.
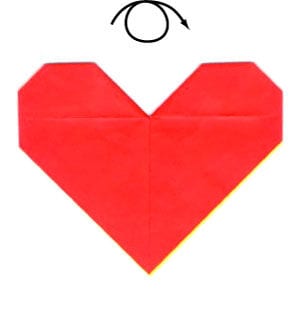
STEP 12
Turn the origami heart model over. Prepare to unfold the previous four folds.

STEP 13
Unfold the four previous folds from Step 12. Prepare to apply two inside reverse folds and two mountain folds on the front-most layer.
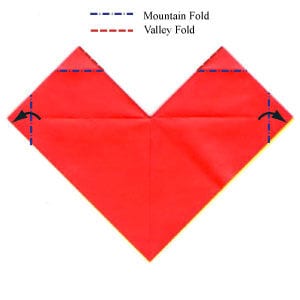
STEP 14
Apply the two inside reverse folds and two mountain folds on the front-most layer. Prepare to turn the origami heart model over.

STEP 15
Turn the origami heart model over. Prepare to apply two inside reverse folds and two mountain folds on the front-most layer.
STEP 16
Apply the two inside reverse folds and two mountain folds on the front-most layer. Prepare to apply two inside reverse folds.
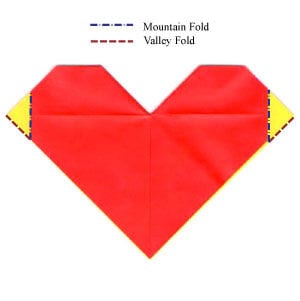
STEP 17
Apply the two inside reverse folds from Step 16. Congratulations! You have completed this easy origami paper heart.