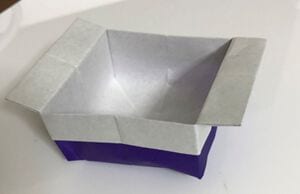
Origami Box (13-Step Version)
Everyone needs a small box now and then—for paper clips, for a tiny gift, or just to keep a few treasures tidy. This origami box is one of the most useful models you can learn because it needs nothing but a square sheet and comes together in about a dozen moves. Along the way you'll practice reading mountain and valley creases and bringing corners neatly to the center, skills that carry over to plenty of other containers. Once you've made one, try a few in different sizes and colors; a little stack of them looks lovely on a desk.

Here is how to fold a simple and practical origami box.
It folds easily and is genuinely useful, so give it a try.
Of course, there are many other ways to fold an origami box as well.
How to Fold an Origami Box
STEP 1. Make the mountain folds and valley folds as shown.


STEP 2. Fold the paper along the creases.


STEP 3. Fold the bottom corner up to the top corner and crease it.


STEP 4. Fold the corners so they line up with the creases.


STEP 5. Fold the edges so they line up with the creases.


STEP 6. Fold again along the crease. Fold the back side in the same way.


STEP 7. Turn the corner over.


STEP 8. Fold the left, right, and bottom corners toward the center.


STEP 9. Fold the back side in the same way.

STEP 10. Fold the bottom edge as shown.


STEP 11. Fold it up once more.


STEP 12. Fold the other side in the same way.

STEP 13. Open the inside and shape it into a box, and you're done.