
Kadomatsu
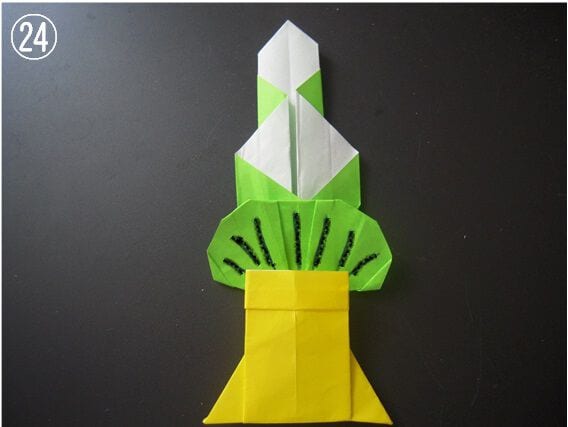
Walk past a Japanese doorway in early January and you will usually see one: a tidy cluster of bamboo and pine standing beside the entrance, put there to welcome the New Year. That arrangement is called a kadomatsu, and this tutorial shows you how to fold a paper version of it that captures the same quiet, festive look - one that stands just as happily on a wall as beside a door.
The fold is really two small projects joined at the end. The first is the bamboo: a single square of paper that is creased, collapsed, and coaxed into a stalk with a couple of deft tucks. The second is the pine: a half sheet of yellow paper folded into a bushy green branch that gets glued to the bamboo. The colored guide lines in the photos do most of the heavy lifting, pointing out exactly which fold comes next and what to line it up with, so even the moments that look fiddly at first tend to resolve themselves into a neat, satisfying finish.
How to Fold
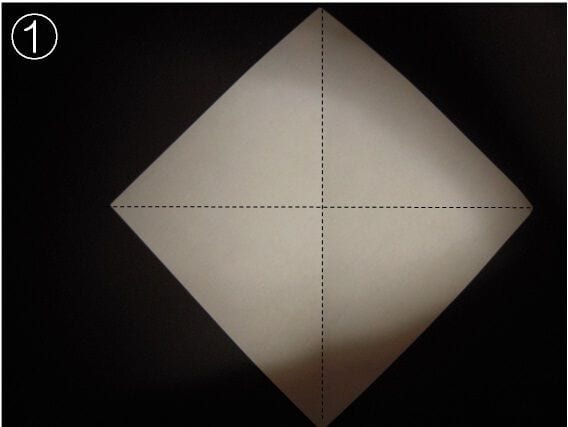
STEP 1. Make a crease along the diagonal.
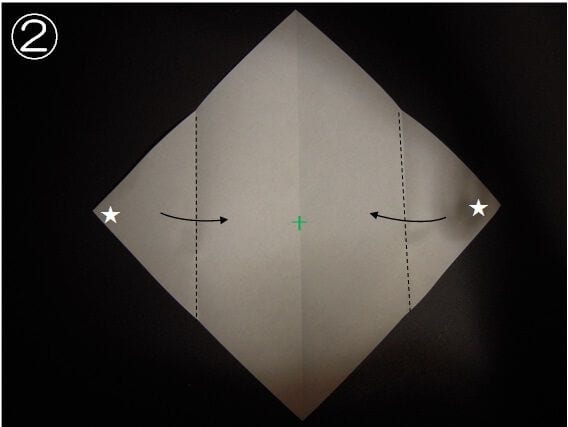
STEP 2. Fold the corner marked ☆ in toward the center of the paper.
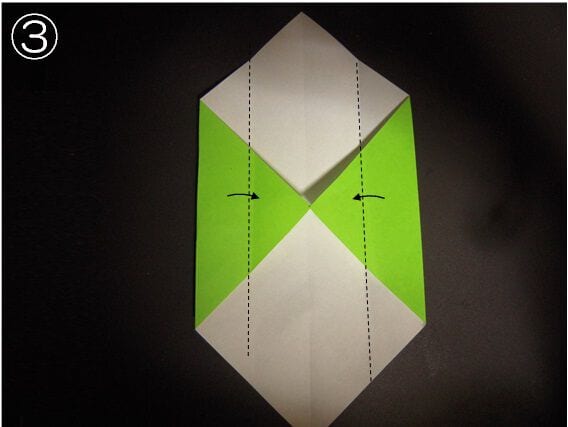
STEP 3. Fold along the dotted line.
STEP 4. Fold along the dotted line once more.
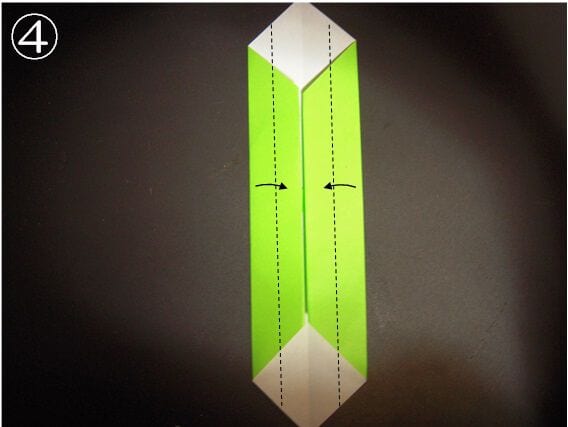
STEP 5. Once it looks like this, unfold everything again.
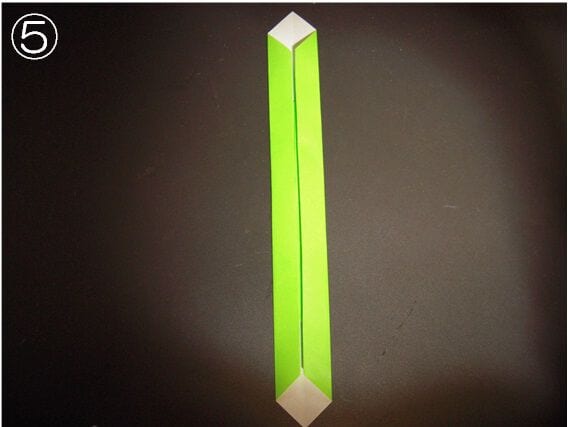
STEP 6. Fold along the blue line as a mountain fold and along the red line as a valley fold.
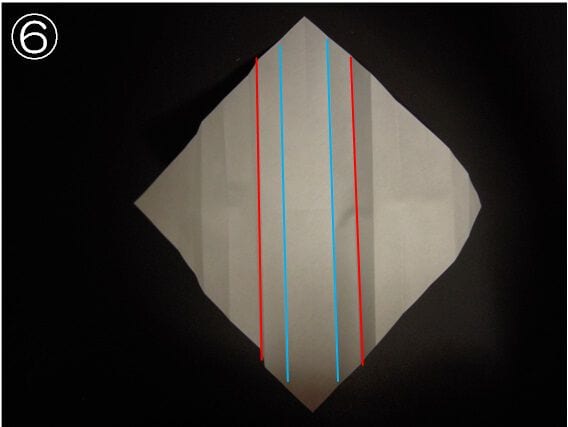
STEP 7. Fold along the red line as a valley fold and along the blue line as a mountain fold.
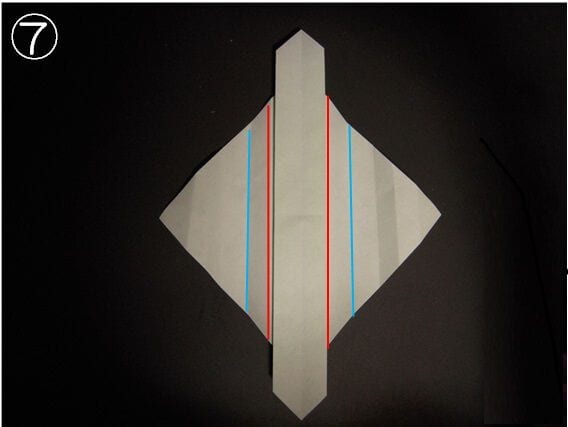
STEP 8. Fold along the red line, which lies between the two creases (the black lines) already in the paper.
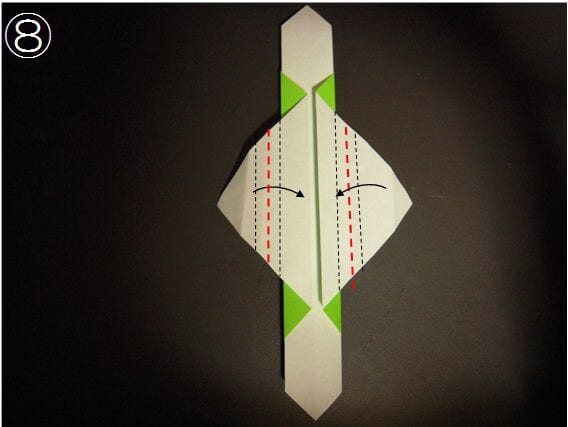
STEP 9. Align the red line with the blue line and fold it.
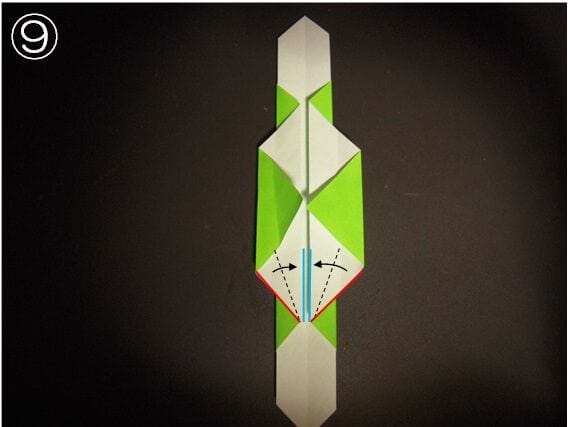
STEP 10. Fold along the dotted line while opening out the part indicated by the arrow.
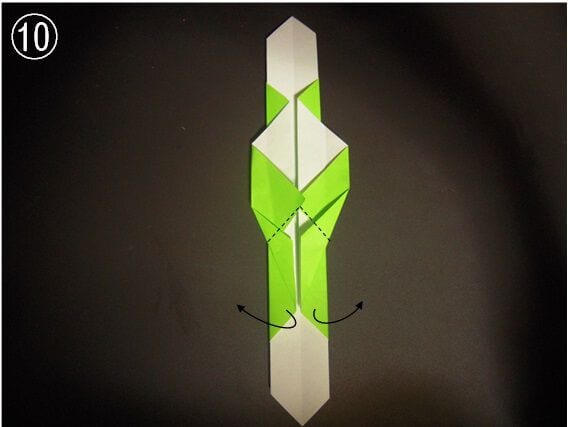
STEP 11. Fold it like this.
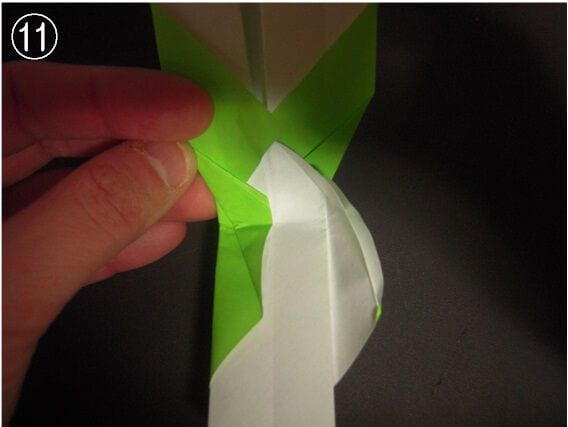
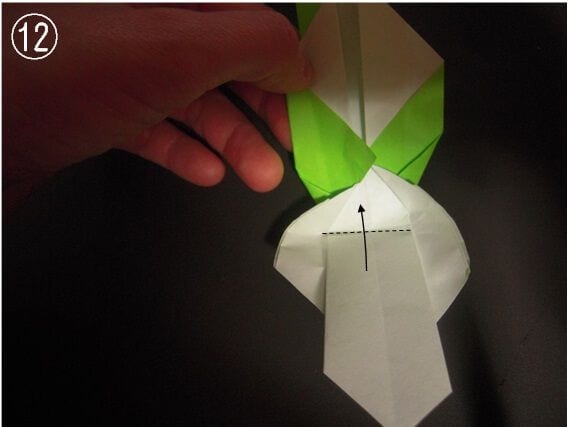
STEP 12. Finally, fold it up in the direction of the arrow.
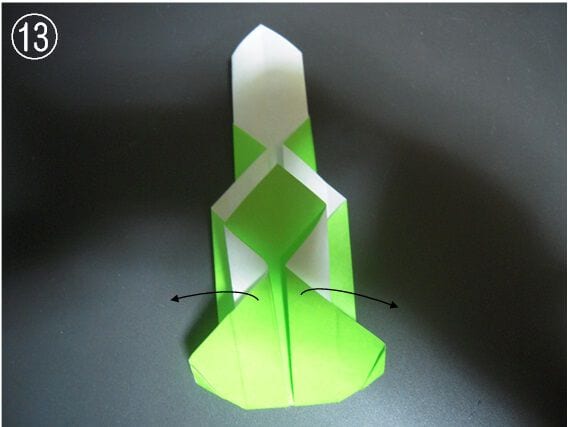
STEP 13. Pull the section indicated by the arrows outward to the left and right.
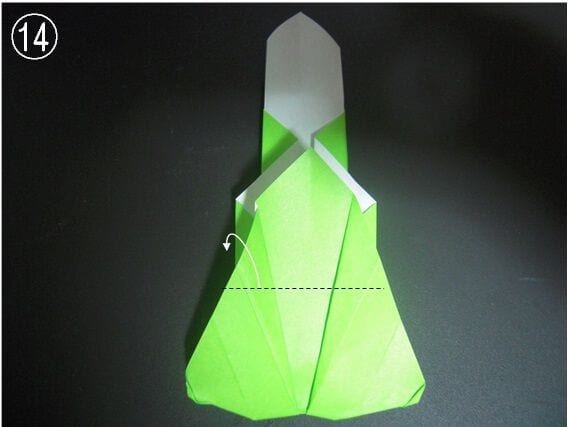
STEP 14. Fold back along the dotted line.
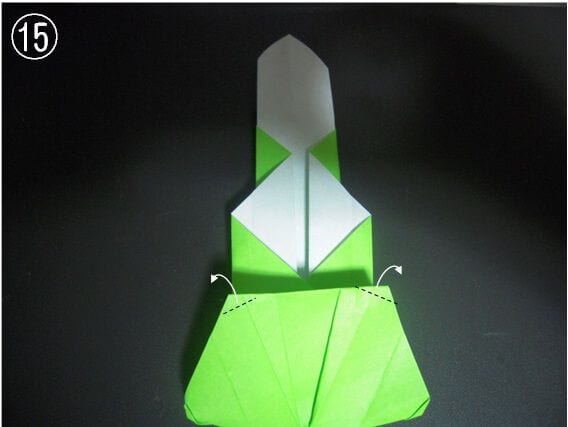
STEP 15. Fold back along the dotted line again.
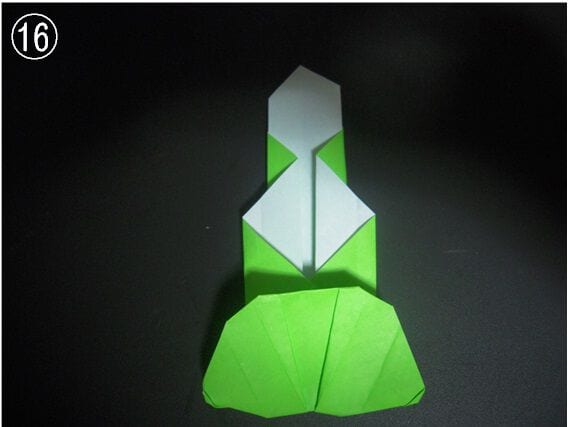
STEP 16. Turn the model over, and the bamboo part is complete. Now take the yellow origami paper and cut it in half.
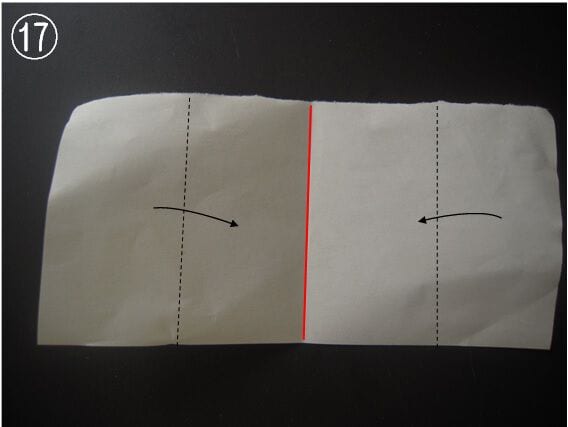
STEP 17. Make a crease (red line) in the center. Align both ends with this line and fold.
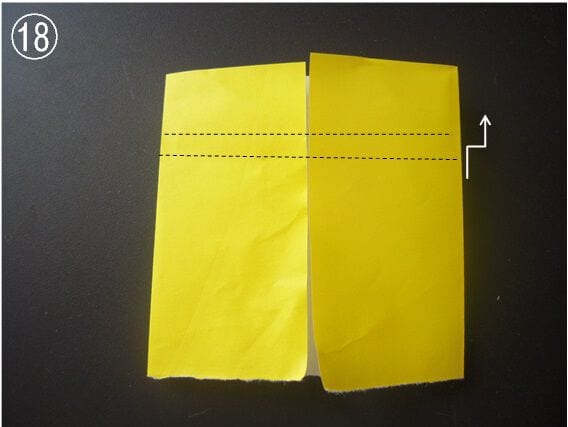
STEP 18. Fold it up little by little, starting from the dotted line.
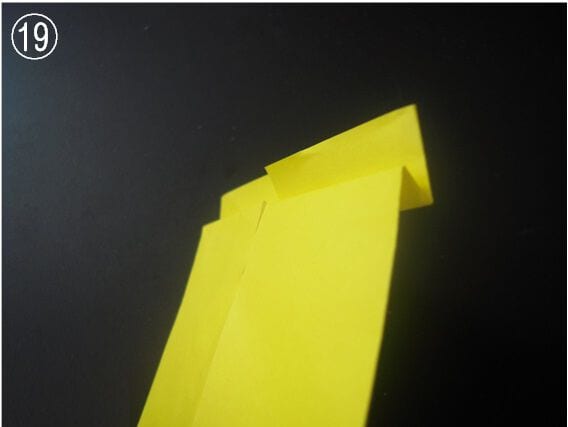
STEP 19. It looks like this.
STEP 20. Fold both ends along the center line.
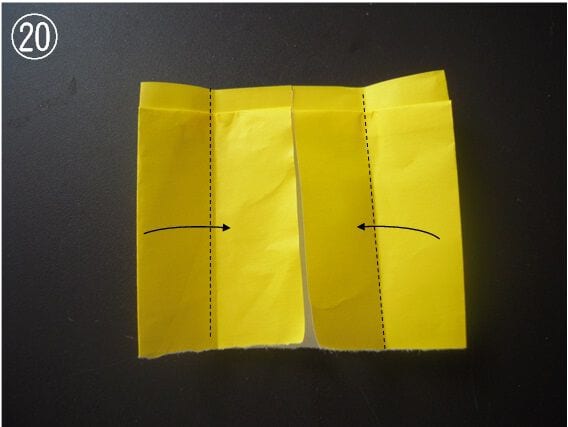
STEP 21. Fold it along the dotted line while opening it in the direction of the arrow.
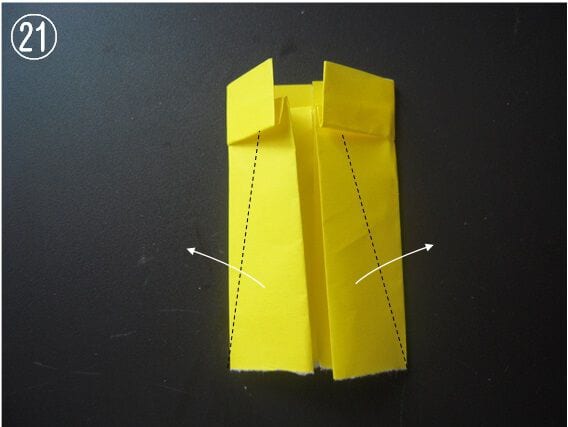
STEP 22. Fold it up along the dotted line.
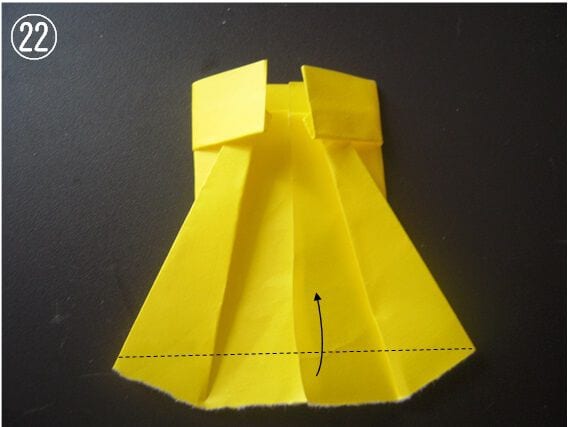
STEP 23. Turn it over.
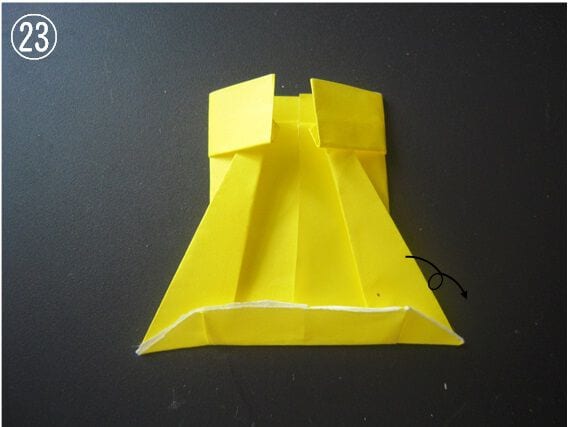
STEP 24. Attach this piece to the bamboo, and the Kadomatsu is complete.
Tips for Folding
There is no single step here that is really difficult, but a few small points are worth keeping in mind.
If you make it from a large sheet such as drawing paper, the finished piece looks very solid. Try making two and decorating a wall with them.
If you live in an apartment building, you can make a mini-size version and stick it on the door with a magnet.




