
Traditional Origami Bird
If you've folded a classic crane, the traditional origami bird is a natural and rewarding next step. It's a timeless model that packs several key techniques into just eleven short steps.
You'll meet the squash fold and, most importantly, the inside reverse fold — the move that gives the bird its head and tail. Take it slowly, follow the photos, and you'll have a charming little bird perched on your desk before you know it.
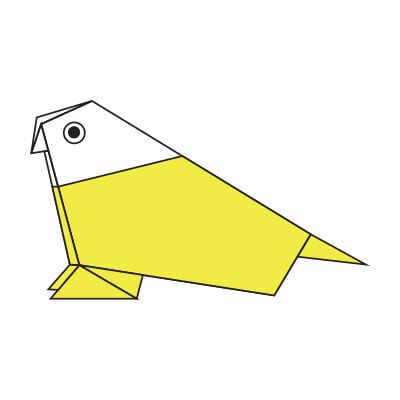
These instructions will show you how to fold an easy origami bird. It is a traditional model and not difficult at all. If you have never folded anything before, take a moment to learn the basic folds first — it will make every step easier.
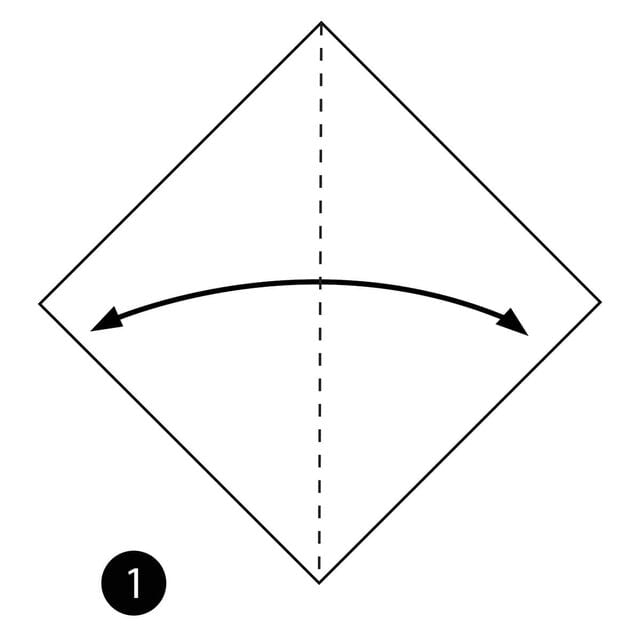
Step 1: Fold the paper in half and then unfold it.
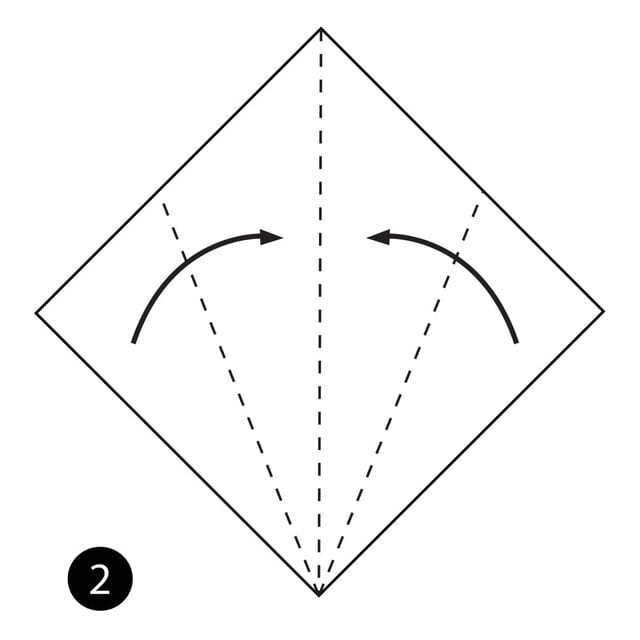
Step 2: Fold both sides of the paper to the center line.
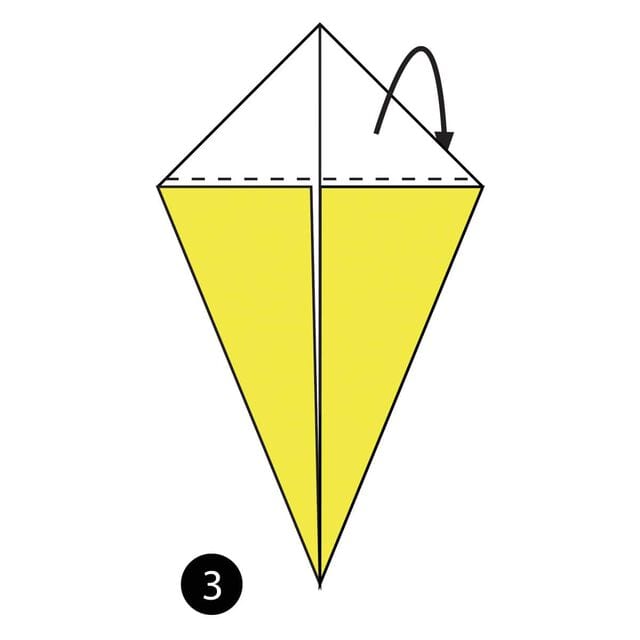
Step 3: Fold the top triangle of paper behind the model.
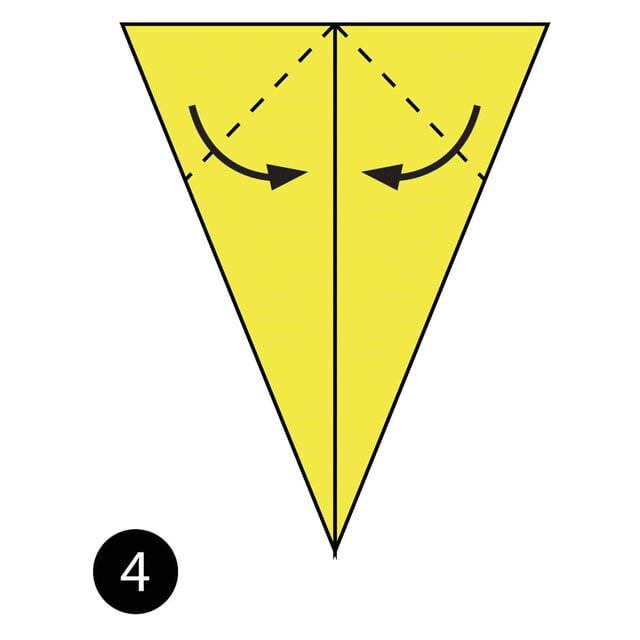
Step 4: Fold both top corners down and toward the center along the dotted lines.
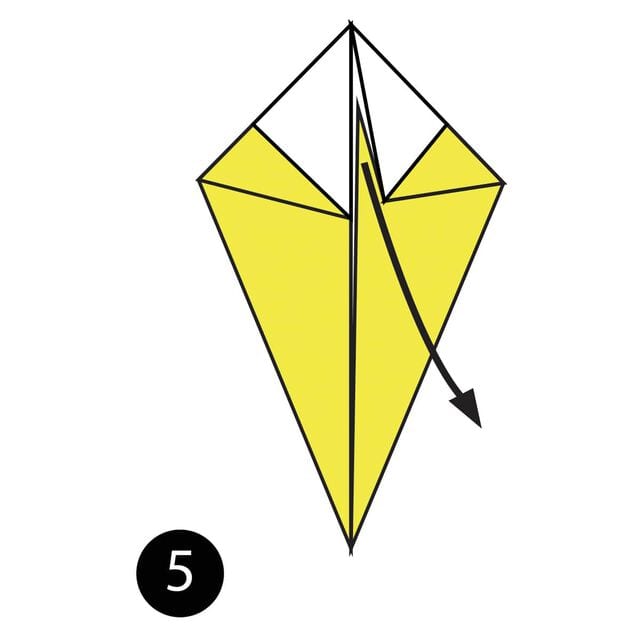
Step 5: Open up the paper trapped inside and pull it out and down.
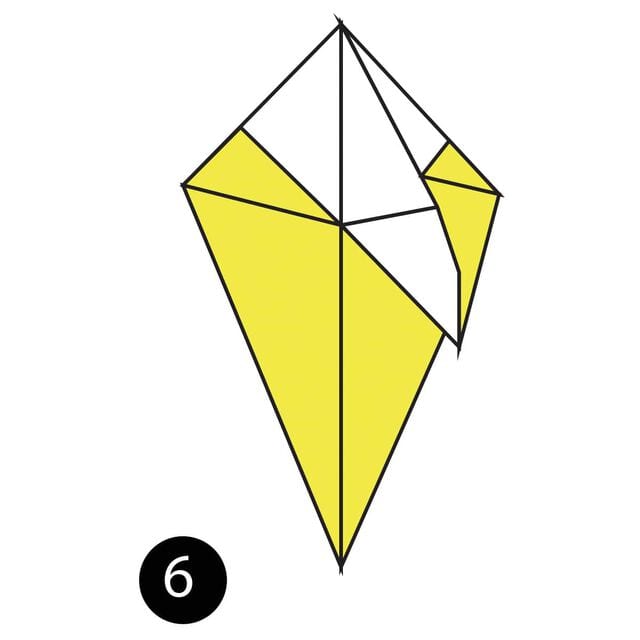
Step 6: Squash fold this flat section, then repeat on the other side.
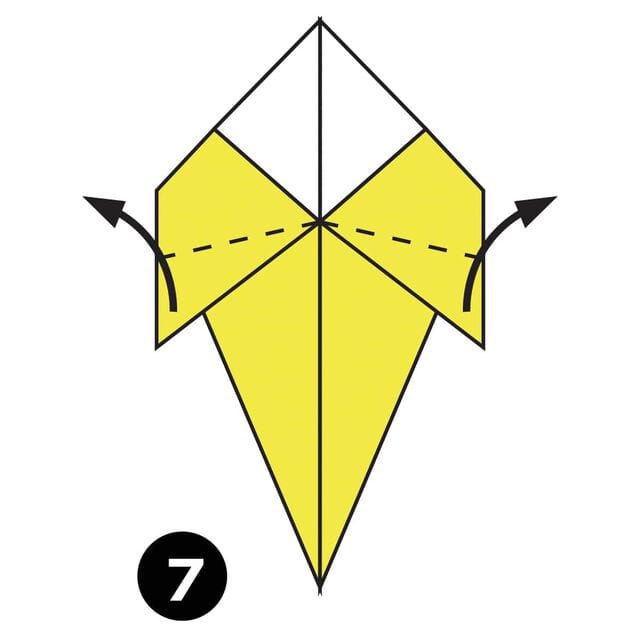
Step 7: Fold the flaps on each side up along the dotted lines.
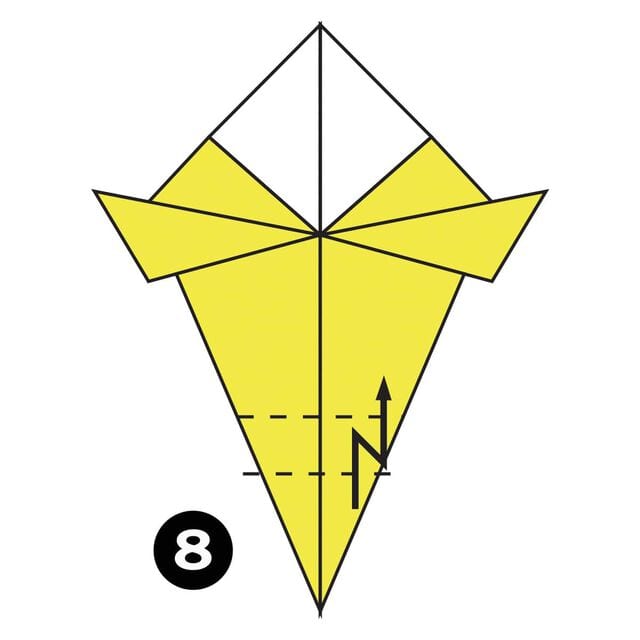
Step 8: Make a pleat along the dotted lines at the bottom.
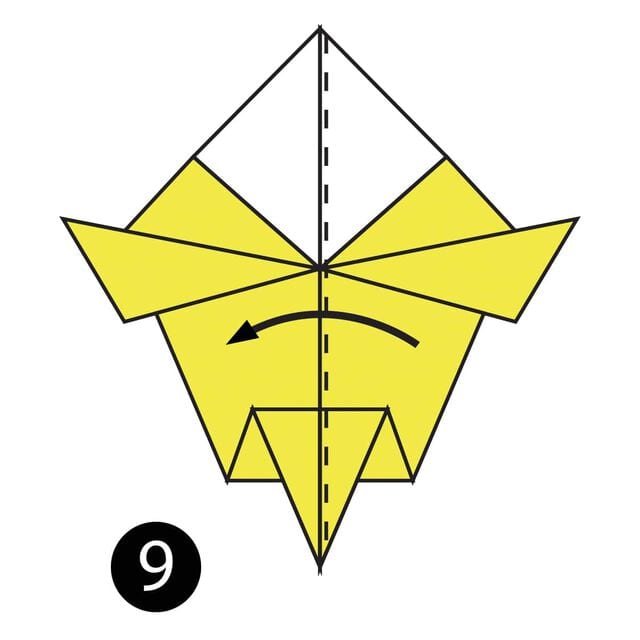
Step 9: Fold the entire model in half.
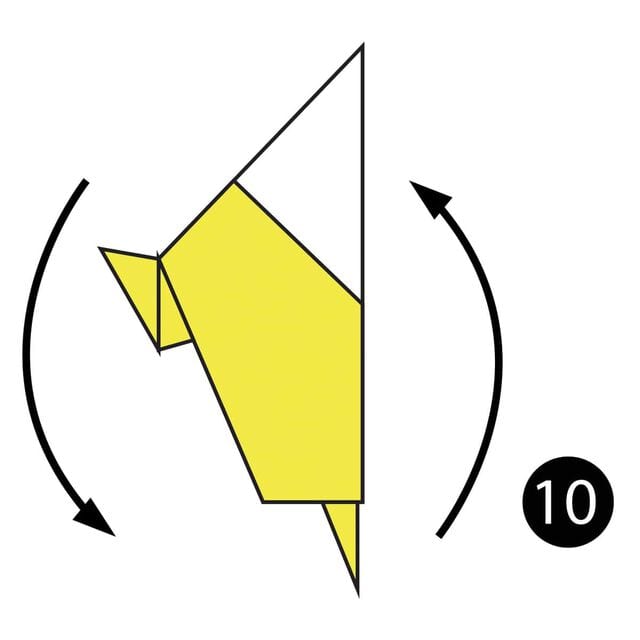
Step 10: Rotate the paper about 90 degrees.
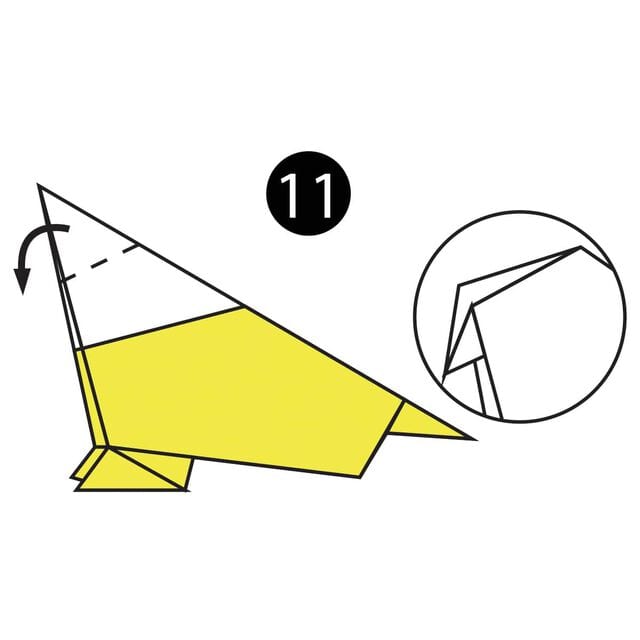
Step 11: Make an inside reverse fold along the dotted line.
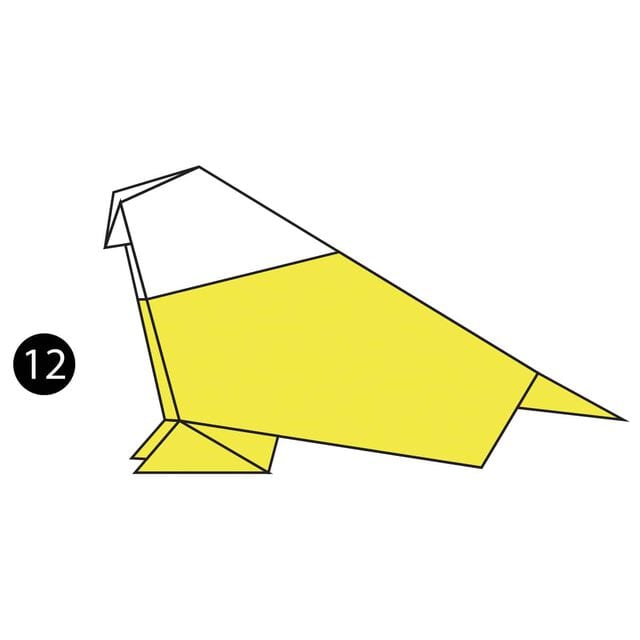
Your traditional origami bird is complete — enjoy your new paper companion!




