
Star Box
There's a special kind of satisfaction in folding a box that's also a little work of art. The origami star box does exactly that — its lid closes into a crisp pointed star, so even before you open it, it already looks like a gift.
The best part is how self-contained it is: one square of paper, no glue, no extra pieces, and about fourteen steps from flat sheet to finished box. Whether you fill it with a tiny trinket or let it sit on a shelf as decoration, it always earns a second glance. Let's fold one.

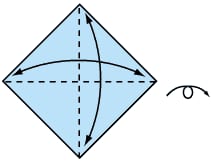
STEP 1. Start with a square piece of paper, coloured side up.
Fold the top corner of the paper down to the bottom corner. Crease and open again. Then fold the paper in half sideways.
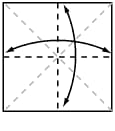
STEP 2. Turn the paper over to the white side. Fold the paper in half, crease well, and open.
Then fold in half again in the other direction.
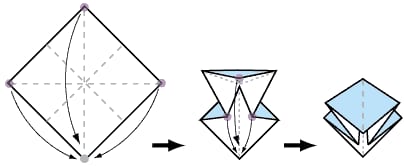
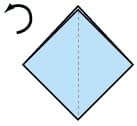
STEP 3. Using the creases you have made, bring the top three corners of the model down to the bottom corner.
Flatten the model.
STEP 4. Rotate the model so the open end is at the top.
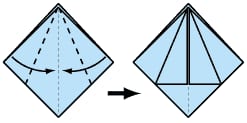
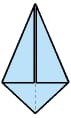
STEP 5. Fold the uppermost outer flaps in to meet the centre line.
STEP 6. Repeat Step 5 on the back side.
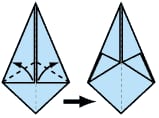
STEP 7. Fold each flap up toward the outer edge of the model and crease well.
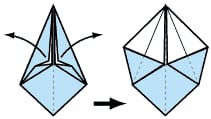
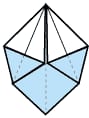
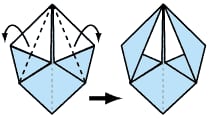
STEP 8. Open out the flaps, and flatten.
STEP 9. Repeat Steps 7 and 8 on the back side.
STEP 10. Tuck the top flaps behind themselves. Crease well.

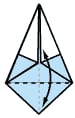
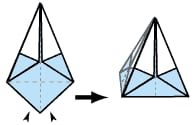
STEP 11. Repeat Step 10 on the back side, so the model now looks like this.
STEP 12. Fold the bottom of the model upward. Crease very well, then unfold.
STEP 13. Push in the base of the model along the creases you just made. This will form the base of the box.
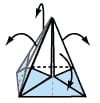

STEP 14. Fold each point of the star downwards.
Finished star box!




