
Traditional Rocket Paper Airplane
Some paper planes are all about distance or loops. The rocket is different — it just goes straight, fast, and true, like its name suggests. There's a real charm in how a plain rectangle of paper becomes something that launches across the room with a single flick of the wrist.
And here's the best part for a quick craft session: you don't need special origami paper. Grab any old A4 or letter-size sheet, learn two folds (valley and mountain), and you're about fifteen minutes from liftoff. Let's fold one.
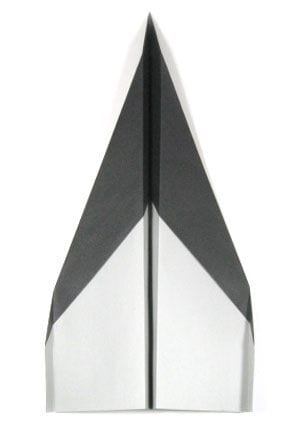
This page shows you how to fold a traditional rocket paper airplane.
This rocket paper airplane is a traditional model. The name “rocket” comes from the way the model flies straight, like a rocket. One thing to keep in mind is that it needs a non-square sheet of paper. A typical square origami sheet won’t work for this plane — use any letter-size or A4 paper instead.
Before working on this model, you need to know what valley-fold and mountain-fold are. If you know these two folding techniques, you’ll have no trouble making this plane.
If you are ready, then let's get started.
You can use just about any paper to fold this plane.
This is the front side of the paper. Any non-square sheet works well — here I used A4-size origami paper.
This is the back side of the paper.
STEP 1.
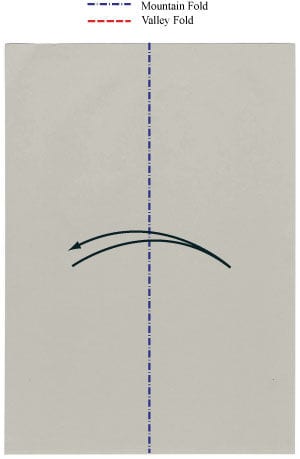
Let's start with the paper's back side facing up. Prepare to mountain-fold in half vertically and then unfold.
STEP 2.
Mountain-fold in half vertically and then unfold. Prepare to apply two valley-folds.
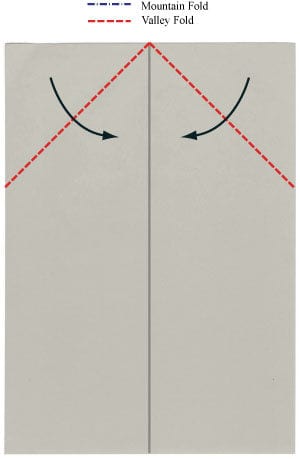
STEP 3.
Apply the two valley-folds from Step 2. Prepare to apply two valley-folds.
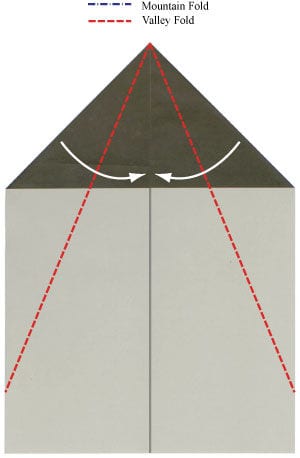
STEP 4.
Apply the two valley-folds from Step 3. Prepare to valley-fold in half vertically.
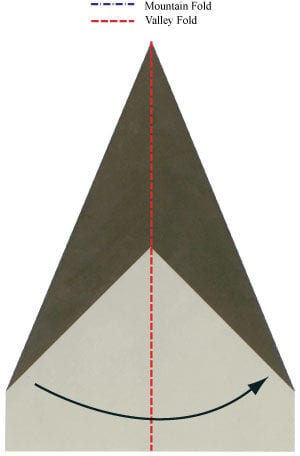
STEP 5.
Valley-fold in half vertically. Prepare to apply a vertical valley-fold.
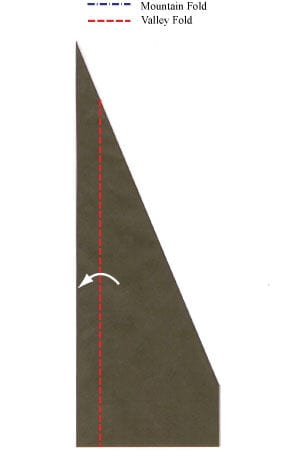
STEP 6.
Apply the vertical valley-fold of the step #5. Prepare to turn the paper plane over.
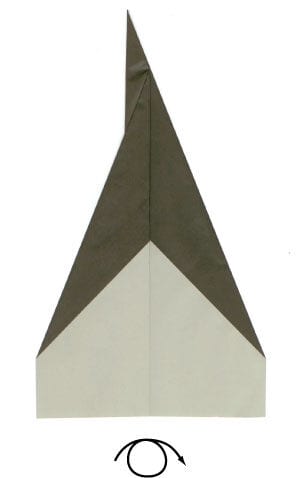
STEP 7.
Turn the paper plane over. Prepare to apply another vertical valley-fold.
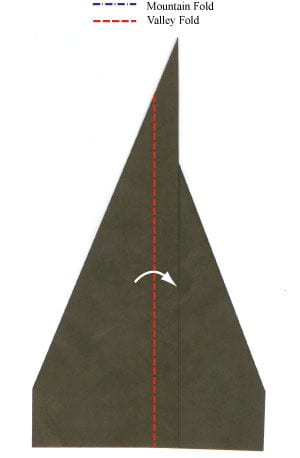
STEP 8.
Apply the vertical valley-fold of the step #7. Prepare to apply a vertical valley-fold.
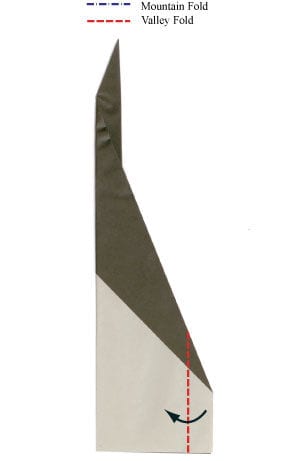
STEP 9.
Apply the vertical valley-fold of the step #8. Prepare to turn the paper plane over.
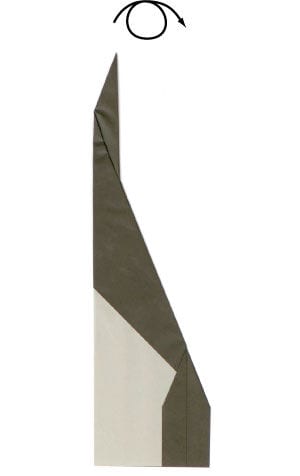
STEP 10.
Turn the paper plane over. Prepare to apply a vertical valley-fold.
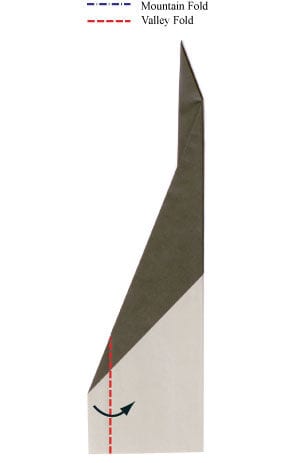
STEP 11.
Apply the vertical valley-fold of the step #10. Prepare to rotate the paper plane model by 90 degrees.
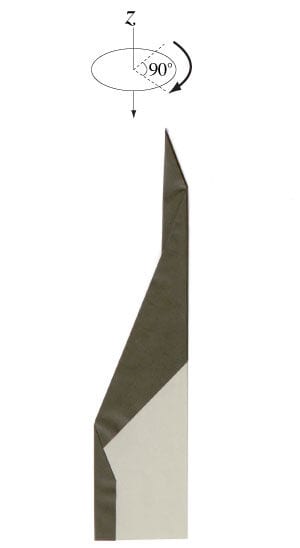
STEP 12.
Rotate the paper plane model by 90 degrees. Prepare to apply two 90 degrees valley-folds to rotate two wings in 90 degrees angle.
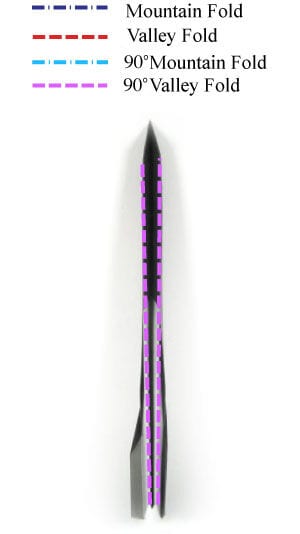
STEP 13.
Rotate two wings in 90 degrees angle to expand them outwards. Prepare to apply two 90 degrees valley-folds.
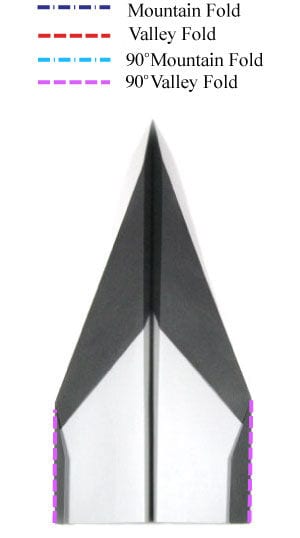
STEP 14.
Apply two 90 degrees valley-folds of the step #13.
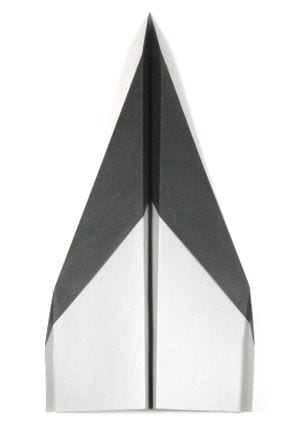
STEP 15.
You can throw the rocket paper airplane in the arrow direction. It will fly in a straight direction.
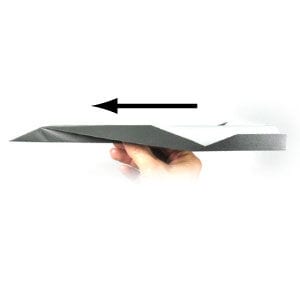
STEP 16.
Congratulations! You have completed making a traditional rocket paper airplane.




