
Rectangular Origami Vase
Most origami vases you run into are round - soft cylinders and cones with no edges to speak of. A rectangular one is a different creature altogether: flat panels, sharp corners, and four identical sides that have to line up before the thing will stand. It looks complicated, but the whole model grows out of a single idea, the 8x8 matrix base, and after that it is simply the same handful of folds repeated four times around.
That repetition is what makes this project so satisfying. Steps 1 through 7 are pure pre-creasing, and the care you put in there decides how crisp the finished vase looks. From there a crease pattern collapses the grid into the body, four flaps wrap around to form the sides, and each face gets the same valley-fold and mountain-fold treatment as you rotate the model a quarter turn at a time. Thirty-five steps sounds like a lot, but you are really learning about six moves.
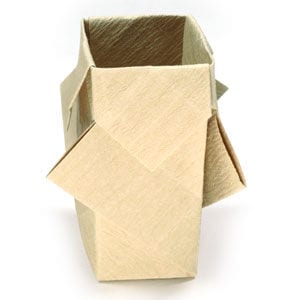
This page is for those who want the instruction to fold a rectangular origami vase.
This rectangular origami vase starts from an 8x8 matrix base. There is no special folding technique involved with this model.
Before working on this model, you need to know what a valley-fold and a mountain-fold are. If you know these two folding techniques, then you will have no problem making the origami vase.
If you are ready, then let's get started.
You may use any kind of paper to fold the origami vase (*it is easier if the front and the back side of the paper are slightly different whether it be in texture or color).
Make sure the paper you use is a square (all sides are equal and all the angles equal 90 degrees). The paper I am using here has a dimension of 15cm x 15cm.
This is the front side of a square.
This is the back side of a square.
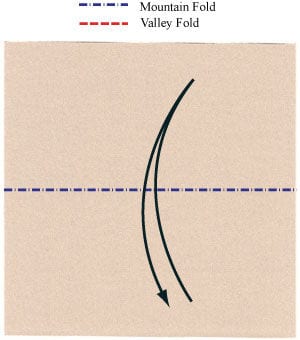
STEP 1.
Let's start with a square paper. Prepare to “mountain-fold” in half horizontally and then “unfold”.
STEP 2.
Mountain-fold in half horizontally and then “unfold”. Prepare to mountain-fold in half vertically and then “unfold”.
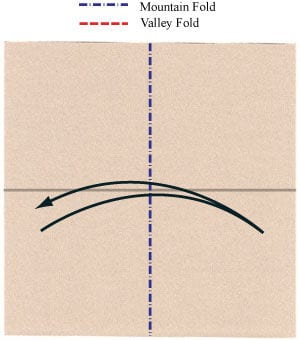
STEP 3.
Mountain-fold in half vertically and then “unfold”. Prepare to apply a horizontal “gate-fold” and then “unfold”.
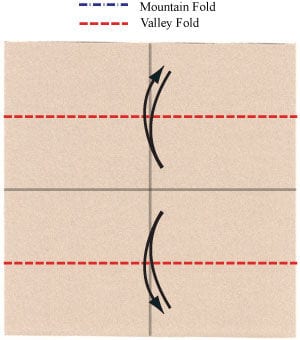
STEP 4.
Apply the horizontal “gate-fold” of the step #3 and then “unfold”. Prepare to apply a vertical “gate-fold” and then “unfold”.
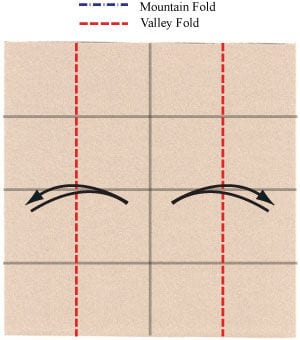
STEP 5.
Apply the vertical “gate-fold” of the step #4 and then “unfold”. Prepare to apply four horizontal “valley-folds” and then “unfold”.
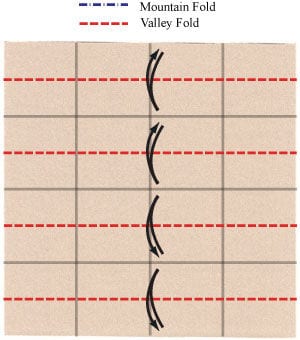
STEP 6.
Apply four horizontal “valley-folds” of the step #5 and then “unfold”. Prepare to apply four vertical “valley-folds” and then “unfold”.
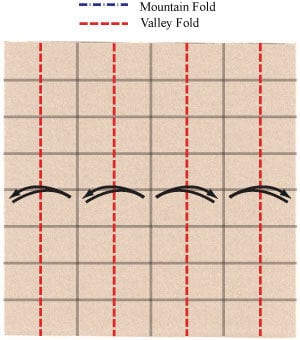
STEP 7.
Apply four vertical “valley-folds” of the step #6 and then “unfold”. Now, you have completed making a “8x8 matrix base”.
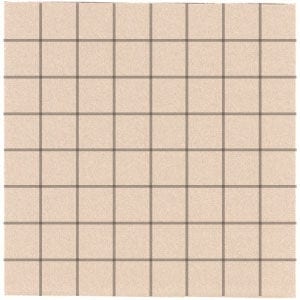
STEP 8.
Prepare to apply four “valley-folds” and then “unfold”.
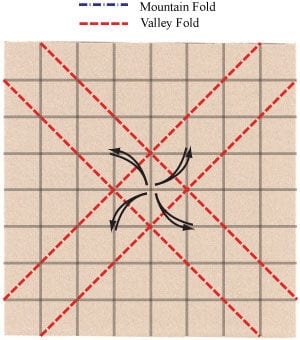
STEP 9.
Apply four “valley-folds” and then “unfold”. Prepare to apply the crease pattern (CP) shown on the left. Here you need to utilize the existing crease lines.
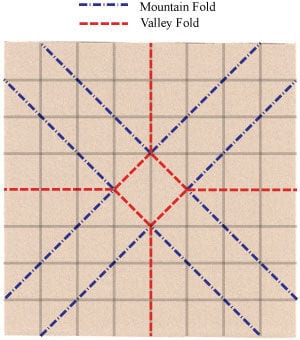
STEP 10.
Start applying the CP of the step #9.
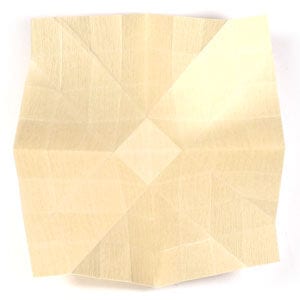
STEP 11.
Continue applying the CP of the step #9.
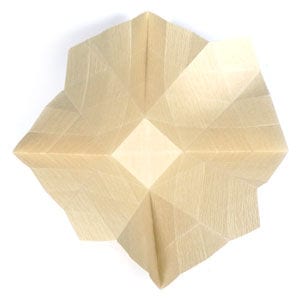
STEP 12.
Complete applying the CP of the step #9. Prepare to wrap four flaps around the body following the arrow directions.
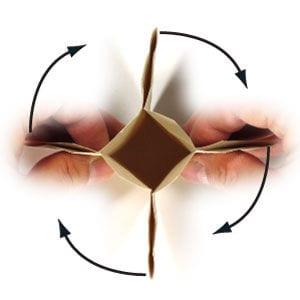
STEP 13.
Wrap four flaps around the body following the arrow directions of the step #12. Prepare to rotate the model by 90 degrees.
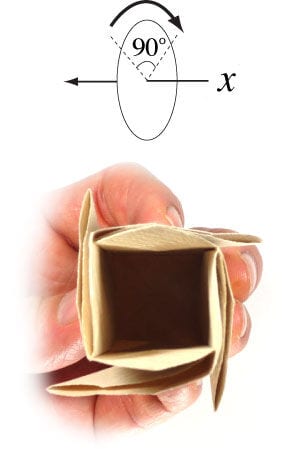
STEP 14.
Rotate the model by 90 degrees. Prepare to “unfold” the flap.
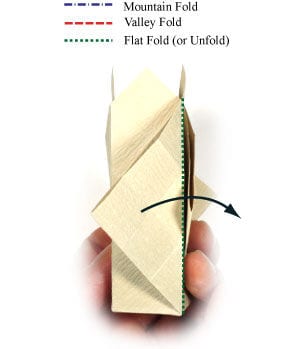
STEP 15.
Unfold the flap of the step #14. Prepare to “unfold” the left flap.
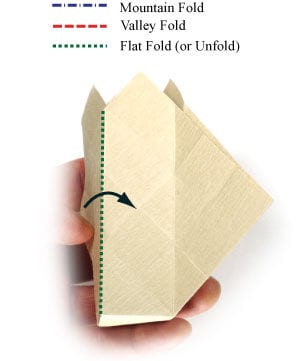
STEP 16.
Unfold the left flap of the step #15. Prepare to apply a horizontal “valley-fold”.
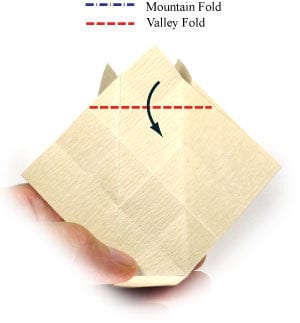
STEP 17.
Apply the horizontal “valley-fold” of the step #16. Prepare to apply a vertical “mountain-fold”.
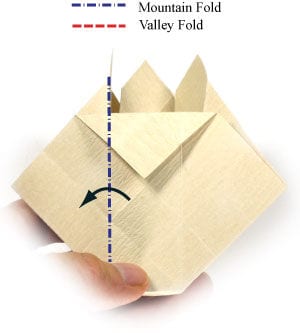
STEP 18.
Apply the vertical “mountain-fold” of the step #17. Prepare to rotate the model by 90 degrees.
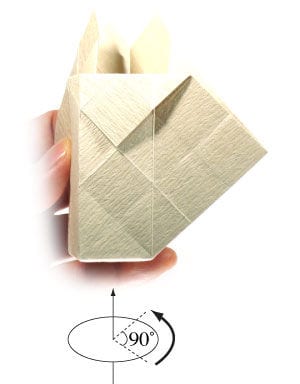
STEP 19.
Rotate the model by 90 degrees. Prepare to apply a horizontal “valley-fold”.
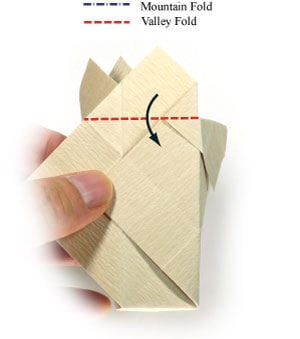
STEP 20.
Apply the horizontal “valley-fold” of the step #19. Prepare to apply a vertical “mountain-fold”.
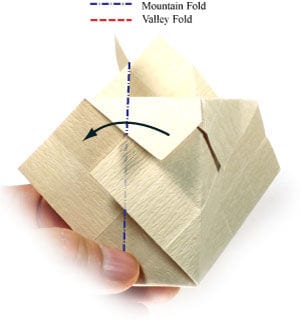
STEP 21.
Apply the vertical “mountain-fold” of the step #20. Prepare to rotate the origami vase model by 90 degrees.
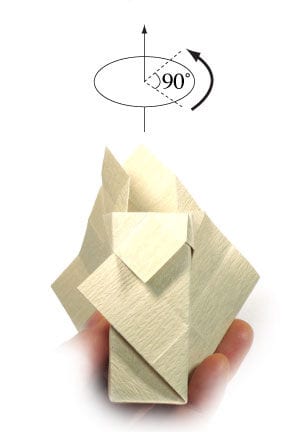
STEP 22.
Rotate the origami vase model by 90 degrees. Prepare to apply a horizontal “valley-fold”.
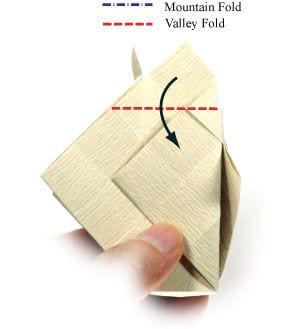
STEP 23.
Apply the horizontal “valley-fold” of the step #22. Prepare to apply a vertical “mountain-fold”.
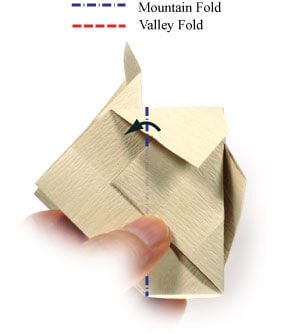
STEP 24.
Apply the vertical “mountain-fold” of the step #23. Prepare to rotate the origami vase model by 90 degrees.
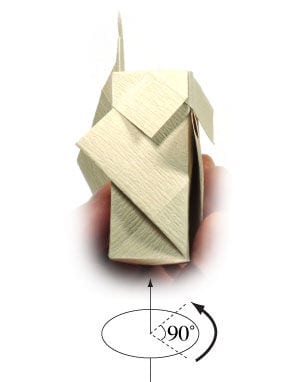
STEP 25.
Rotate the origami vase model by 90 degrees. Prepare to apply a horizontal “valley-fold”.
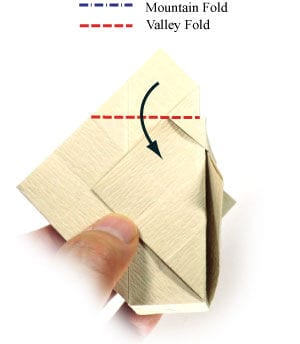
STEP 26.
Apply the horizontal “valley-fold” of the step #25. Prepare to apply a vertical “mountain-fold”.
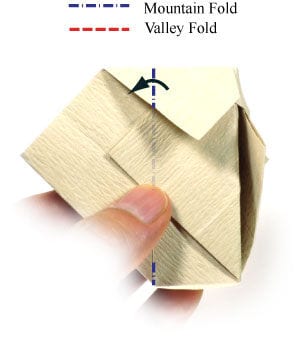
STEP 27.
Apply the vertical “mountain-fold” of the step #26. Prepare to rotate the origami vase model by 90 degrees.
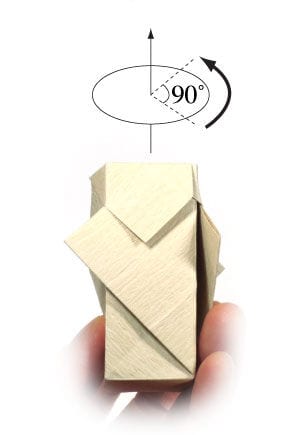
STEP 28.
Rotate the origami vase model by 90 degrees. Prepare to “unfold” the flap.
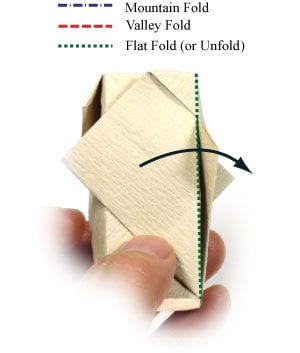
STEP 29.
Unfold the flap. Prepare to lift the top layer.
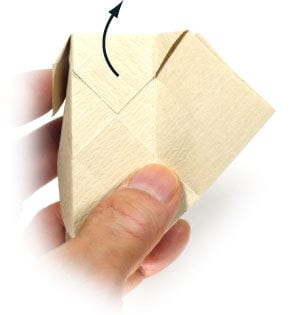
STEP 30.
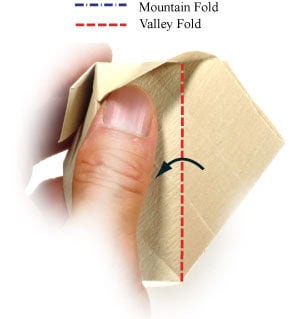
Lift the top layer. Prepare to apply a vertical “valley-fold”.
STEP 31.
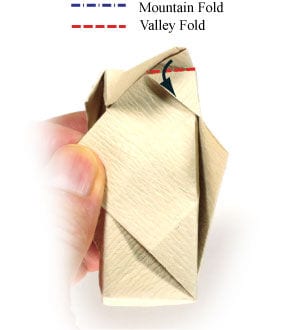
Apply the vertical “valley-fold” of the step #30. Prepare to apply a horizontal “valley-fold”.
STEP 32.
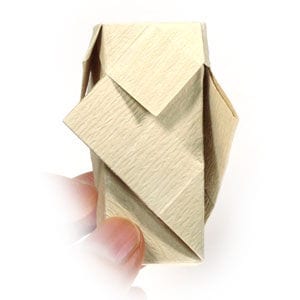
Apply the horizontal “valley-fold” of the step #31. Prepare to lay the origami vase model down.
STEP 33.
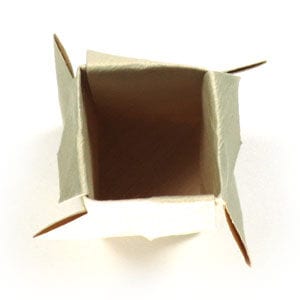
Lay the origami vase model down. This is the top view of the origami vase model.
STEP 34.
This is the front view of the origami vase model.
STEP 35.
Congratulations! You have just completed making a rectangular origami vase.





