
Counterclockwise Rotating Origami Ninja Star
There is a whole family of paper ninja stars, and the spinning kind has a special charm: throw it and it seems to turn in the air as it flies. This version rotates counterclockwise, and the secret behind its motion is a clever modified squash fold repeated at each of the four points. Do not let the eleven steps intimidate you — most of them are the same small sequence done over and over, turning and rotating the paper until the star is complete. It is a satisfying fold that rewards patience with a toy you can actually play with. Grab a square of paper (thicker if you plan to toss it), find a sheet whose front and back look a little different, and let's build a star that spins.
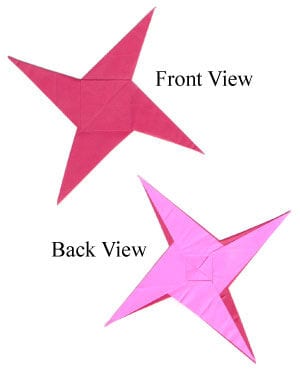
This page is for anyone who wants to fold a counterclockwise-rotating origami ninja star.
This ninja star begins from a counterclockwise-rotating origami star. The one special folding technique used here is a modified squash fold.
You can use any kind of paper to fold the star (it is easier if the front and back of the paper differ slightly — whether in texture or in color).
Be sure to use a square sheet (all four sides equal, all four corners 90°). Here I am using standard 15 cm × 15 cm origami paper. If you plan to throw the star, use thicker paper.
This is the front side of the paper I am using for this tutorial — just ordinary origami paper.

This is the back side of the paper.

STEP 1. First let's make the counterclockwise-rotating origami star. Prepare to turn the star model over.

STEP 2. Turn the star model over. Prepare to apply a modified squash fold.

STEP 3. Begin the modified squash fold from Step 2.

STEP 4. Finish the modified squash fold from Step 2. Prepare to apply a valley fold.

STEP 5. Begin the valley fold from Step 4.

STEP 6. Complete the valley fold from Step 4. Prepare to rotate the star model by 90 degrees.

STEP 7. Rotate the star model by 90 degrees. Prepare to repeat Steps 2–7 for the first time.

STEP 8. Repeat Steps 2–7 for the first time. Prepare to repeat Steps 2–7 for the second time.

STEP 9. Repeat Steps 2–7 for the second time. Prepare to repeat Steps 2–7 for the last time.

STEP 10. Repeat Steps 2–7 for the last time. This is the back view of the star model. Prepare to turn the star model over.

STEP 11. Turn the star model over. Congratulations! You have now completed your counterclockwise-rotating origami ninja star.





