
How to Fold an Origami Church (Easy Halloween Paper Craft)
Most Halloween origami is bats, ghosts and pumpkins, which is exactly why a little paper church feels so refreshing. There is something about that tall, narrow steeple that reads as slightly spooky without any effort at all — put it on a windowsill at dusk with a light behind it and it does the job beautifully. The fold itself is friendly: a grid of creases first, then a series of simple folds that pull the walls up and sharpen the roof. Take your time with the opening-out step in the middle, because that is where the building gets its depth. Add a tiny paper cross on the roof and you are done — fold a row of them in different sizes and you have an instant village.
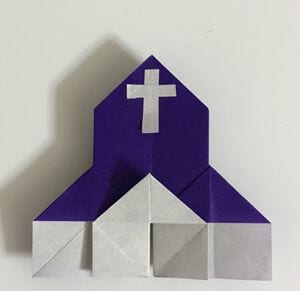
This tutorial shows how to fold an origami church from a single square sheet of paper.
With its tall steeple it has a slightly eerie look about it, which makes it perfect for Halloween.
It is simple enough for anyone to make, so do give it a try.
How to fold a church
STEP 1
With the white side facing up, make diagonal valley creases and vertical and horizontal mountain creases.


STEP 2
Fold the paper along the creases.


STEP 3
Fold the left and right corners up so that they meet the top corner.


STEP 4
Fold the corner so that the inside opens out.


Do the same with the right-hand corner.

STEP 5
Turn the paper over and fold it the same way.


STEP 6
Turn it over so that the overlapping surface is on top, as shown in the photo.


STEP 7
Fold the left and right edges in so they line up with the centre.


STEP 8
Turn it over again so that the overlapping part is on top.


STEP 9
Fold it so that the pocket opens outwards.


STEP 10
Fold the corners upwards.


STEP 11
Cut a cross from another piece of origami paper and glue it on, and the church is complete.




