
How to Fold an Origami Dragonfly
The pleats are the whole thing. Steps 5 to 13 are almost entirely narrow accordion folds, and while you are making them there is no sign of a dragonfly at all — just a strip of paper folded back on itself. Then step 17 arrives, the layers get pulled apart, and four wings appear where a moment ago there were none.
That is also why this model is rated moderate rather than easy. The creases have to stay aligned, and from step 17 onwards there are enough layers that the paper wants to spring apart unless you hold it firmly. The original tutorial's tip — open the paper out once and fold while checking the line — is worth following at step 8 in particular.
Gold, silver or a patterned sheet turns this into something genuinely striking. Stick it on a window next to a few paper butterflies, or back it with a pin and wear it.
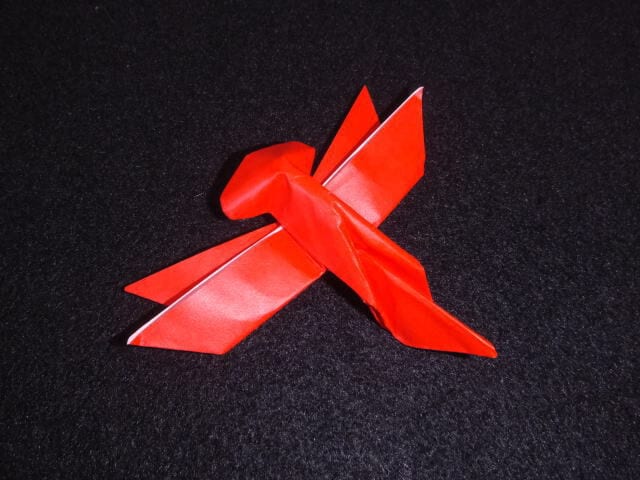
How to fold the dragonfly
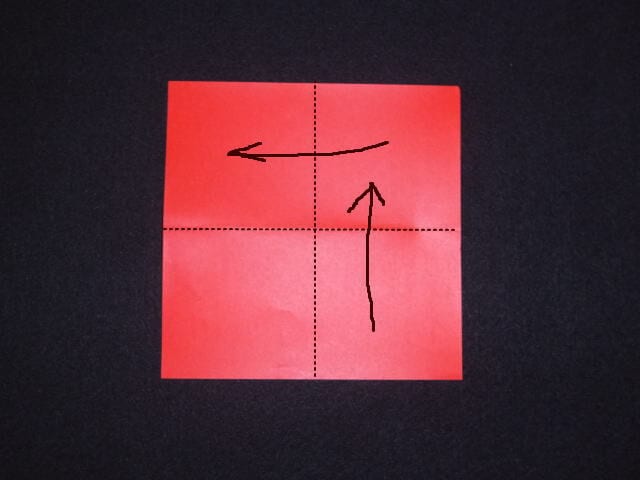
STEP 1. Place the paper with the coloured side up and crease it in half vertically and horizontally.
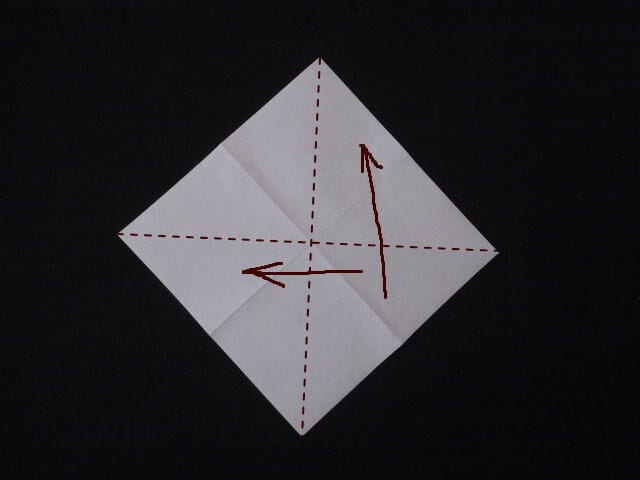
STEP 2. Turn it over and crease both diagonals.
STEP 3. Pinch the diagonal creases and push them in from both sides to collapse the paper into a triangle.
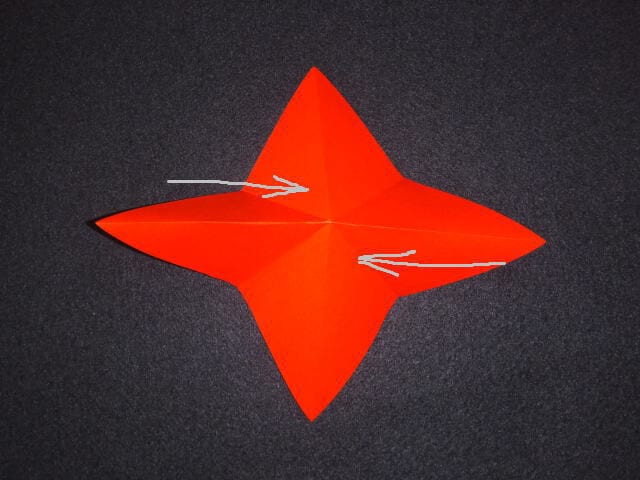
STEP 4. Position the paper as shown, and fold both corners in towards the centre.
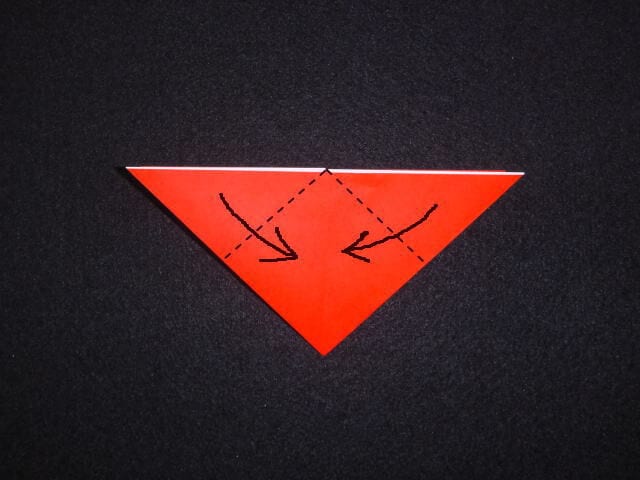
STEP 5. Fold the triangular flap on the left over to the right, about a third of the way across.
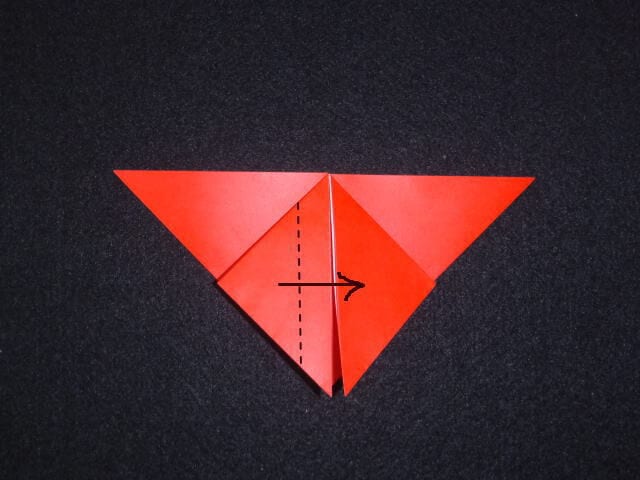
STEP 6. Fold the triangle in half over to the left.
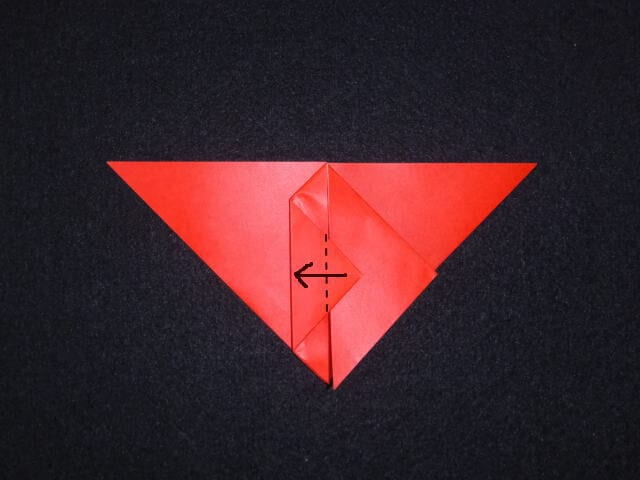
STEP 7. Once the creases are firm, unfold back to the shape from step 4.
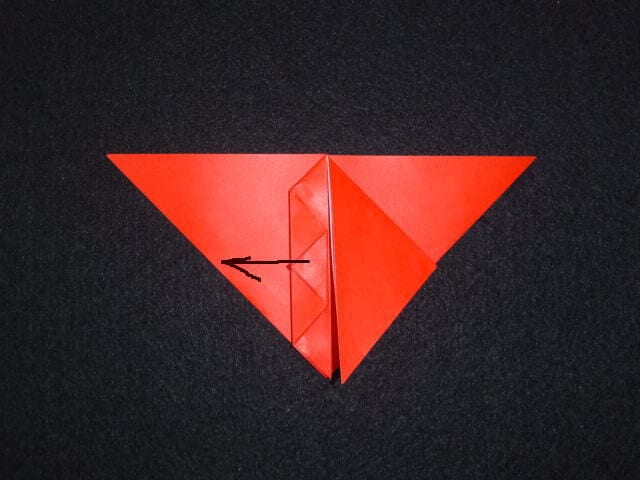
STEP 8. Fold to the right along the first crease you made.
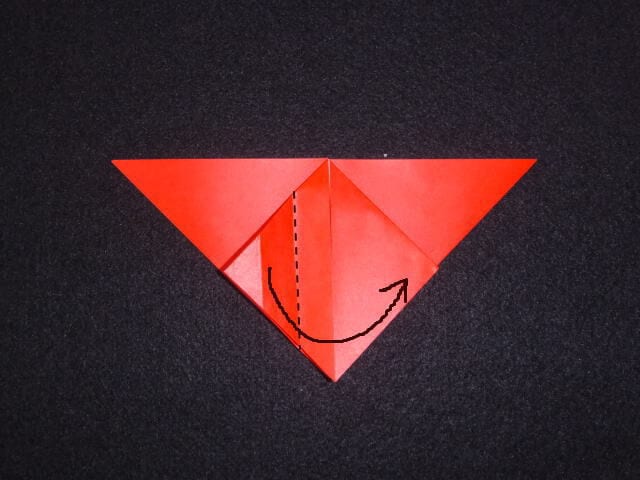
STEP 9. Fold to the left from the next crease along.
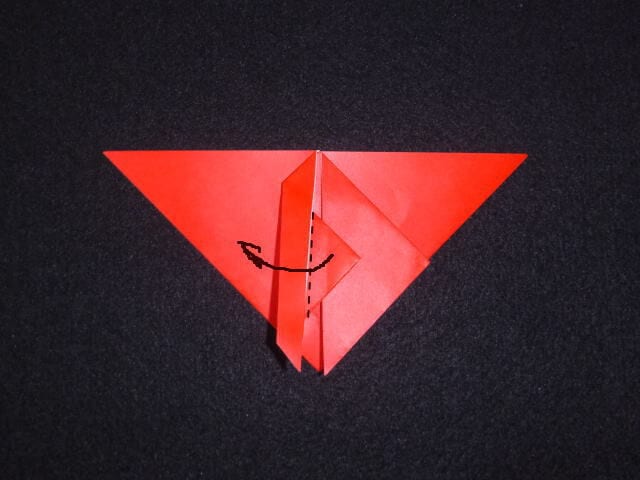
STEP 10. The pleat on the left side is done. Fold the right side the same way as in step 5.
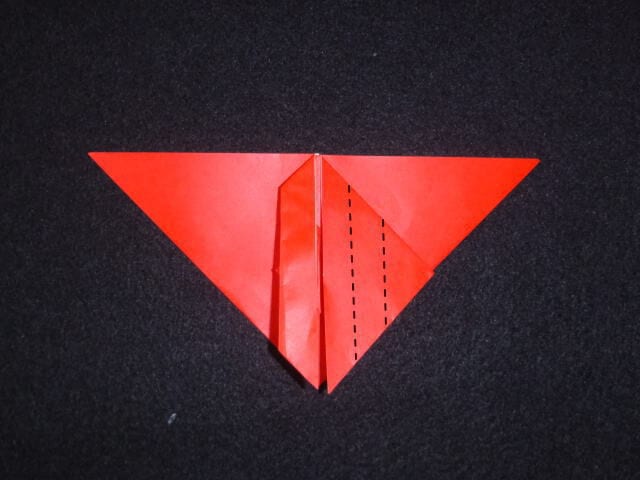
STEP 11. Fold it in the same way.
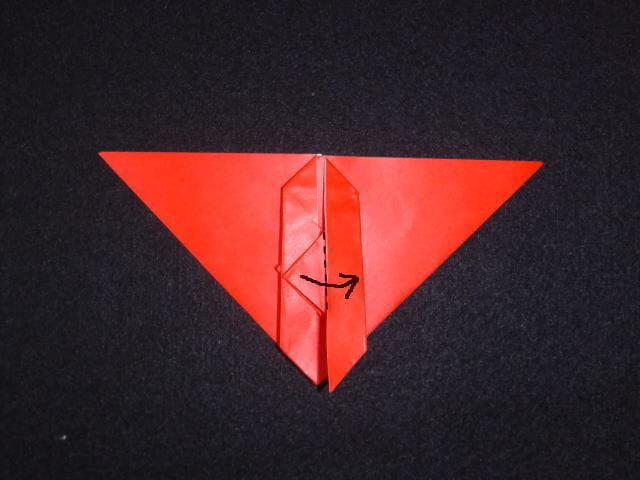
STEP 12. Once you have the crease, fold it the same way as from step 8 onwards. If the layers come apart, tilt the folded part to the left.
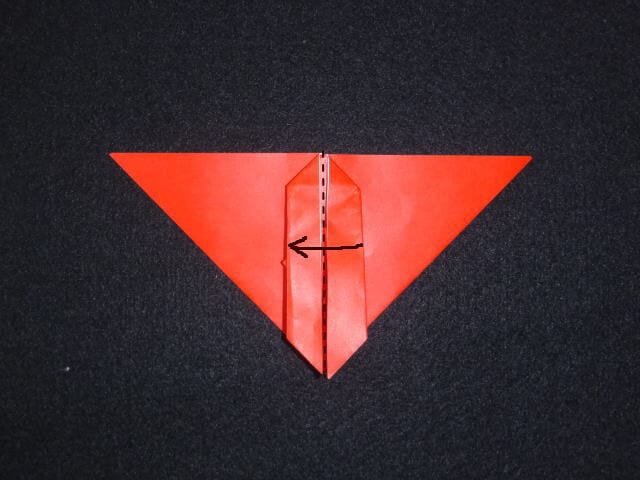
STEP 13. Fold the bottom layer of paper the same way as from step 3 onwards.
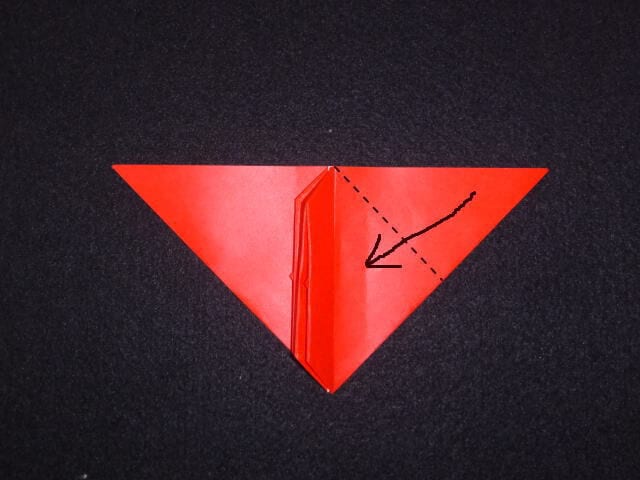
STEP 14. Make a crease.
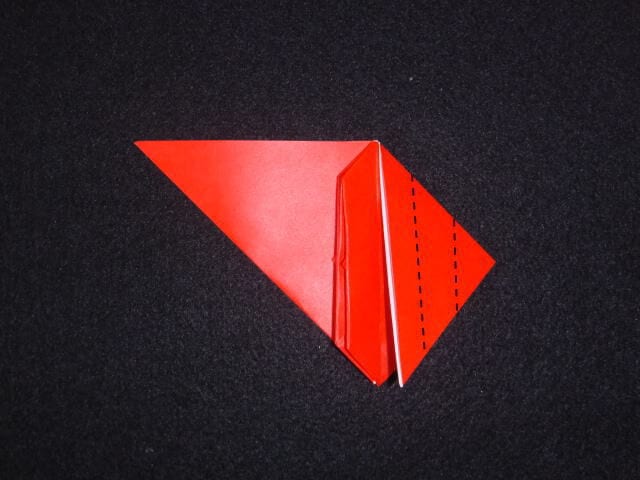
STEP 15. Fold the model in half. If the layers come apart, tilt all the folded parts on the left over to the right.
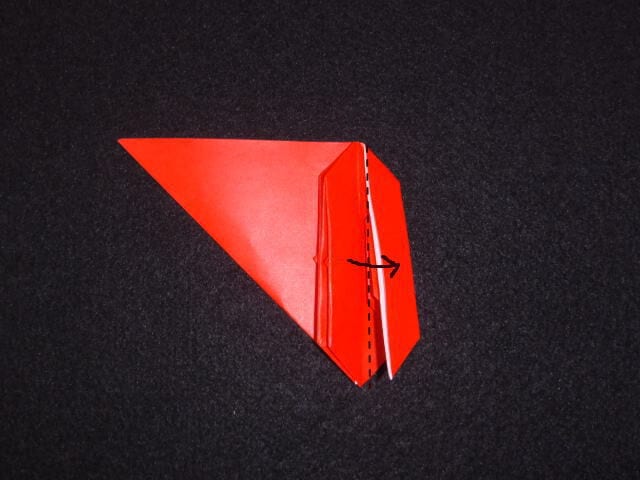
STEP 16. Crease the left side, and the other three places as well, then fold in the middle.
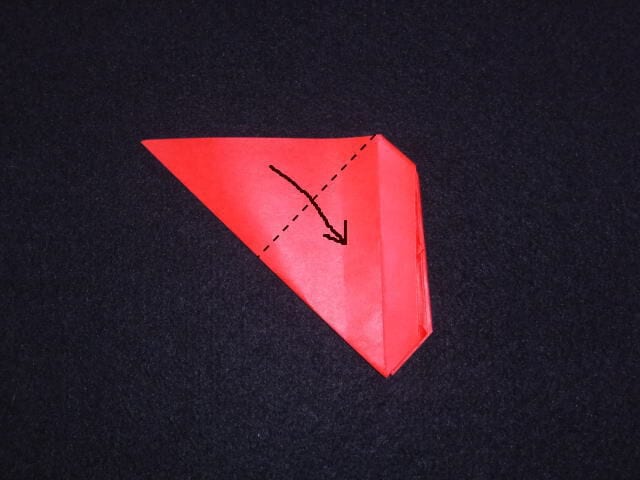
STEP 17. When the layers separate, fold evenly so that there are two on each side. Fold the upper wing along the dotted line so that it opens out on both sides.
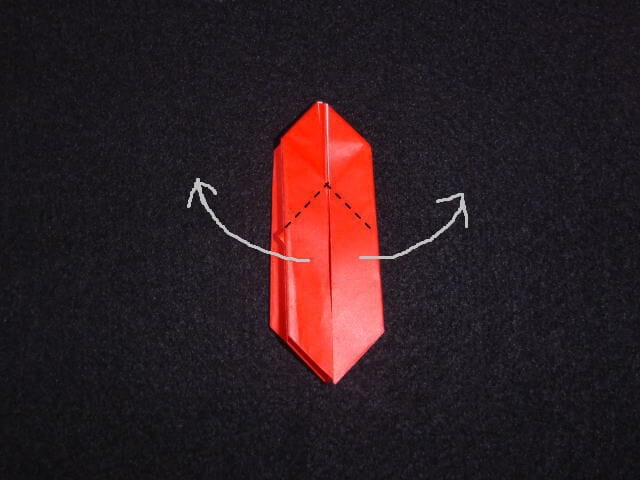
STEP 18. Having opened the upper pair, fold the lower wing so that it opens out on both sides the same way.
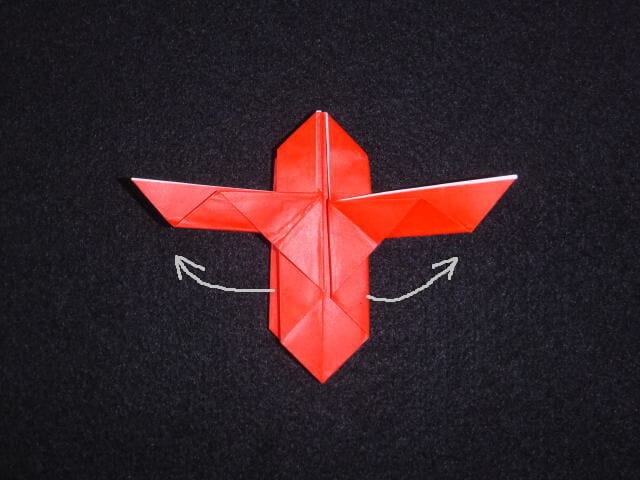
STEP 19. Fold the top slightly towards you.
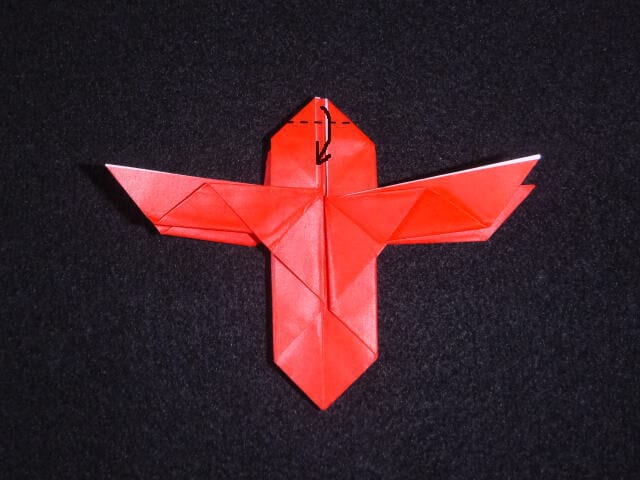
STEP 20. Fold the model in half vertically.
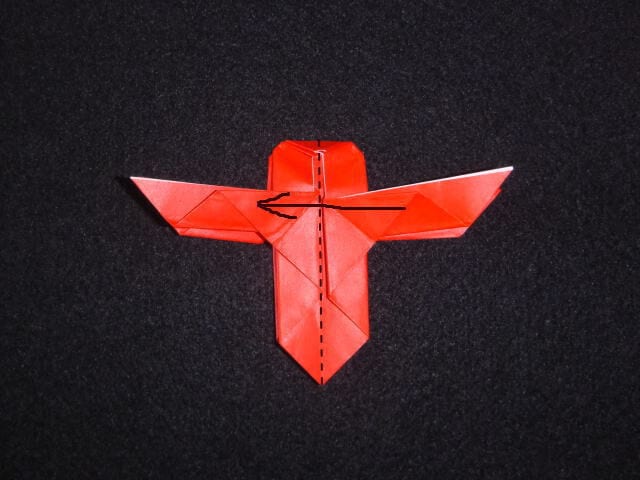
STEP 21. Fold along the dotted line.
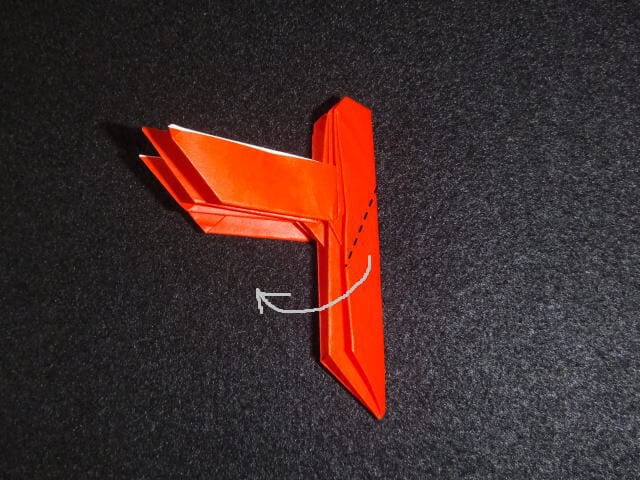
STEP 22. Hold the crease firmly and fold it in the middle.
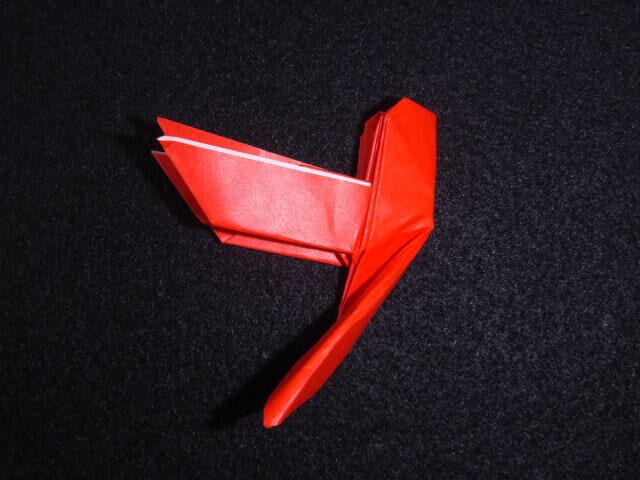
STEP 23. Crease along the dotted line and fold it in the middle.
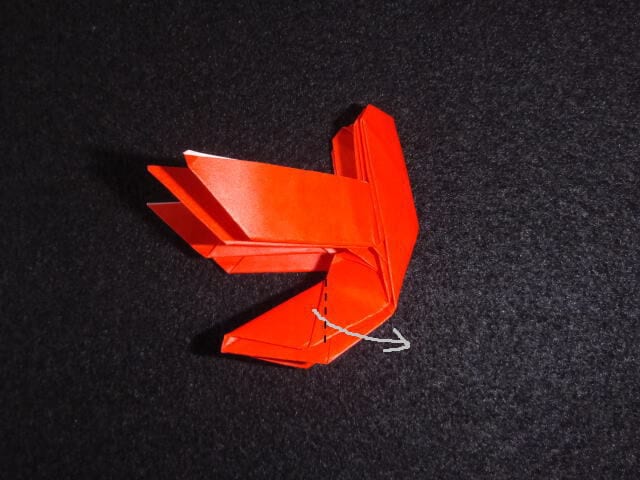
STEP 24. Hold the creases firmly and shape the model.
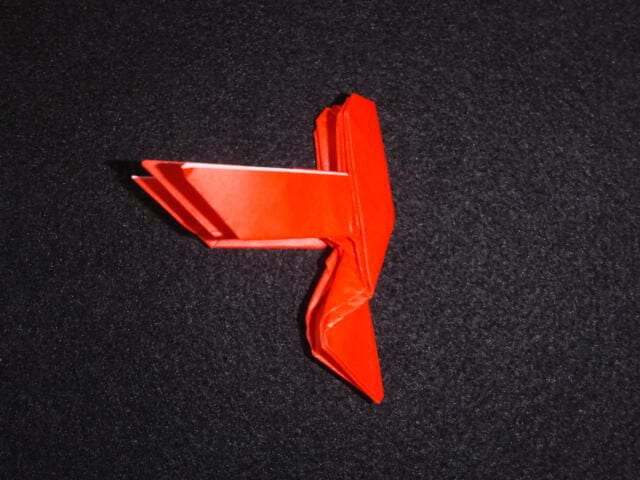
STEP 25. Press down on the top to flatten it.
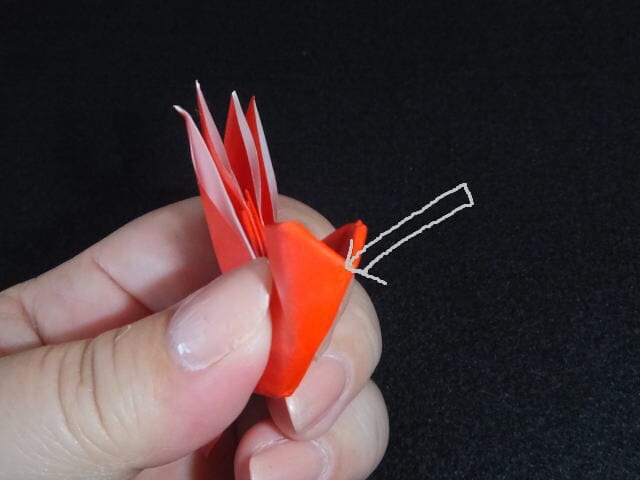
STEP 26. The head is done.
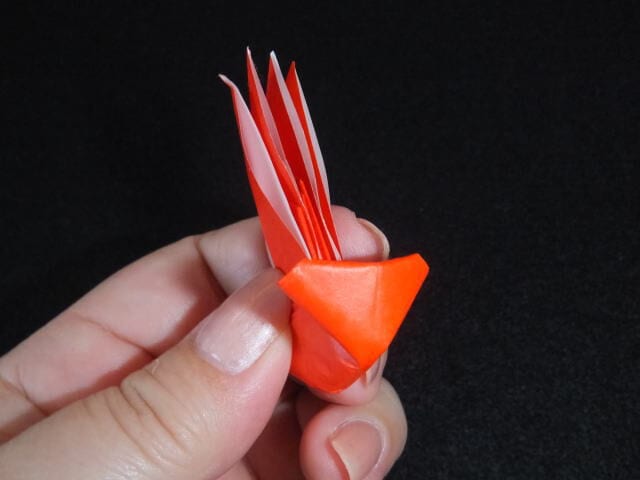
STEP 27. Holding the body, spread the four wings. Adjust the shape by shifting the lower wings slightly.
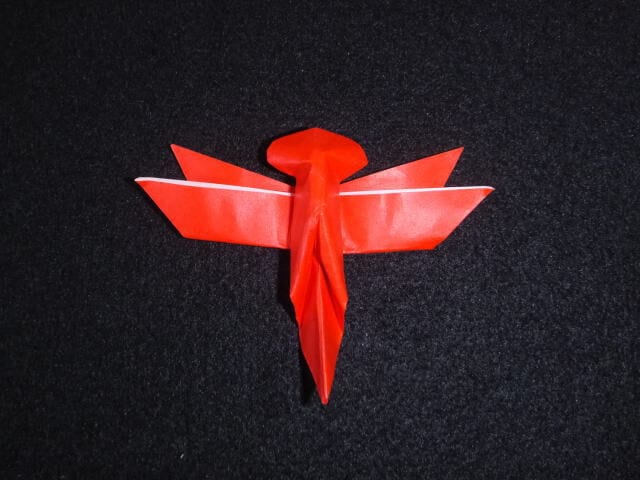
STEP 28. The dragonfly is finished.
Tips for folding
For the fold in the middle from step 8 onwards, open the paper out once and fold it while checking the line — that gives a neater result.
From step 17 onwards there are a great many creases, so hold the paper firmly and fold into the middle.
It is a little small, but it is surprisingly lifelike, do you not think?
Fold it from gold or silver paper, or a patterned sheet, and you get a very colourful dragonfly.
It is fun to stick it on a wall or a window alongside origami butterflies and flowers, or to turn it into a brooch.




