
Traditional Origami Koi Fish
The koi is one of the most beloved subjects in the origami world, and for good reason: its flowing body and flared fins capture the spirit of the fish in just a few elegant folds. This traditional design starts from a square base and builds up into a charming three-dimensional koi, complete with a rounded mouth and curled side fins. If you've already mastered the basics like the square base, this is a rewarding next step that introduces two signature techniques — the petal fold and the inside reverse fold.
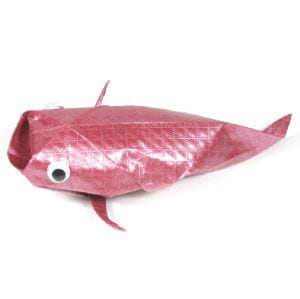
This page is for anyone who wants to learn how to fold a traditional origami koi fish.
This traditional origami koi starts from a square base and lets you build a three-dimensional koi. The special folding techniques used in this model are the petal fold and the inside reverse fold.
If you’re ready, let’s get started.
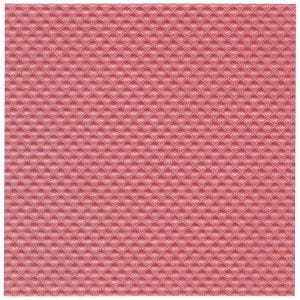
You can use any kind of paper to fold the origami fish. It’s a little easier if the front and back of the paper differ slightly — whether in texture or color. The sheet I’m using here measures 20 cm × 20 cm.
This is the front side of the paper.
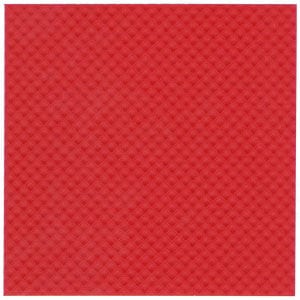
This is the back side of the paper.
Step 1.
Start with a square base. You should already know how to make a square base before beginning — if not, practice that first. Prepare to apply a horizontal valley fold.
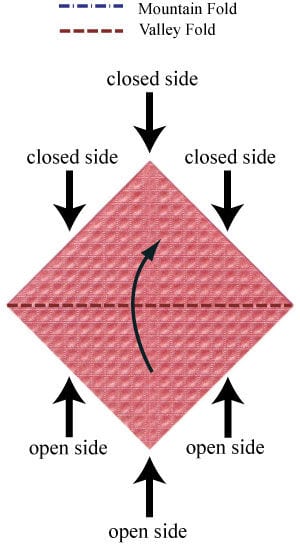
Step 2.
Apply the horizontal valley fold from Step 1. Prepare to apply two valley folds.
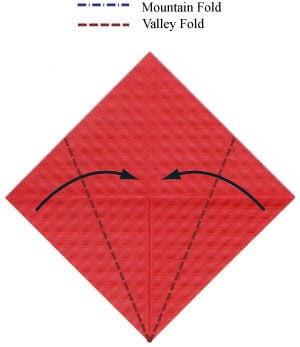
Step 3.
Apply the two valley folds from Step 2. Prepare to apply two more valley folds.
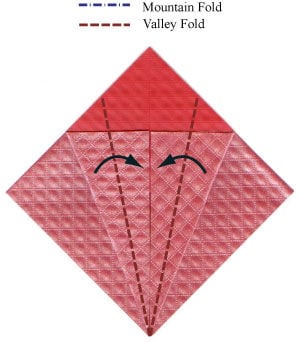
Step 4.
Apply the two valley folds from Step 3. Prepare to turn the koi model over.
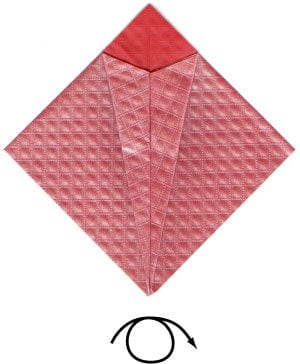
Step 5.
Turn the koi model over. Prepare to apply two valley folds.
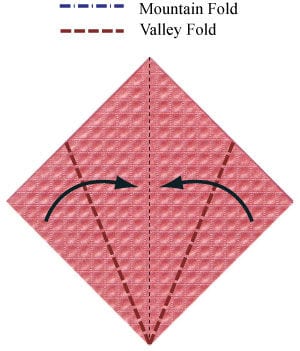
Step 6.
Apply the two valley folds from Step 5. Prepare to apply a horizontal valley fold.
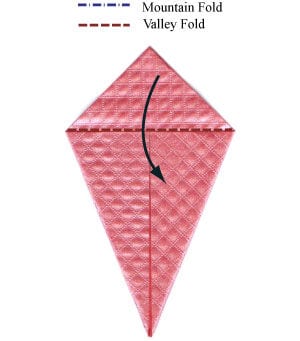
Step 7.
Apply the horizontal valley fold from Step 6. Prepare to unfold three valley folds by returning to Step 5.
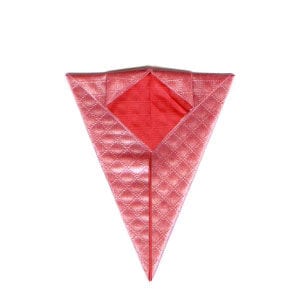
Step 8.
Unfold the three valley folds by returning to Step 5. Prepare to apply a petal fold.
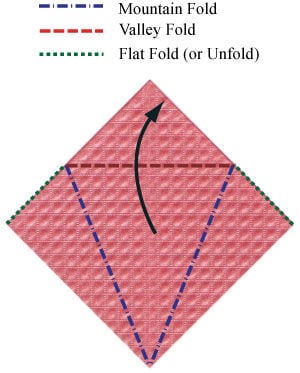
Step 9.
Apply the petal fold from Step 8. Prepare to apply two valley folds.
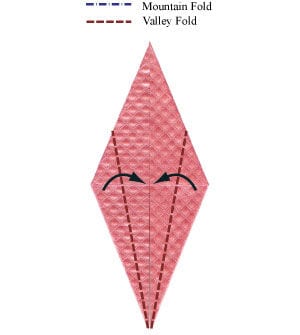
Step 10.
Apply the two valley folds from Step 9. Prepare to apply two more valley folds.
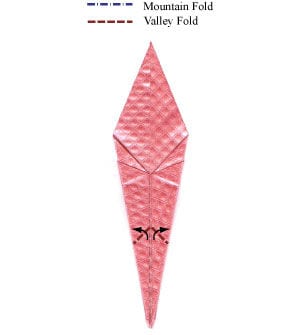
Step 11.
Apply the two valley folds from Step 10. Prepare to unfold the two valley folds you just made.
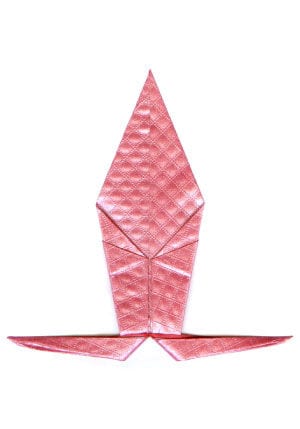
Step 12.
Unfold the two valley folds from Step 11. Prepare to apply two inside reverse folds using the existing crease lines.
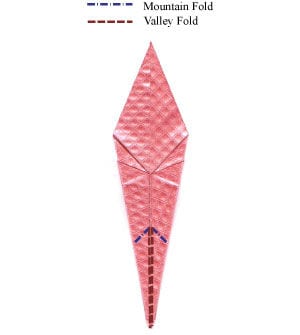
Step 13.
Apply the two inside reverse folds from Step 12. Prepare to turn the koi model over.
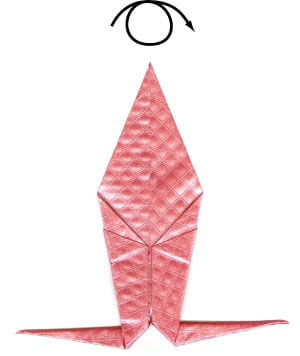
Step 14.
Turn the koi model over. Prepare to apply a horizontal valley fold.
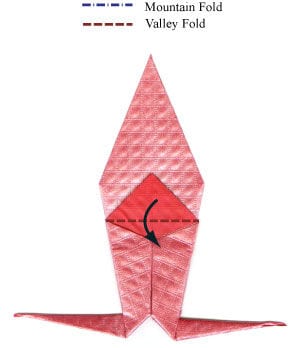
Step 15.
Apply the horizontal valley fold from Step 14. Prepare to rotate the koi model by 90 degrees.
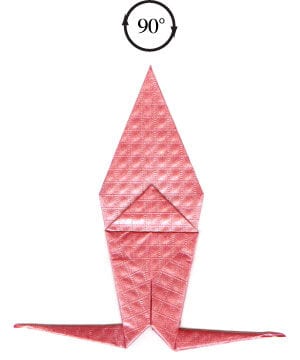
Step 16.
Rotate the koi model by 90 degrees. Prepare to open the hole indicated by the arrow.
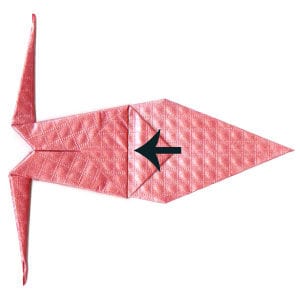
Step 17.
Open the hole indicated by the arrow in Step 16. Prepare to insert a thumb (or any finger) into the hole.
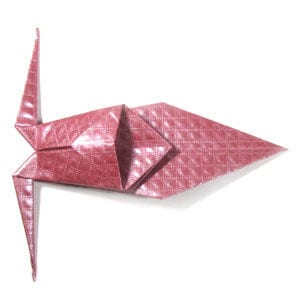
Step 18.
Insert a thumb into the hole. Prepare to pull it in the direction of the arrow.
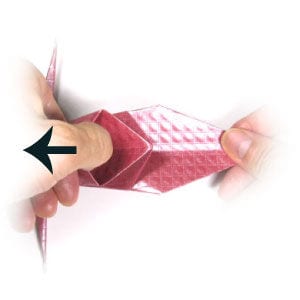
Step 19.
Start pulling it to the left.
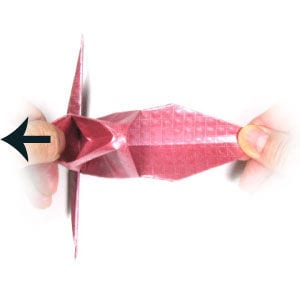
Step 20.
Continue pulling it to the left.
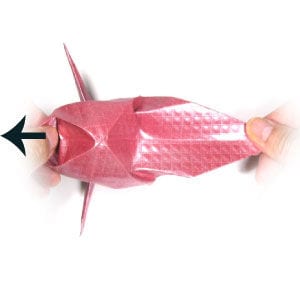
Step 21.
Pull it fully to the left. Prepare to shape the region encircled by the dotted circle into a mouth.
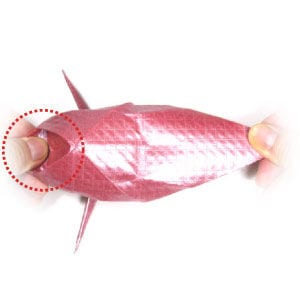
Step 22.
Shape the region encircled by the dotted circle (Step 21) into a mouth. Prepare to give the rear half some volume.
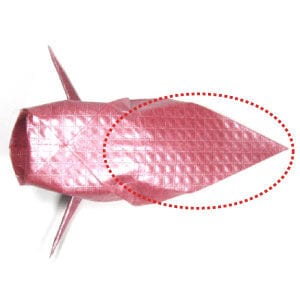
Step 23.
Give the rear half some volume. Prepare to curl the two side fins.
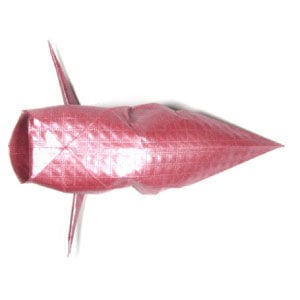
Step 24.
Curl the two side fins. Prepare to rotate the koi model by 90 degrees.
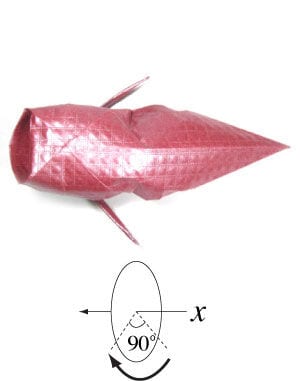
Step 25.
Rotate the koi model by 90 degrees. Prepare to smooth the surface of the model.
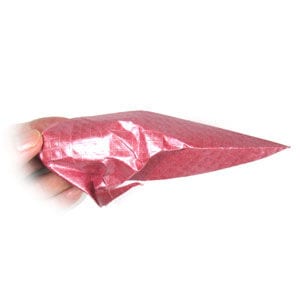
Step 26.
Smooth the surface of the koi model. Prepare to rotate the model by 180 degrees.
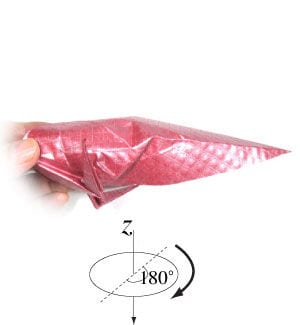
Step 27.
Rotate the koi model by 180 degrees. Prepare to smooth the surface of the model again.
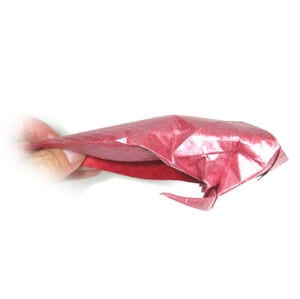
Step 28.
Smooth the surface of the koi model. Prepare to flatten the tail region encircled by the dotted circle.
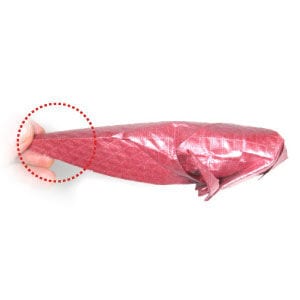
Step 29.
Flatten the tail region encircled by the dotted circle. Prepare to apply a valley fold.
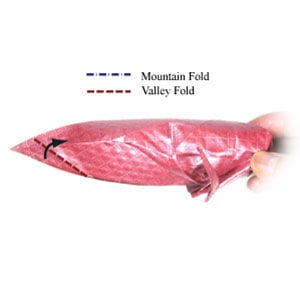
Step 30.
Apply the valley fold from Step 29. Prepare to rotate the koi model by 180 degrees.
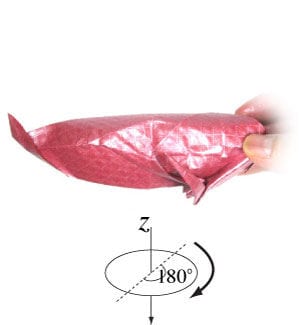
Step 31.
Rotate the koi model by 180 degrees. Prepare to draw two eyes or add eye stickers.
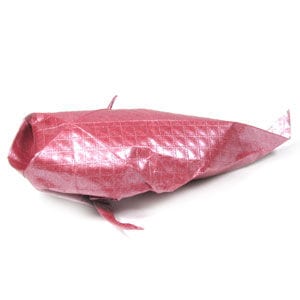
Step 32.
Here I added two googly eyes. Congratulations! You have just completed a traditional origami koi fish.




