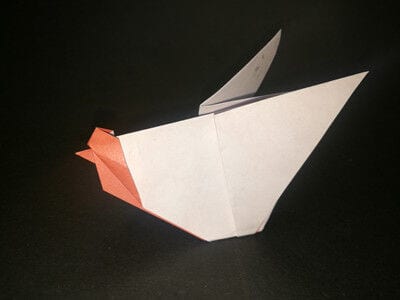
Pegasus
There is something magical about coaxing a flying horse out of one flat square — no cuts, no glue, just creases. Pegasus is one of those models that looks intimidating in the finished photo but comes together step by patient step. Grab a sheet in your favorite color (blue is the classic choice, but metallic foil is gorgeous here), clear a little table space, and let's fold.

What You’ll Need to Fold a Pegasus
What you need: 1 sheet of origami paper.
You can fold Pegasus from any color you like. A blue sheet gives it that classic winged-horse look, while shimmery silver or gold foil makes a dazzling version — those papers can be a little slippery to fold, but they’re well worth it here.
How to Fold Pegasus (with step-by-step photos)
STEP 1. Fold the square in half diagonally both ways to crease the diagonals.
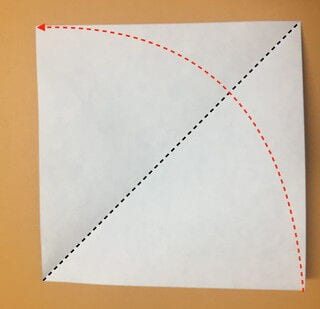
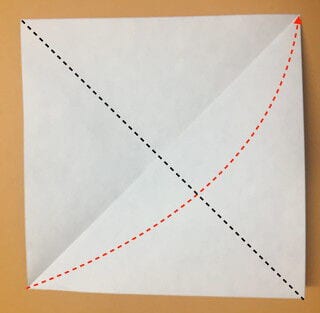
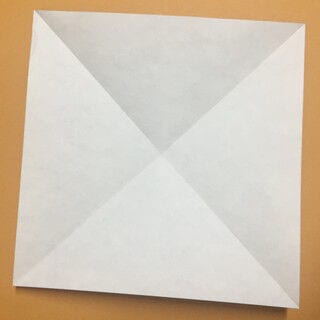
STEP 2. Fold the corner toward the center.
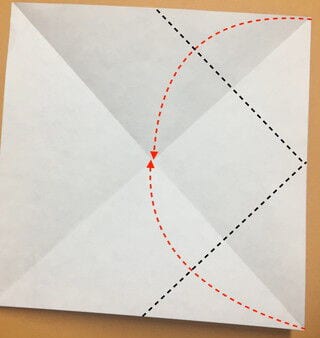
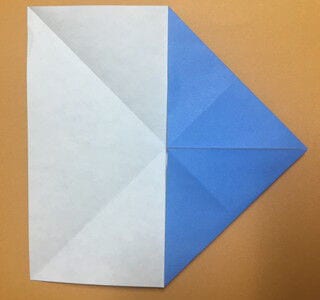
STEP 3. Fold the other side’s corner toward the center as well.
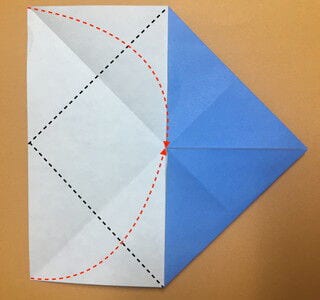
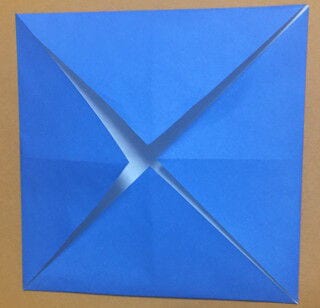
STEP 4. Turn the model over.
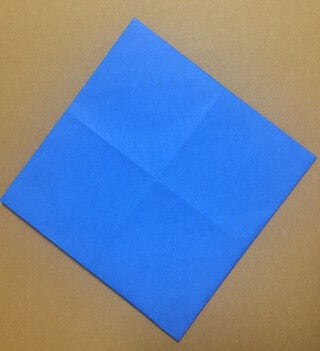
STEP 5. Fold it in half.
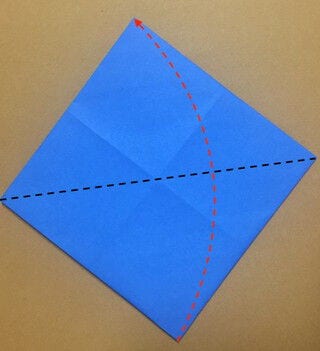
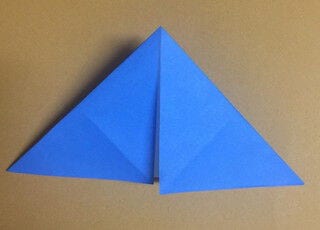
STEP 6. Fold the left side into a pocket fold.
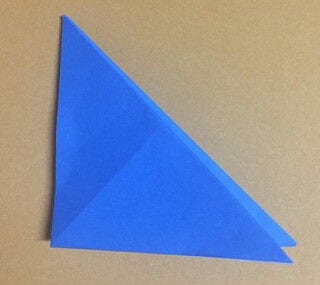
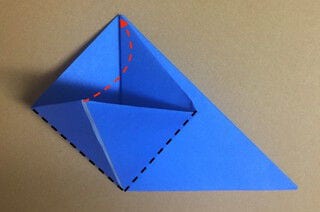
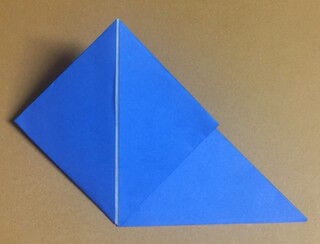
STEP 7. Make the same pocket fold on the right side.
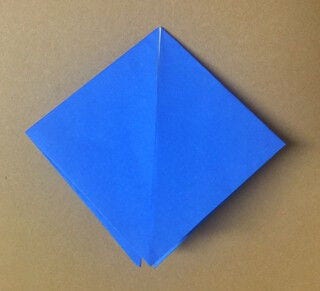
STEP 8. Lay the model down with the loose (flapping) flap pointing to the right.
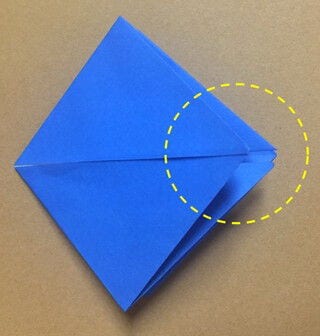
STEP 9. Fold the top and bottom corners toward the center line.
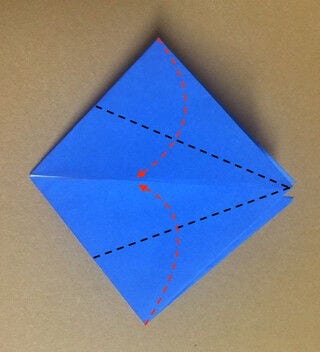
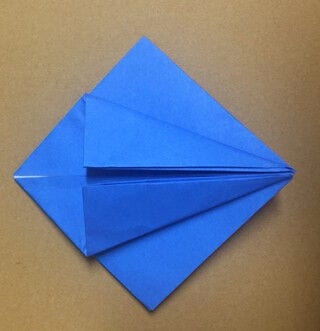
STEP 10. Unfold, check the creases, then open the right corner out by one layer toward the left.
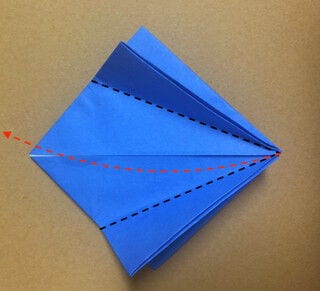
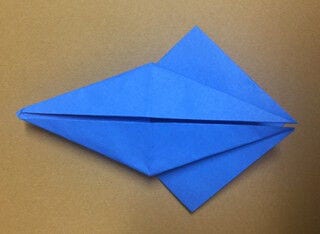
STEP 11. Do the same on the back side.
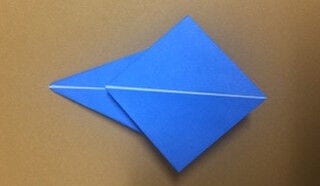
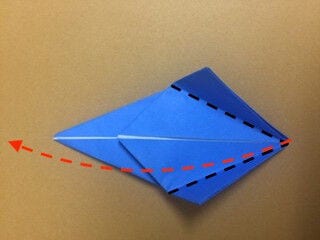
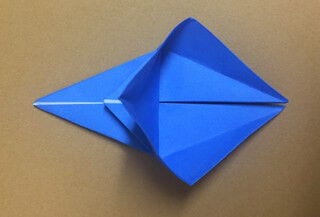
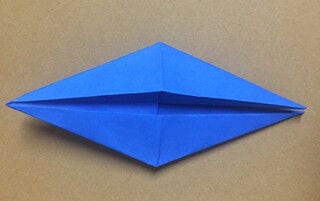
STEP 12. Fold one layer over from the left side to the right side.
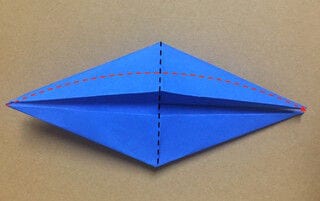
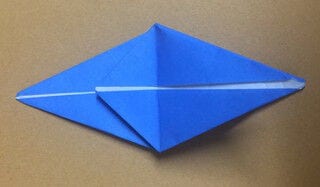
STEP 13. Fold the back side the same way.
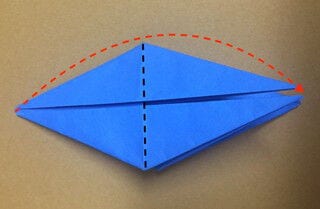
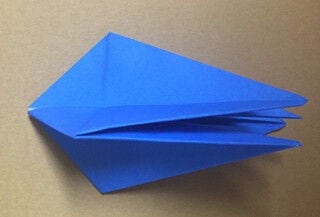
STEP 14. While opening the center, lift the top layer and fold it back like peeling.
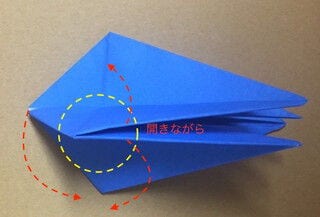
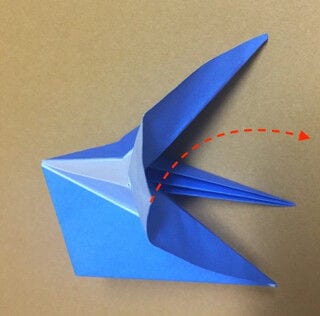
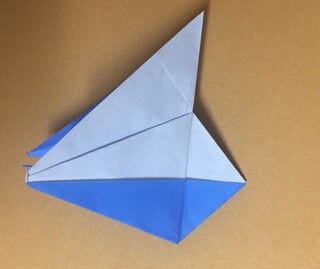
STEP 15. Fold the other side the same way, peeling one layer.
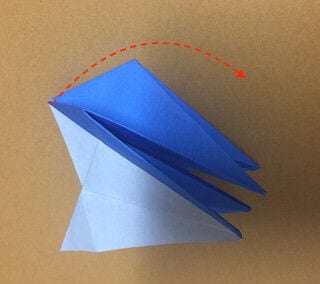
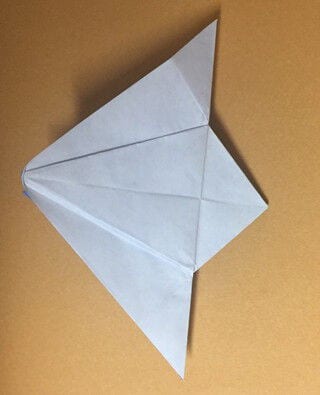
STEP 16. Fold it up along the dotted line.
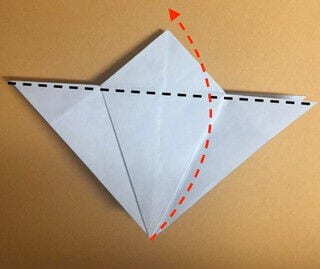
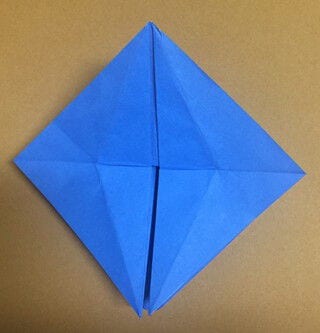
STEP 17. Slip your finger into the lower-left corner and form a pocket fold.
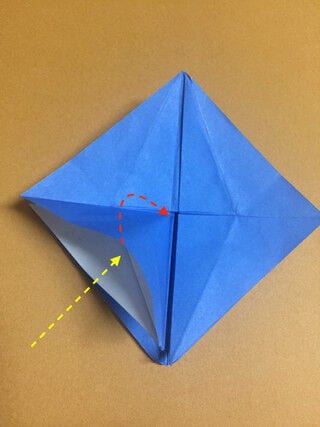
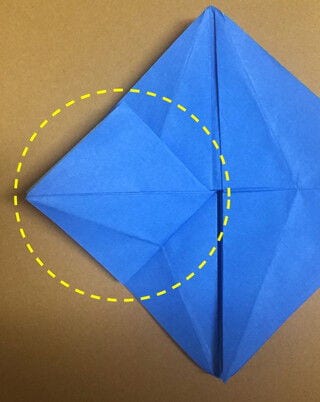
STEP 18. Make the same pocket fold at the lower right.
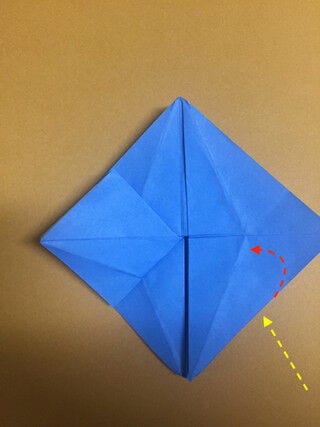
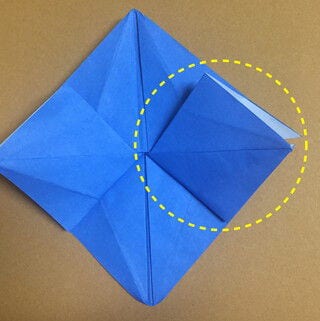
STEP 19. Fold the pocket so its corner lines up with the center line.
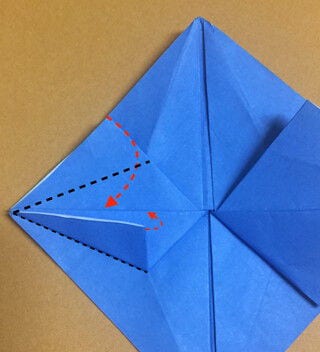
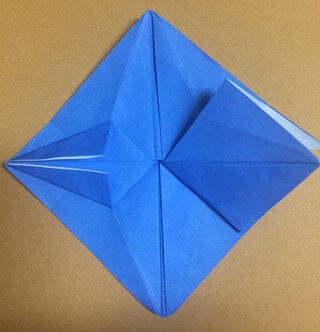
STEP 20. Align the corner on the other side to the center the same way.
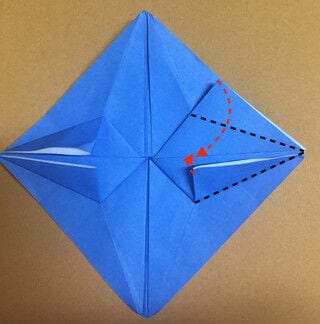
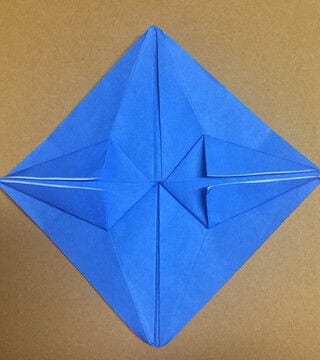
STEP 21. Using the crease you just made, fold the left layer over to the right.
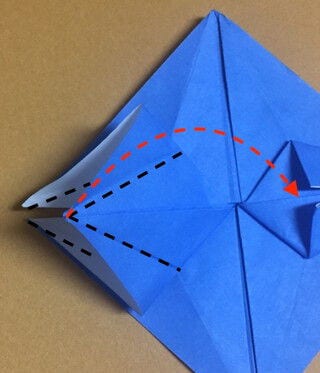
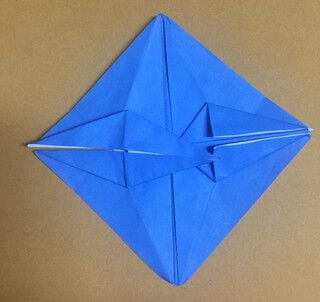
STEP 22. Fold that section back toward the left.
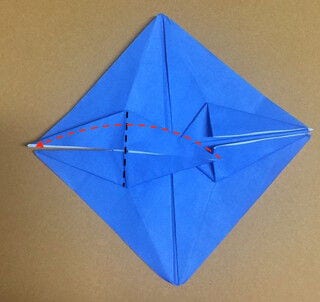
STEP 23. On the right side, do the same: open it from right to left along the creases and fold it back.
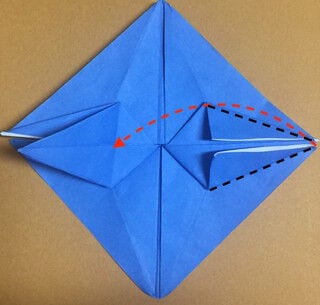
STEP 24. Likewise, fold it to the right at the halfway point.
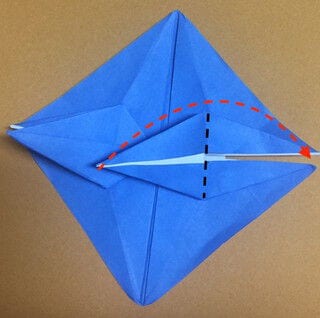
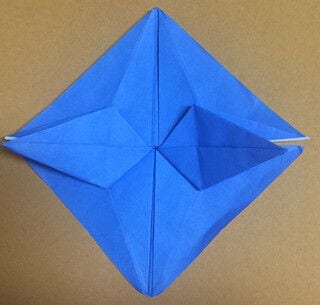
STEP 25. Fold it in half.
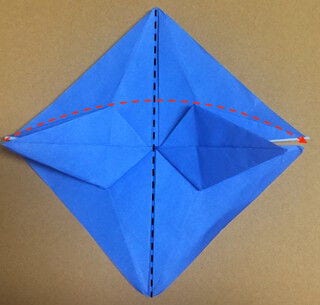
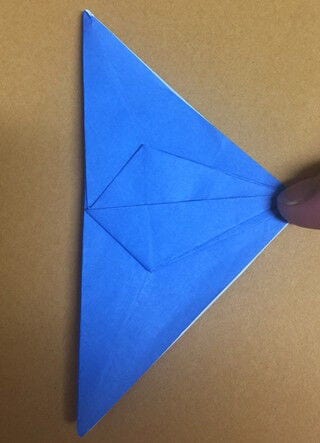
STEP 26. Rotate the model and set it down.
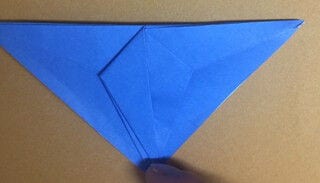
STEP 27. Fold it so it tucks in (a crimp).
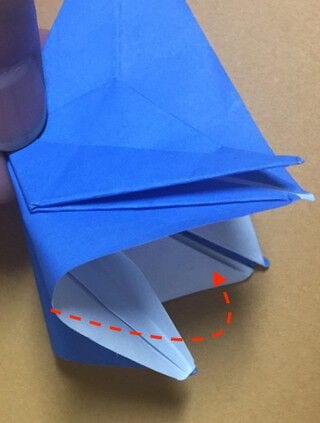
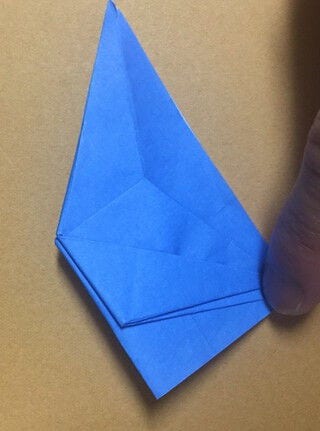
STEP 28. Turn over one layer.
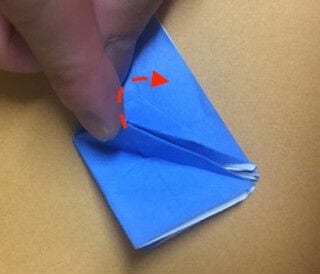
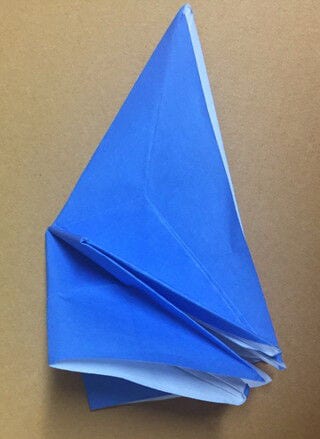
STEP 29. Open the exposed flap from right to left and fold it.
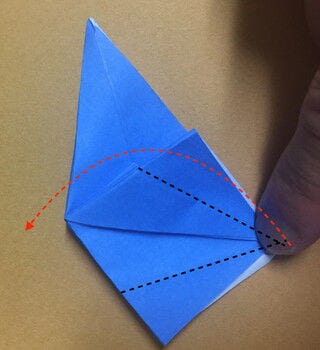
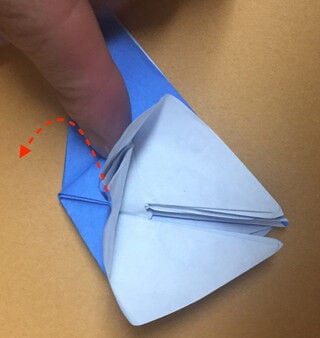
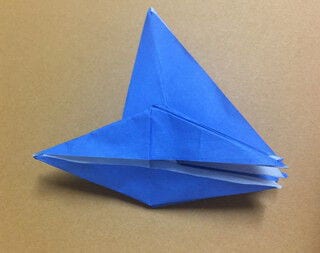
STEP 30. Fold it in half.
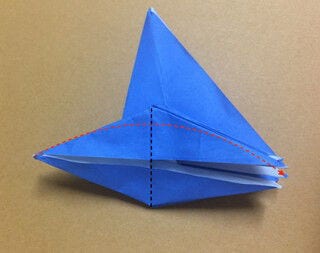
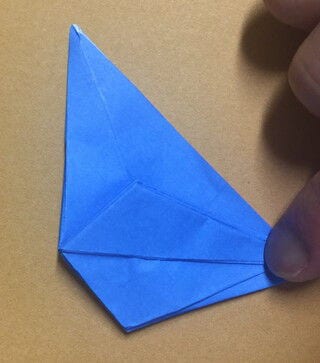
STEP 31. Repeat steps 27–30 on the back side.
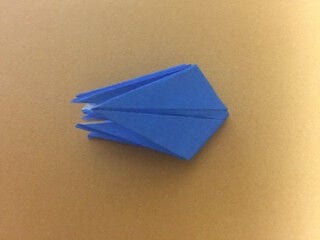
STEP 32. Fold it over to the right.
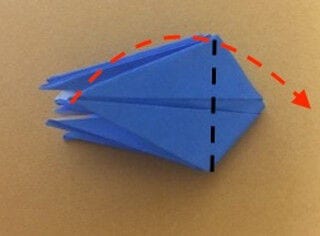
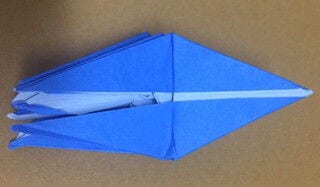
STEP 33. Fold it in half.
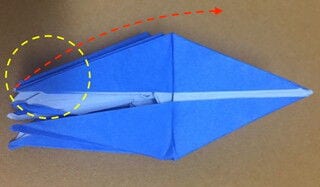
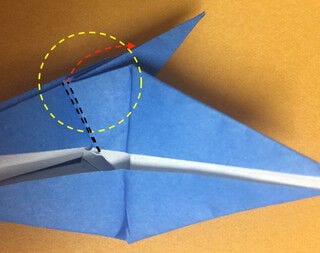
STEP 34. Fold the tip in half to shape a leg; do the same on the other side.
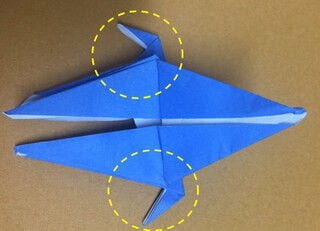
STEP 35. Fold the two corresponding spots on the back the same way to form four legs.
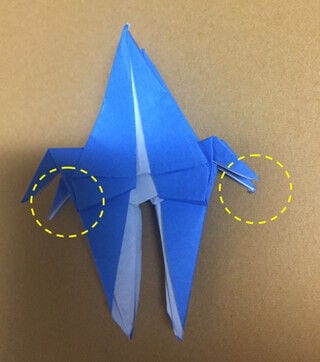
STEP 36. Fold the pointed tip in half and fold it upward.
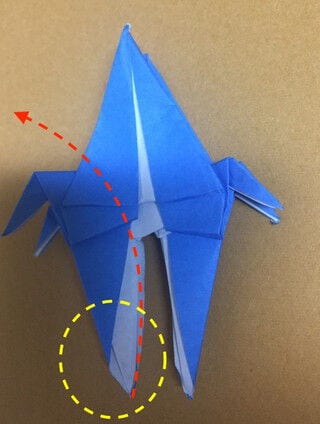
STEP 37. Fold the tip in half to form the head (face).
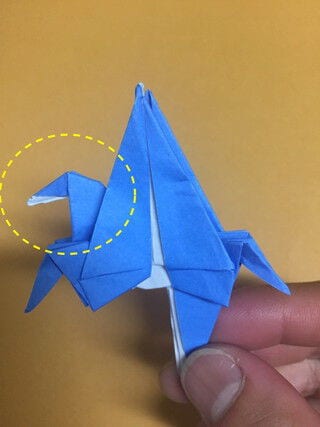
STEP 38. Fold the opposite pointed tip in half and fold it upward.
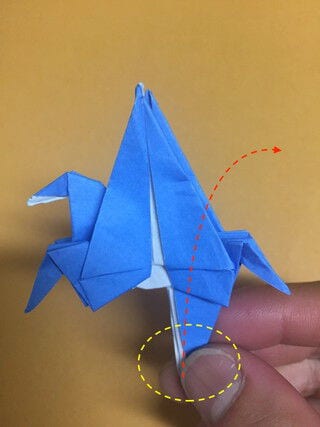
STEP 39. This becomes the tail.
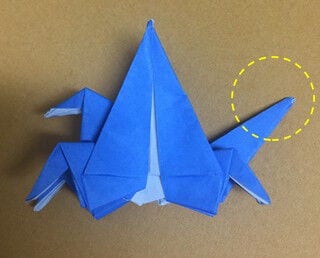
STEP 40. Spread the legs slightly apart and fold the wings downward to finish.
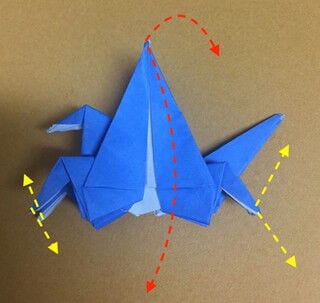
STEP 41. Your Pegasus is complete!