Easy Origami Sword
Few things feel as satisfying as folding a sword out of nothing but a flat square of paper. This easy origami sword is the longer, sleeker sibling of the origami dagger — the kind of model that looks impressive on a shelf yet only asks you to know two basic creases: the valley fold and the mountain fold.
The real star of the show is the squash fold, a move you will meet around the middle of the sequence. It might look intimidating the first time, but once you push that little flap flat, everything clicks into place. Grab a 20 cm square, find a clear table, and let's build something you can actually hold.
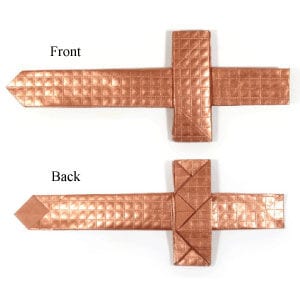
This page is for anyone who wants to learn how to fold an easy origami sword.
This easy origami sword is a longer version of the easy origami dagger. The special folding technique you will learn from this model is the squash fold. Overall, its folding method is very similar to that of the easy origami dagger.
Before working on this model, you need to know what a valley fold and a mountain fold are. If you know these two folding techniques, you will have no problem making the origami sword.
If you are ready, then let’s get started.
You may use any kind of paper to fold this origami sword. It is a little easier if the front and back sides of the paper are slightly different, whether in texture or in color.
Make sure the paper you use is a square (all sides equal and all angles 90 degrees). The paper I am using here is a 20 cm × 20 cm square. It is a good size for those who are not experienced in paper folding. Once you become familiar with this model, you can try smaller paper.
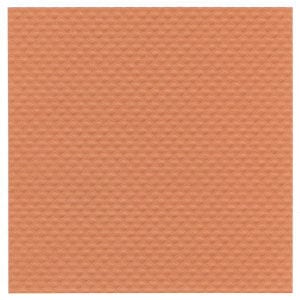
This is the front side of the paper.
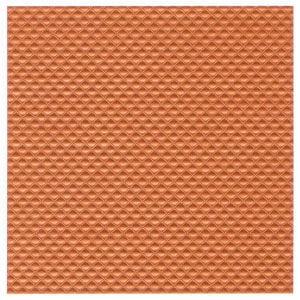
This is the back side of the paper.
STEP 1.
Start with the back side of the paper facing up. Prepare to apply a horizontal valley fold.
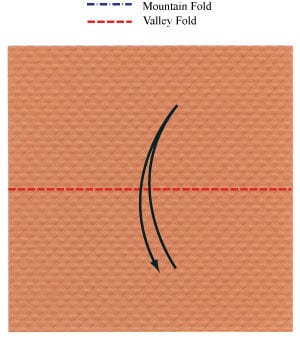
STEP 2.
Valley-fold in half horizontally. Prepare to apply a vertical valley fold.
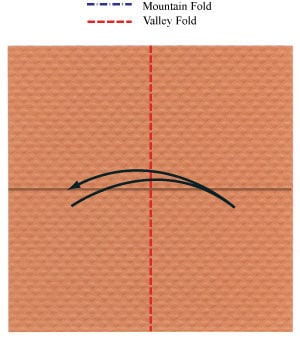
STEP 3.
Valley-fold in half vertically. Prepare to turn the paper over.
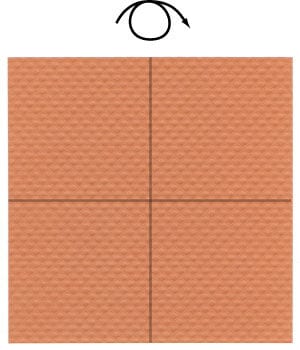
STEP 4.
Turn the paper over. Prepare to apply a diagonal valley fold.
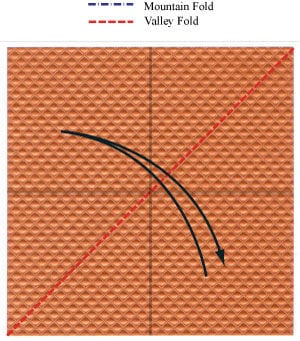
STEP 5.
Valley-fold diagonally. Prepare to apply another diagonal valley fold.
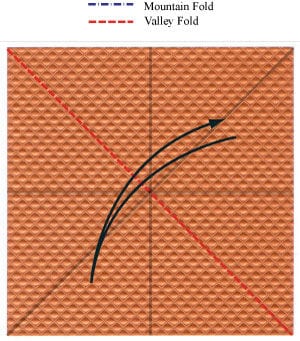
STEP 6.
Apply the diagonal valley fold of STEP 5. Prepare to rotate the paper by 45 degrees.
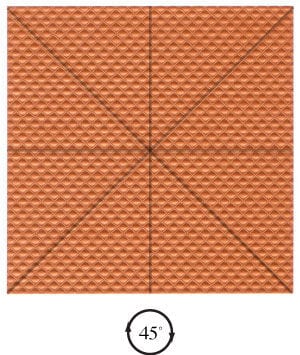
STEP 7.
Rotate the paper by 45 degrees. Prepare to apply two vertical valley folds.
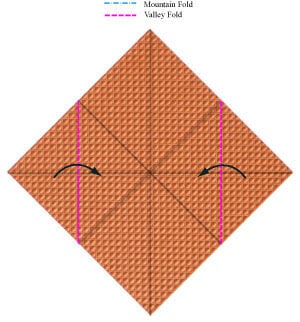
STEP 8.
Apply the two vertical valley folds of STEP 7. Prepare to turn the paper over.
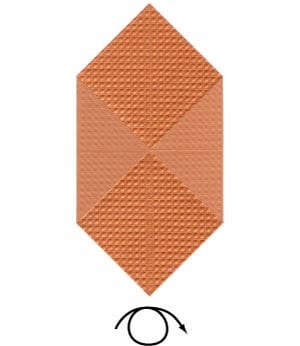
STEP 9.
Turn the paper over. Prepare to apply two vertical valley folds. Be sure to apply the valley fold on the frontmost layer only.
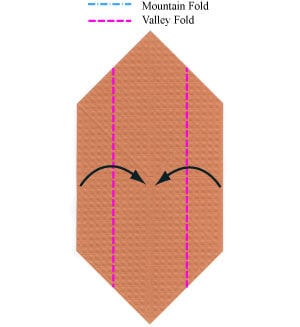
STEP 10.
Apply the two vertical valley folds of STEP 9. Prepare to apply another two vertical valley folds.
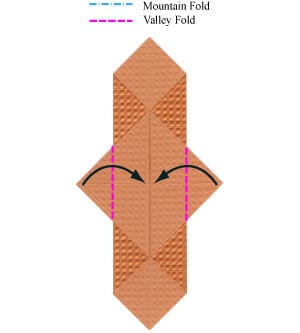
STEP 11.
Apply another two vertical valley folds of STEP 10. Prepare to apply a valley fold.
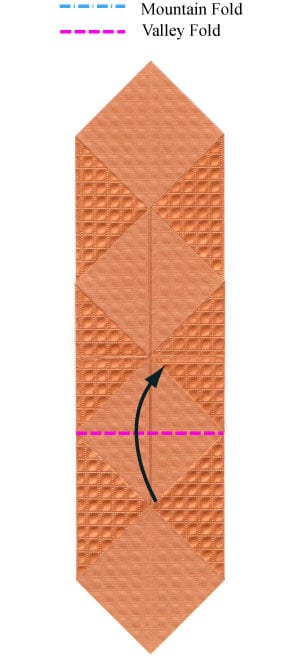
STEP 12.
Apply the valley fold of STEP 11. Prepare to apply another horizontal valley fold.
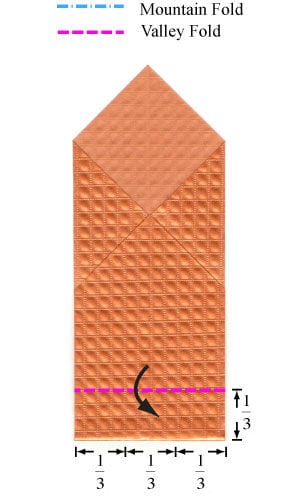
STEP 13.
Apply the horizontal valley fold of STEP 12. Prepare to apply a squash fold.
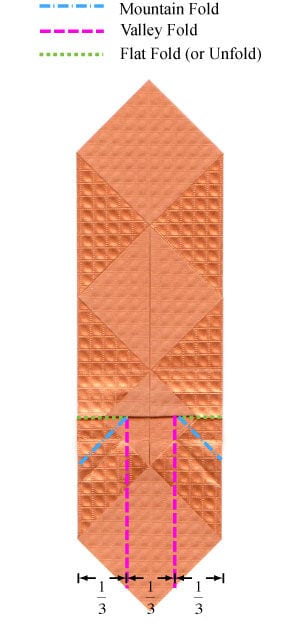
STEP 14.
Apply the squash fold of STEP 13. Prepare to apply a horizontal valley fold while unfolding the lower horizontal edge.
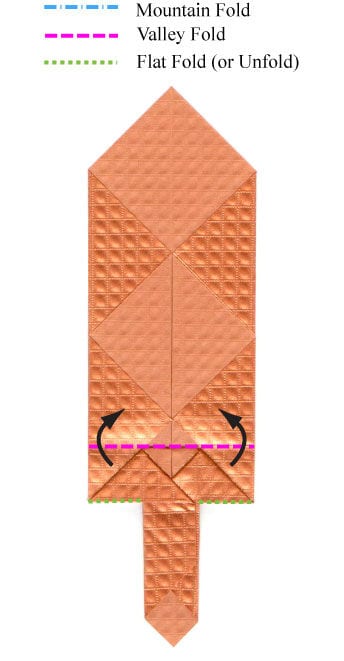
STEP 15.
Apply the horizontal valley fold while unfolding the lower horizontal edge. Prepare to apply a mountain fold to all layers.
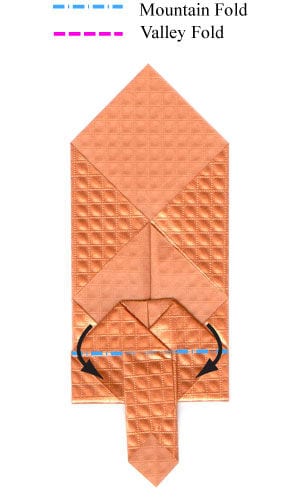
STEP 16.
Apply the mountain fold to all layers. Prepare for a right-side squash fold.
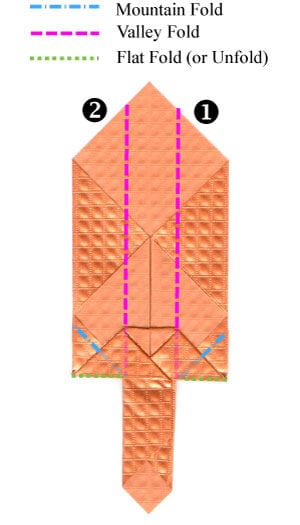
STEP 17.
Apply the right-side squash fold. Prepare to apply the left-side squash fold.
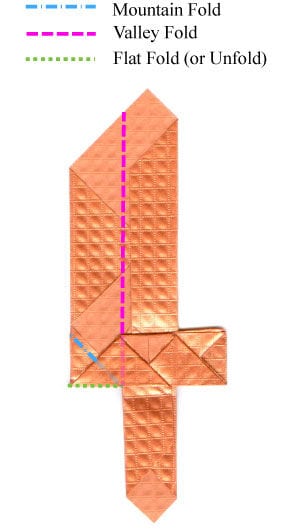
STEP 18.
Apply the left-side squash fold. Prepare to apply a valley fold.
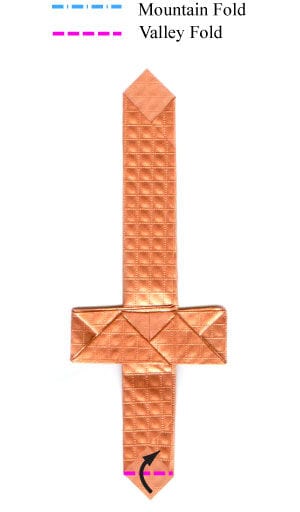
STEP 19.
Apply the valley fold of STEP 18. Prepare to turn the origami sword over.
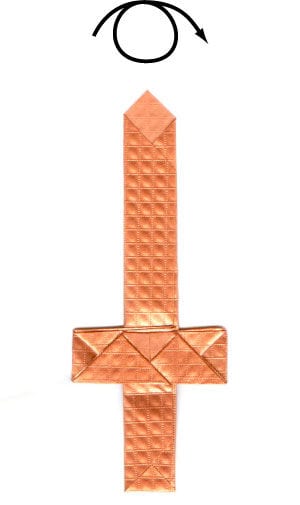
STEP 20.
Turn the origami sword over. You can add some glue if you want the sword to be sturdier.
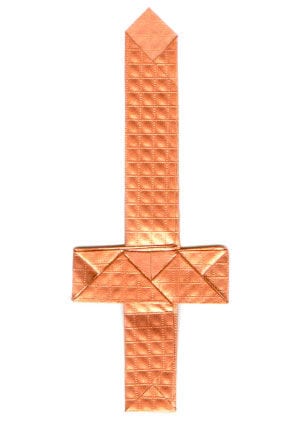
STEP 21.
Congratulations! You have completed making an easy origami sword.