
Traditional Origami Horse
The horse is one of those origami subjects that instantly reads as "a horse" the moment the legs splay out—no ambiguity, just a proud little creature standing on your desk. What makes this traditional version fun is that it leans on the bird base you may already know, then adds a clever scissor cut and a pair of reverse folds to carve out the legs and lift the head. It's a step up from the easy animals, but every move is a technique worth having in your repertoire. Pour a coffee, grab a 20 cm square, and let's build ourselves a paper steed.
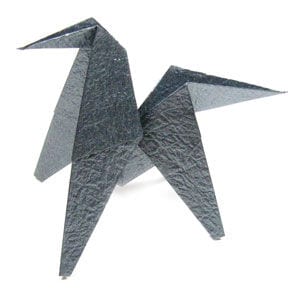
This page is for anyone who wants to fold a traditional origami horse.
The origami horse is based on the bird base. One distinctive feature is that you will need to use scissors to cut along a guide line. You will also apply both the inside reverse-fold and the outside reverse-fold.
Before working on this model, you need to know what the valley-fold and mountain-fold are. If you know these two folding techniques, then you will have no problem making the origami horse.
If you are ready, then let’s get started.
You may use any kind of paper to fold the origami horse. It is a little easier if the front and back sides of the paper are slightly different in texture or color.
Make sure the paper you use is a square (all sides equal and all angles 90 degrees). The paper I am using here is a 20cm x 20cm square, a good size for those who are not experienced in paper folding. Once you are familiar with this model, you can try smaller paper.
This is the front side of the paper.
This is the back side of the paper.
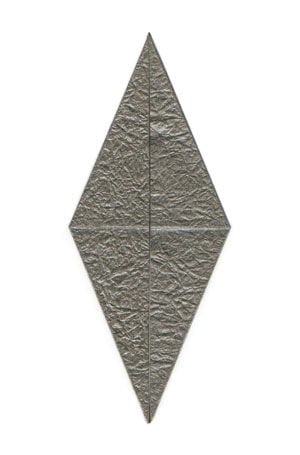
STEP 1.
We are going to start from the bird base, since the origami horse is based on it. Prepare to return to the square base.
STEP 2.
Start to open the pocket.
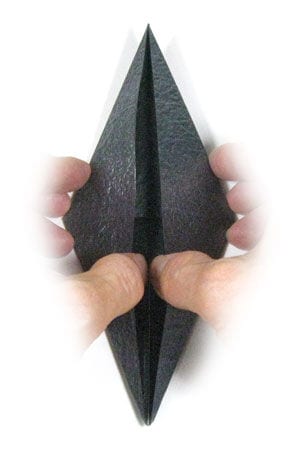
STEP 3.
Continue opening the pocket.
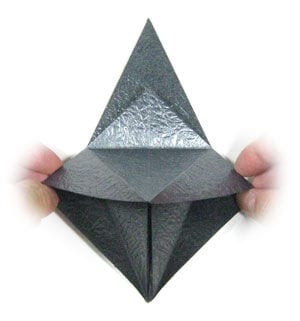
STEP 4.
Finish opening the pocket. Prepare to turn the model over.
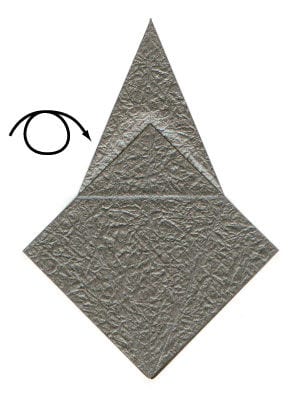
STEP 5.
Turn the model over. Prepare to open the pocket.
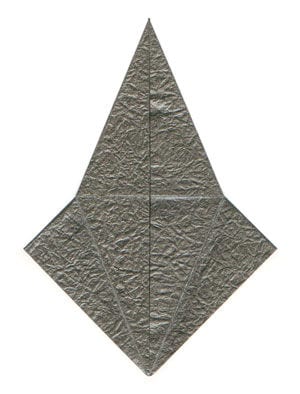
STEP 6.
Start to open the pocket.
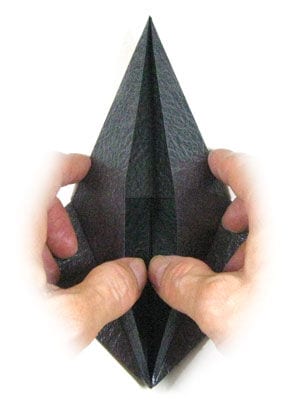
STEP 7.
Continue opening the pocket.
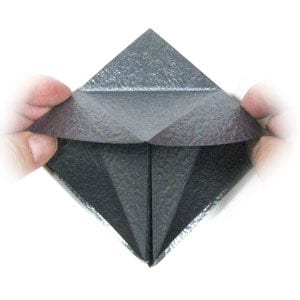
STEP 8.
Finish opening the pocket. Prepare to cut the paper along the white dashed line.
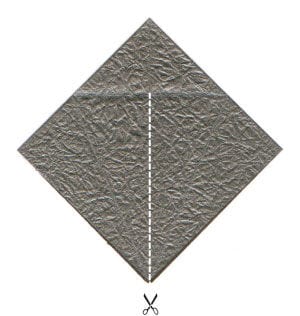
STEP 9.
Cut the paper along the white dashed line from step #8.
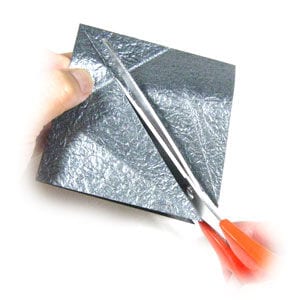
STEP 10.
Prepare for two valley-folds.
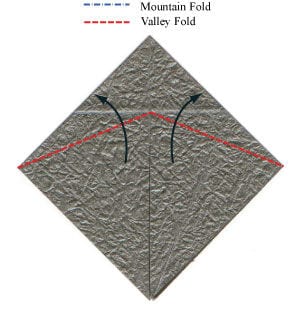
STEP 11.
Apply the two valley-folds from step #10. Prepare for two more valley-folds.
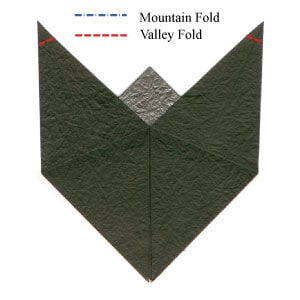
STEP 12.
Apply the two valley-folds from step #11. Prepare for two more valley-folds.
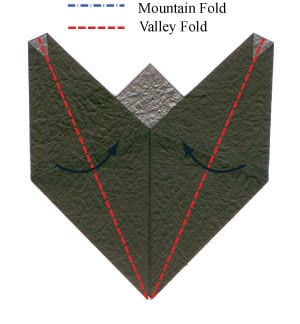
STEP 13.
Apply the two valley-folds from step #12. Prepare to turn the model over.
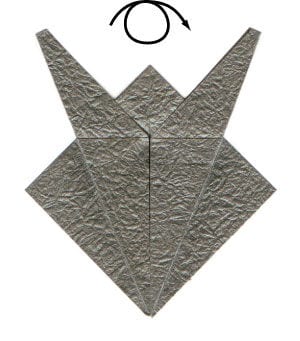
STEP 14.
Turn the model over. Prepare to repeat steps #8-13.
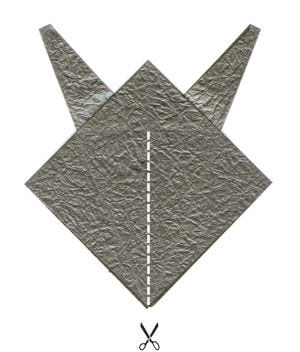
STEP 15.
Repeat steps #8-13. Prepare to rotate the model by 180 degrees.
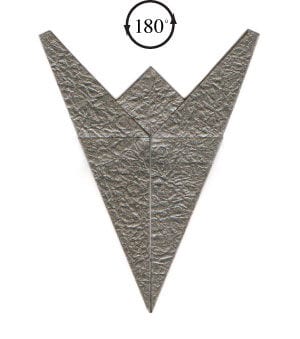
STEP 16.
Rotate the model by 180 degrees. Prepare for a valley-fold.
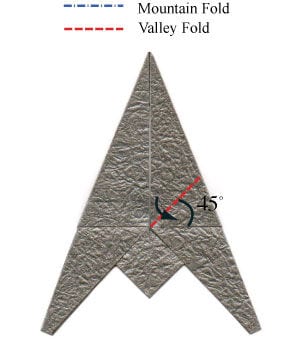
STEP 17.
Apply the valley-fold from step #16. Prepare to unfold it.
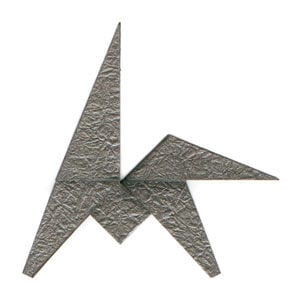
STEP 18.
Unfold the valley-fold from step #17. Prepare to apply an “inside reverse-fold”.
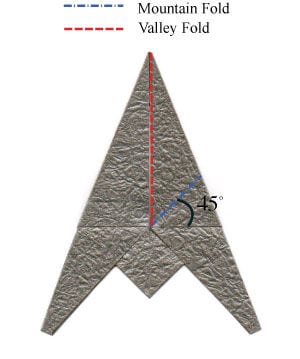
STEP 19.
Apply the “inside reverse-fold” from step #18. Prepare for a valley-fold.
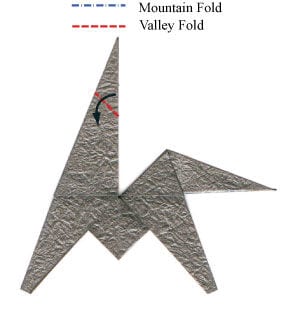
STEP 20.
Apply the valley-fold from step #19. Prepare to unfold it.
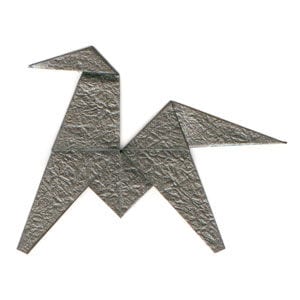
STEP 21.
Unfold the valley-fold from step #20. Prepare to apply an “outside reverse-fold”.
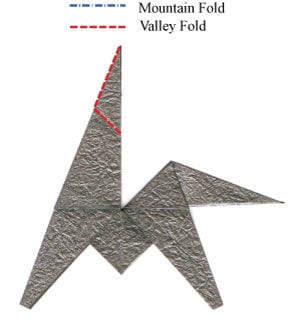
STEP 22.
Apply the “outside reverse-fold” from step #21.
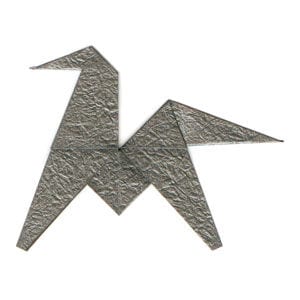
STEP 23.
Congratulations! You have just completed making an origami horse.




