
Fish That Swims Quickly
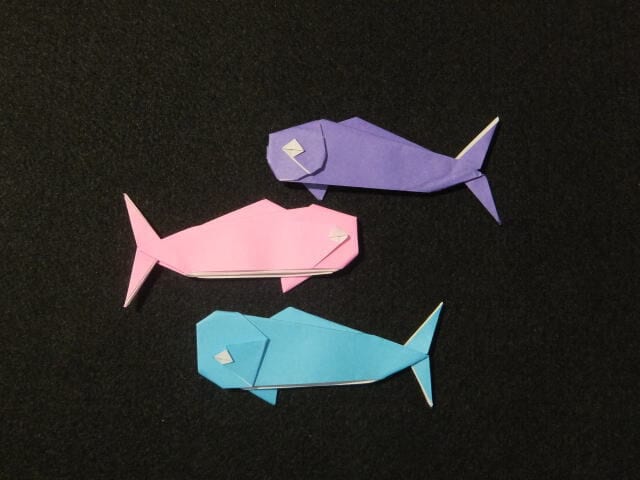
There's something irresistible about a fish that looks like it's mid-dart across the page, and this quick-swimming origami fish captures exactly that motion. It's the kind of model that feels dynamic the moment it's finished—tail poised, body streamlined, ready to leap off the table into an imaginary aquarium. The path there is a satisfying mix of pocket openings and tidy corner work, so you'll get a real sense of origami "engineering" without needing advanced techniques. Once you've made one, you'll probably want a whole school of them in different colors, scattering them across a wall or a sheet of blue paper to build your own paper sea.
Way of folding
STEP 1. Turn the white side up, fold it in half diagonally to form a triangle, then unfold and fold the top and bottom edges toward the center.
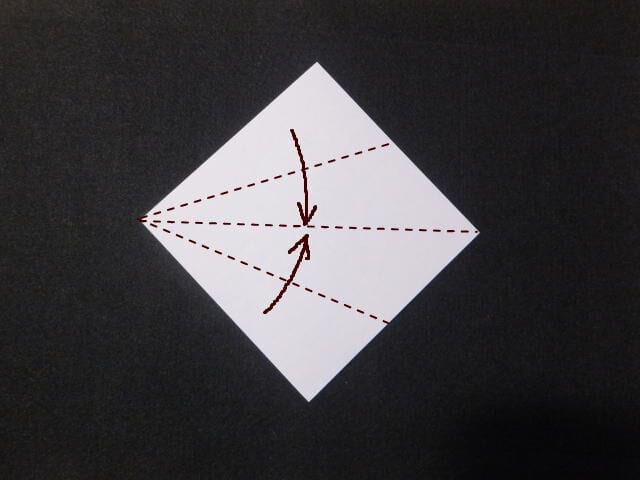
STEP 2. Fold it in half and then unfold. Align the corners exactly.
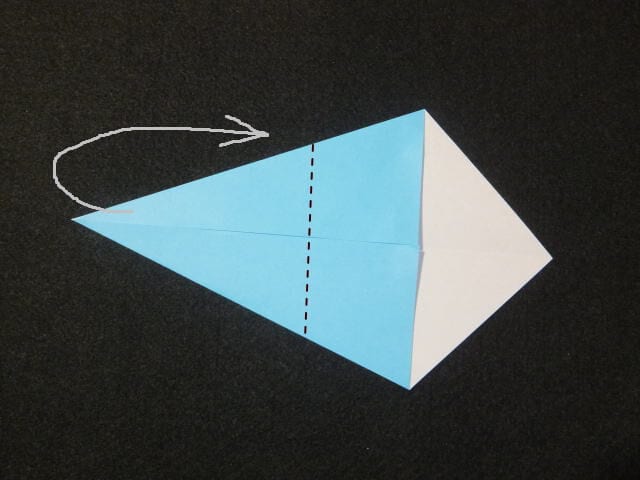
STEP 3. Open the top and bottom along the dotted line as shown.
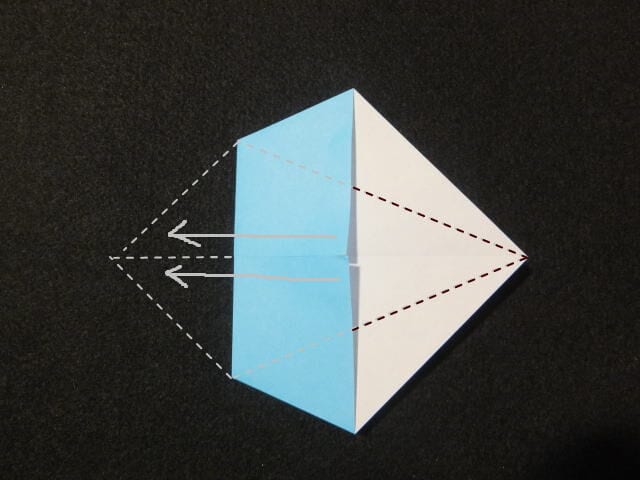
STEP 4. Open the lower section. Insert your finger into the corner pocket and spread it open in the direction of the arrow.
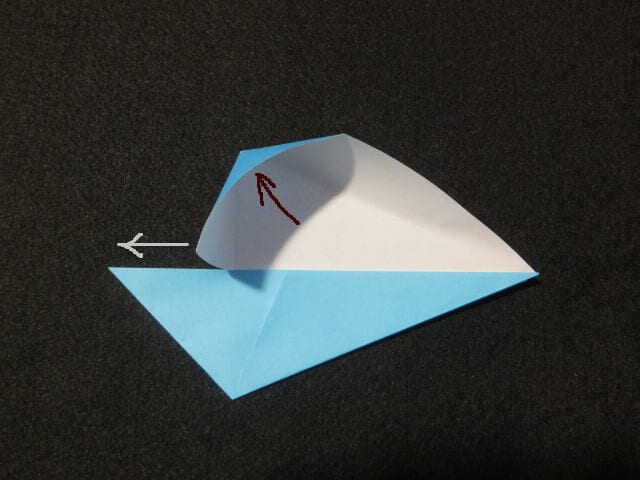
STEP 5. Fold the top flap forward along the dotted line and the bottom flap backward.
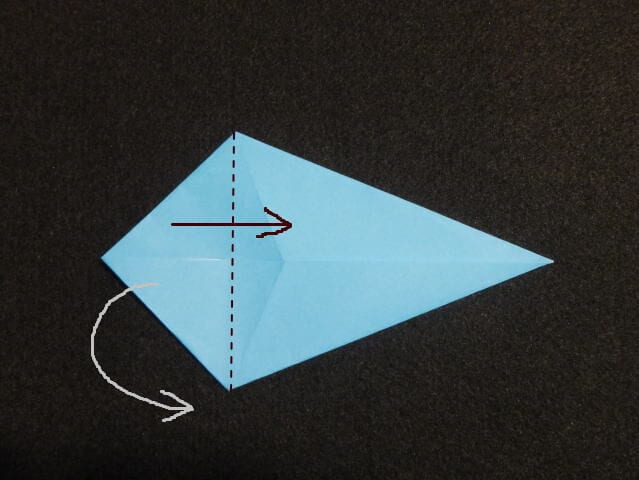
STEP 6. Fold it in half along the dotted line.
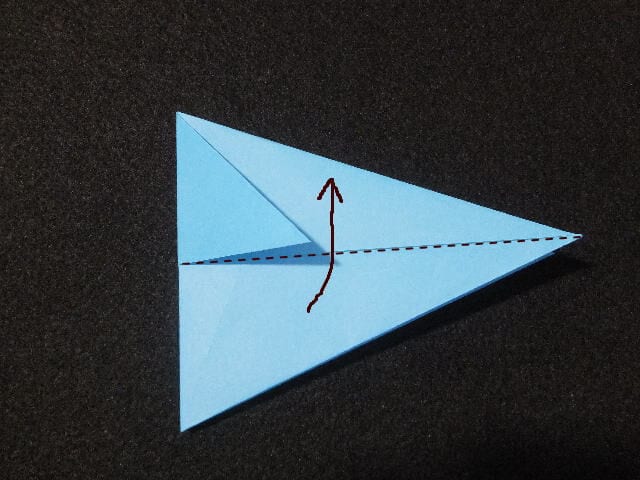
STEP 7. Fold it so that the tip of the triangular section lines up with the left edge.
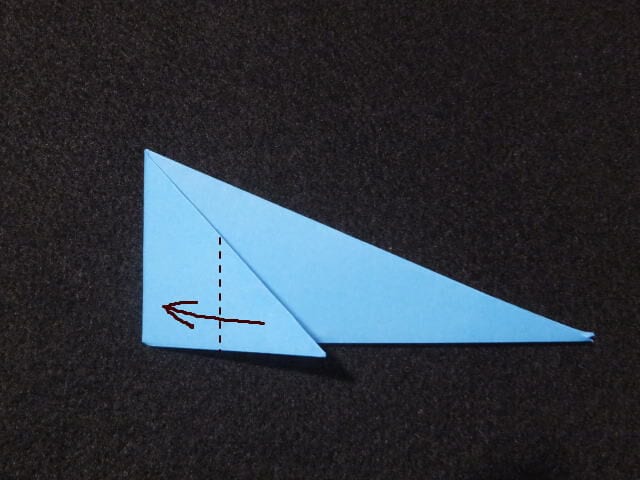
STEP 8. Fold the corners to the right as shown by the dotted line.
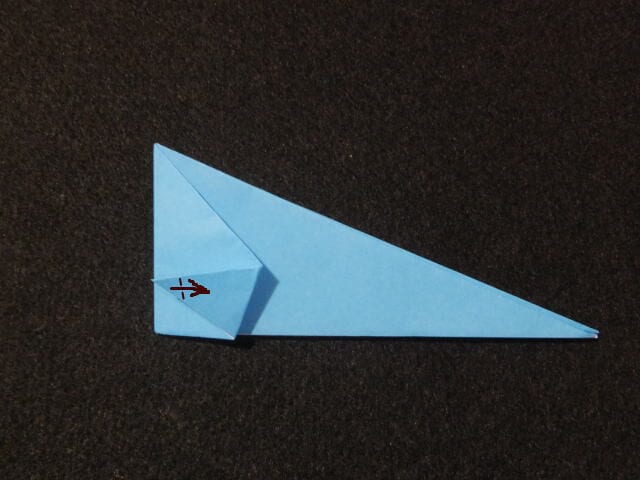
STEP 9. Insert your finger into the triangular pocket formed in the previous steps and spread it open.
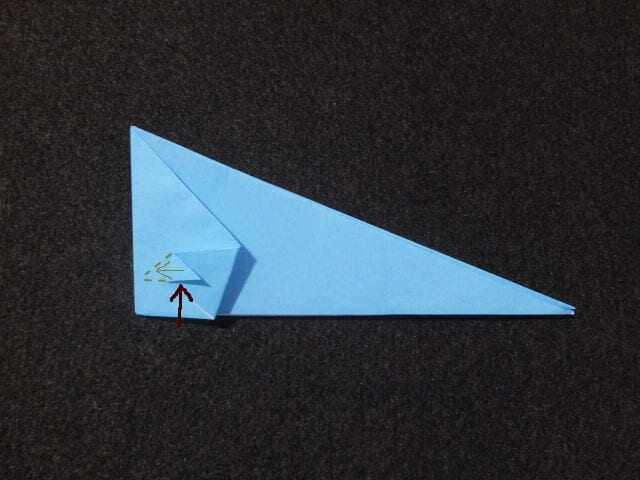
STEP 10. Open it out as shown. Once unfolded, press down from above to flatten it into a square.
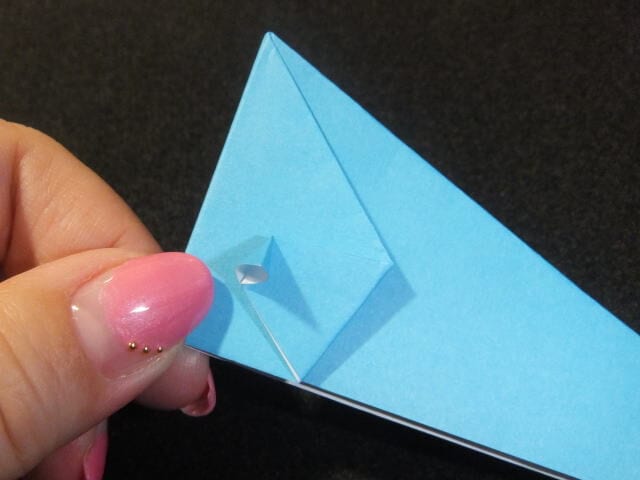
STEP 11. Fold the bottom half upward.
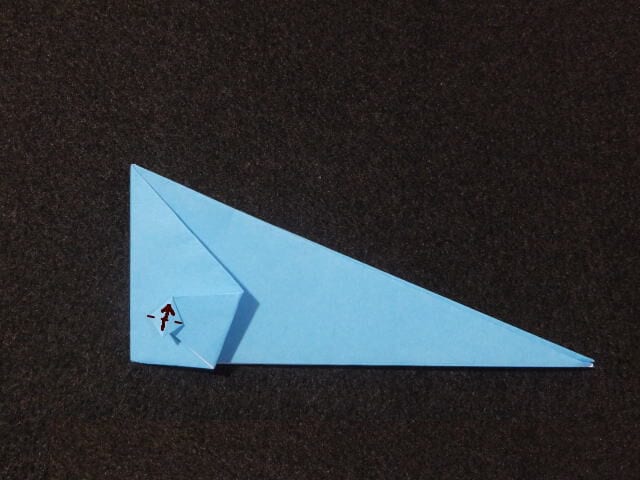
STEP 12. Fold the top flap to the back as shown by the dotted line.
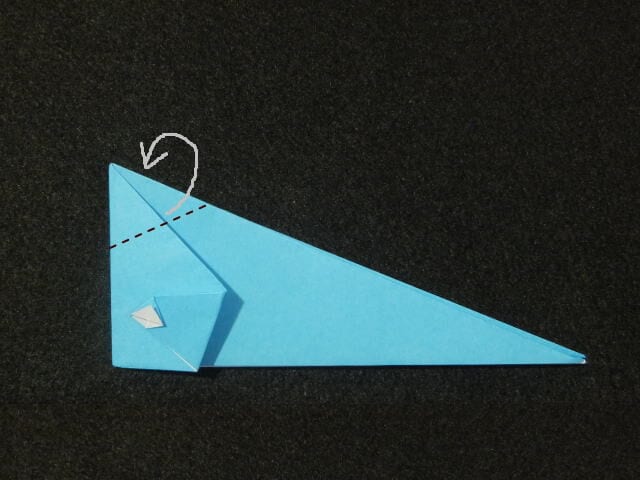
STEP 13. Then fold it back again as shown by the dotted line.
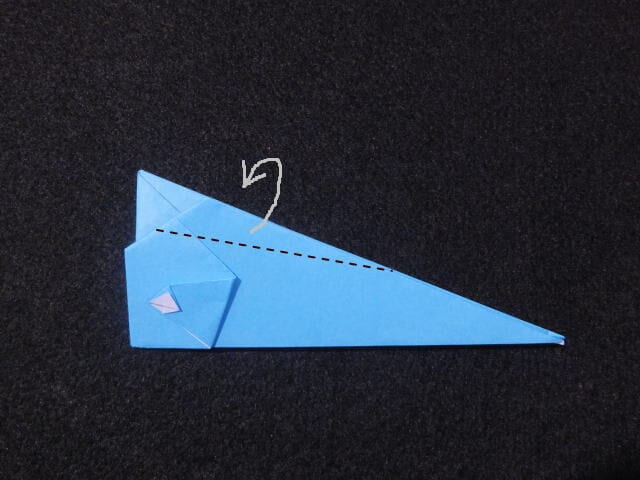
STEP 14. Fold it back along the dotted line so that a little of the back corners peek out at the bottom.
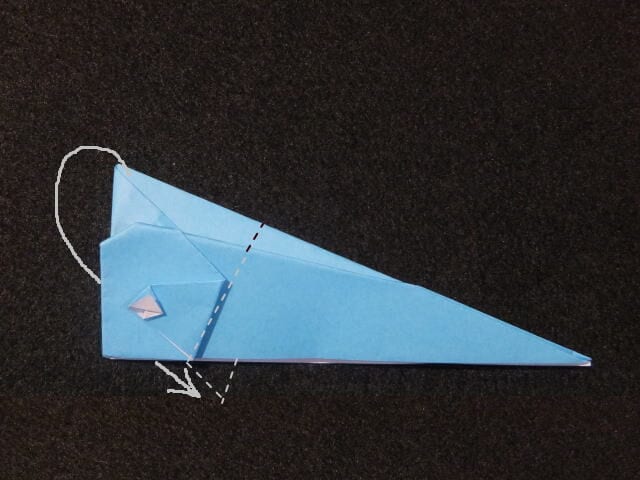
STEP 15. Fold the left corner to the back.
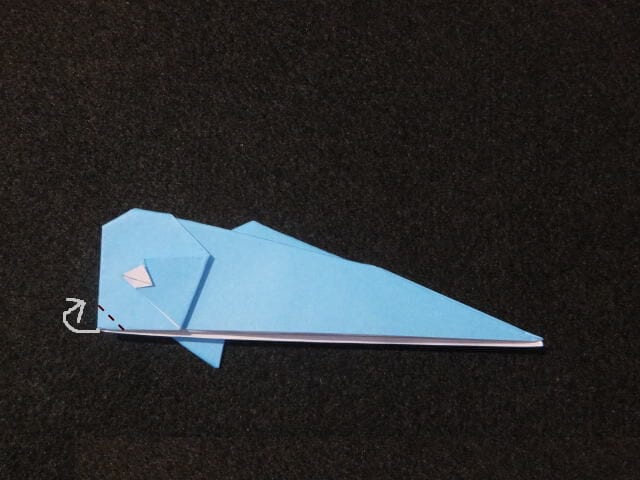
STEP 16. Line up the two tails, make a crease, and fold it in half.
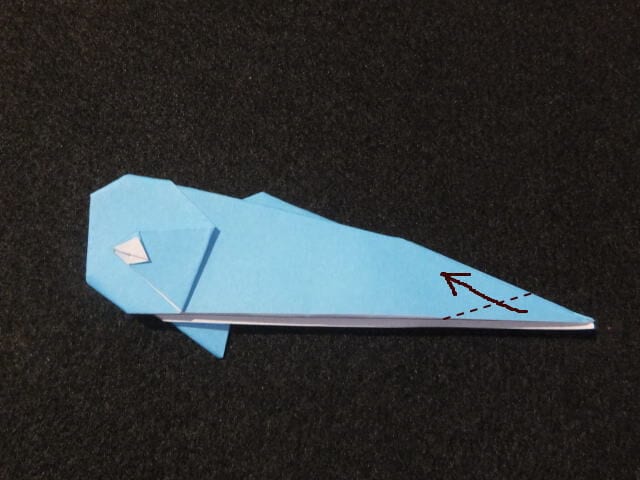
STEP 17. Hold along the dotted line and tuck the flap inside.
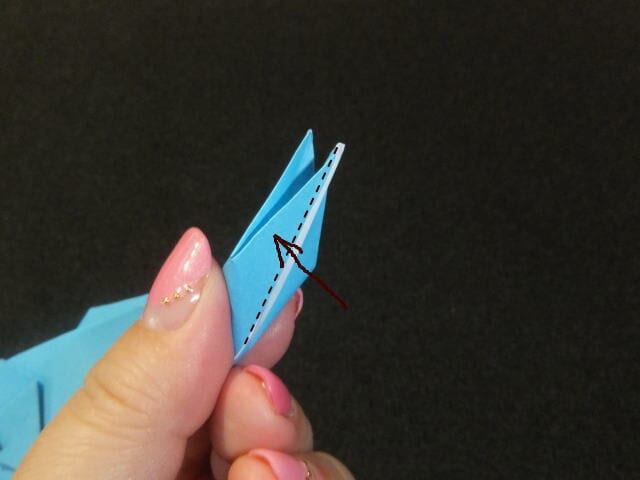
STEP 18. Fold the inner flap downward along the dotted line.
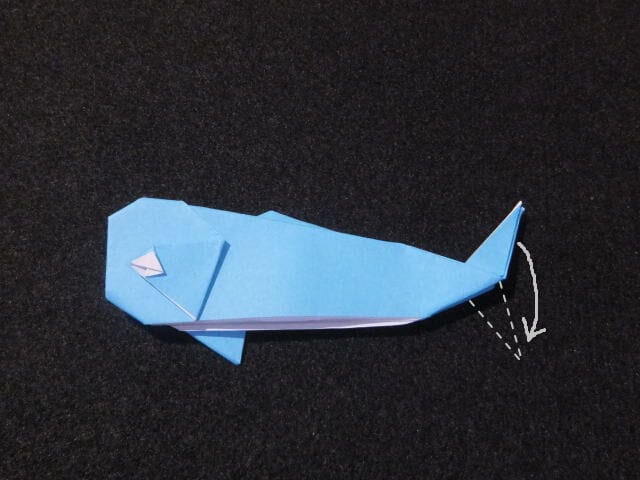
STEP 19. Fold it to the opposite side from the top.
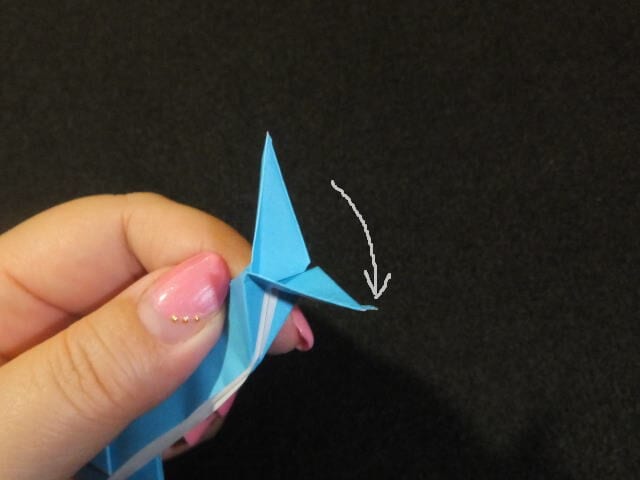
STEP 20. The fish is ready.
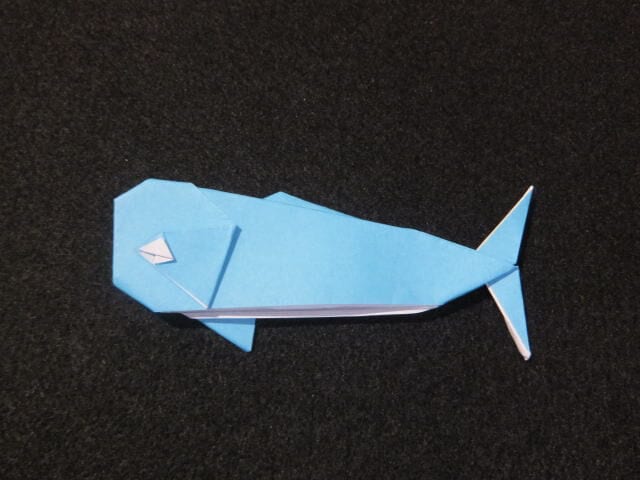
If you fold it in the opposite direction, you’ll get a fish facing the other way. And if you round off the corners of the face, you’ll get a fish with a softer, rounder look.
Tips for folding
When working through steps 1 to 5, be sure to line up the creases precisely; this keeps everything neat and makes shaping the eyes easier later.
Because the face appears on only one side, the fish won’t work as a hanging mobile, but it’s great fun to build a sea or aquarium scene by sticking it—along with other fish and sea friends—onto paper or a wall.




